
Why Hammock Compression is Essential for Outdoor Enthusiasts
For outdoor adventurers who’ve discovered the comfort of hammock camping, mastering proper compression techniques is a game-changer for your backpacking experience. Whether you’re planning a weekend hike or an extended backcountry journey, how you pack your hammock can significantly impact your comfort on the trail.
Effective hammock compression offers several key benefits:
- Space efficiency: Reduce your hammock system’s packed volume by up to 50%, creating valuable room for other essentials
- Weight distribution: A well-compressed hammock creates a more balanced, comfortable load
- Gear protection: Proper packing shields your hammock from damage, moisture, and trail debris
- Quick access: Organized compression allows for faster setup and takedown at camp
Understanding ultralight hammock packing techniques can transform your outdoor experience, making longer distances more manageable while reducing fatigue. Throughout this guide, we’ll explore multiple compression methods suited for different scenarios, helping you choose the perfect approach for your next adventure.
The right packing technique not only saves space but extends the life of your hammock. Many experienced hikers eventually upgrade to ultralight camping hammock sets specifically designed to minimize bulk and weight while maximizing comfort.
Understanding Your Complete Hammock System Components
Before diving into compression techniques, it’s essential to understand what you’re packing. A complete hammock system typically includes several components, each with unique compression characteristics.
Hammock Body
The main fabric determines compressibility. Lightweight hammocks made of 70D nylon generally compress smaller than those made with heavier 210D polyester. However, material density isn’t the only factor—weave patterns and coatings also affect how small your hammock can pack down. Ripstop nylon typically offers the best balance between durability and compression.
Suspension Systems
Straps, buckles, carabiners, and other hanging hardware take up significant space if not organized properly. Webbing straps can be folded or rolled while preventing tangles. Hardware components should be grouped together to prevent damage to fabric parts.
Integrated Components
Modern ultimate guide ultralight hammock designs may include built-in features that require special packing consideration:
- Bug nets: Mesh components should be compressed carefully to prevent tears
- Ridge lines: These should be straight when packed to prevent kinks
- Guy lines: Must be properly coiled to prevent tangles
Insulation Components
Underquilts and topquilts are often the bulkiest parts of your system. Down insulation compresses remarkably well but must be protected from moisture. Synthetic insulation offers less compression but maintains warmth when damp. Both types require special packing techniques to maximize space savings without damaging the insulation.
For hammock campers concerned about insects, camping hammock sets with bug net protection offer integrated solutions that often include specialized compression methods designed for the complete system.
The Classic Stuff Sack Method: Simple and Effective
The stuff sack method is the foundation of hammock compression—simple, reliable, and accessible to everyone. Most hammocks come with a manufacturer-provided stuff sack sized appropriately for your specific model.
Choosing the Right Stuff Sack
- Size: For most single hammocks, 5-8 liter sacks work well
- Material: Lightweight ripstop nylon offers durability while adding minimal weight
- Opening style: Drawstring closures are standard, while roll-top closures offer better weather resistance
Step-by-Step Stuffing Technique
- Hold the empty stuff sack open with one hand
- With your other hand, gather small sections of hammock fabric (don’t fold neatly)
- Push these sections into the bottom of the sack, working your way across the hammock
- Continue stuffing until the entire hammock is in the sack
- Compress the filled sack by pressing air out before closing
The Burrito Method Variation
For eliminating stubborn air pockets:
- Stuff the hammock loosely into the sack, leaving the closure open
- Place the stuffed sack on a flat surface
- Starting at the bottom, roll the sack upward, forcing air out through the opening
- Once rolled completely, secure the closure quickly to maintain compression
When properly executed, this method prevents creating permanent creases while achieving good compression. Developing proper how to pack hammock hiking skills takes practice but becomes second nature after a few attempts.
Compression Sacks: Maximizing Space Reduction
When standard stuff sacks don’t provide enough space savings, compression sacks take hammock packing to the next level. Unlike basic stuff sacks, compression sacks feature additional straps that create mechanical advantage, reducing packed volume by 30-40%.
How Compression Sacks Work
Compression sacks use a system of straps and buckles that apply pressure evenly around the circumference of the packed hammock. After stuffing your hammock inside, you tighten these straps sequentially to squeeze out additional air and create a denser, more compact package.
Step-by-Step Compression Method
- Stuff your hammock into the compression sack using the same technique as a standard stuff sack
- Close the main opening securely
- Lay the sack on its side and begin tightening the compression straps
- Start with the strap nearest the bottom, working toward the top
- Make several passes, gradually increasing tension on each strap
- Continue until the sack is firmly compressed but not overly strained
Important Warnings
Avoid over-compression, particularly with hammocks containing integrated bug nets or delicate components. Excessive compression can damage fabrics and components. Follow manufacturer recommendations for your specific gear.
For the most efficient camping setup, many hikers choose complete camping hammock systems designed with compatible compression methods that protect all components while minimizing packed size.
Waterproof Dry Bag Compression Techniques
When hiking in wet environments, protecting your hammock becomes as important as compressing it. Waterproof dry bags offer dual benefits: keeping moisture out while allowing efficient compression.
The Roll-and-Seal Technique
- Lay your hammock flat and fold it loosely to match the width of your dry bag
- Insert the folded hammock into the dry bag
- Close the top partially, leaving a small opening
- Press down firmly to expel as much air as possible
- Fold the top closure at least 3-4 times tightly
- Secure the buckle or closure system
Choosing the Right Dry Bag
For hammock compression, look for:
– Bags rated IPX7 or higher for true waterproof protection
– Durable materials that can withstand compression forces
– Appropriate size (typically 8-12 liters for a complete system)
– Clear panels that help identify contents without opening
When to Use This Method
This technique is particularly valuable during:
– Rainy season backpacking trips
– River or lake crossings
– Multi-day treks with unpredictable weather
– Winter camping where snow contact is likely
Understanding how to mastering pack efficiently pack hammock in various environmental conditions ensures your sleep system remains dry and functional when needed most.
Hammock Sleeves (“Snake Skins”): The Quick-Pack Solution
For hammock campers who prioritize setup and takedown speed, hammock sleeves—often called “snake skins”—offer a revolutionary approach to hammock compression. These tubular sleeves slide over your hammock, allowing compression without disconnecting from trees.
What Are Hammock Sleeves?
Snake skins are lightweight tubes of slippery fabric that slide over your hammock from both ends, meeting in the middle. They compress and protect your hammock while leaving the suspension system attached to anchor points.
Installation and Usage Instructions
- Slide one sleeve onto each end of your suspension system before hanging your hammock
- When breaking camp, detach any accessories (bug nets, tarps) if not integrated
- Starting from one end, slide the sleeve over the hammock, bunching the fabric inside
- Repeat from the opposite end, meeting in the middle
- Once fully covered, you can disconnect from anchor points
This method reduces pack-up time from 5+ minutes to under 60 seconds, making it ideal for campers who frequently change locations.
Benefits and Limitations
Benefits:
– Ultra-fast setup and takedown
– No need to disconnect suspension from anchor points during short breaks
– Protects hammock fabric from dirt and scratches
– Works with integrated bug nets in many designs
Limitations:
– Typically achieves less compression than stuff or compression sacks
– Adds slight weight compared to minimal stuff sacks
– Usually requires separate packing for tarps and insulation
For casual backyard or campground use, camping hammocks with stands often implement similar quick-setup systems while providing greater stability.
The Bishop Bag Method: Rapid Deployment Storage
The bishop bag offers a unique hybrid between stuff sacks and snake skins, combining storage efficiency with deployment speed. With its distinctive double-ended design, this method has gained popularity among frequent hammock users.
What Makes Bishop Bags Different
Unlike traditional stuff sacks that open at one end, bishop bags have openings at both ends connected by a continuous sleeve. They function as both storage container and deployment aid in a single system.
Using a Bishop Bag Effectively
- Attach one end of the bishop bag to your hammock’s end loop
- Bunch the hammock fabric into the bag from that end
- Once completely packed, attach the opposite end of the bag to your other hammock end
- To deploy, simply pull both ends of your hammock apart
When Bishop Bags Excel
This method is particularly valuable for:
– Frequent setup/takedown scenarios like thru-hiking
– Situations where you need to quickly relocate your hammock
– Protecting your hammock from dirt and moisture
– Campers who prefer an integrated storage solution
For hammock enthusiasts interested in minimalist setups, learning about ultralight hammock camping design tips can help determine if the bishop bag method aligns with your overall lightweight strategy.
Advanced Packing Strategies: Beyond Basic Compression
Once you’ve mastered basic compression techniques, these advanced strategies can help squeeze even more space from your hammock system while improving organization.
The “Sit and Squeeze” Method
For maximum air removal:
1. Place your partially stuffed hammock sack between your knees
2. Apply gentle pressure with your legs while continuing to stuff remaining fabric
3. After closing, sit directly on the packed sack while maintaining even pressure
4. This technique can reduce volume by an additional 10-15% compared to hand compression
Integrated Packing Strategies
- Hammock in Underquilt: Some ultralight hikers stuff their hammock directly inside their underquilt compression sack, creating a single package
- Suspension Organization: Wrap suspension straps around the compressed hammock bundle to save additional space
- Tarp Integration: For minimalist setups, a hammock can sometimes be packed inside its companion tarp
Strategic Backpack Loading
The placement of your hammock system affects comfort and accessibility:
– Position compressed hammock vertically against your back panel for stability
– Keep quick-access items (like tarps) near the top of your pack
– Use your hammock’s compressed shape to create structure in ultralight packs
Proper lightweight hammock gear organization extends beyond compression to encompass your entire packing system, creating efficiency throughout your backpack.
Comparing Compression Tools and Accessories
With multiple compression options available, selecting the right tool depends on your specific needs, budget, and preferences. This comparison helps identify which method best suits your hammocking style.
| Method | Compression Efficiency | Weight | Protection | Convenience | Durability | Price Range |
|---|---|---|---|---|---|---|
| Standard Stuff Sack | Moderate | Low (0.5-1.5 oz) | Basic | Good | Moderate | $5-15 |
| Compression Sack | Excellent | Medium (1.5-3 oz) | Good | Moderate | Good | $15-30 |
| Waterproof Dry Bag | Good | Medium (2-4 oz) | Excellent | Good | Excellent | $15-35 |
| Snake Skins | Fair | Low (1-2 oz) | Good | Excellent | Good | $20-30 |
| Bishop Bag | Good | Low (1-2 oz) | Good | Very Good | Moderate | $15-25 |
Material Considerations
- Silnylon: Lightweight, somewhat water-resistant, and slippery (aids in stuffing)
- Dyneema/DCF: Ultra-lightweight, fully waterproof, but expensive
- Coated nylon: Good balance of durability and water resistance
- Mesh panels: Useful for allowing gear to breathe during storage
DIY Alternatives
Budget-conscious hammockers can:
– Convert old tent stuff sacks into compression sacks by adding webbing straps
– Create snake skins from silnylon fabric scraps
– Use roll-top dry bags from other gear as multi-purpose compression tools
For weight-conscious backpackers, our lightweight hammock sets are specifically engineered for minimal weight without sacrificing comfort or durability.
Preserving Your Hammock: Compression Without Damage
While effective compression is important, protecting your investment should remain a priority. Proper compression techniques extend your hammock’s lifespan while maintaining its performance.
Material-Specific Considerations
- Nylon hammocks: Can withstand significant compression but need protection from prolonged UV exposure
- Polyester hammocks: Slightly less compressible but resist moisture better
- Down insulation: Requires careful compression and absolute moisture protection
- Synthetic insulation: More compression-resistant; avoid extreme packing force
Short-Term vs. Long-Term Storage
- Trail compression: Maximum compression is acceptable for short periods (days to weeks)
- Home storage: Loose packing in breathable containers protects fabrics and insulation
- Post-trip care: Always dry completely before long-term storage to prevent mildew
Temperature and Environment Factors
- Cold environments make fabrics less flexible; warm hammocks slightly before compression
- High humidity requires additional moisture protection during compression
- Extreme heat can make some coatings sticky; avoid compressing in direct sunlight
For those with limited storage space at home, conquering clutter brilliant hammock storage provides solutions that preserve your hammock between adventures.


Camping Hammock Sets with Bug Net, Ultralight Camping Hammock Sets
$139.72 Select options This product has multiple variants. The options may be chosen on the product page
Folding Hammock Sets, Quick Setup Hammock Sets
Price range: $305.52 through $583.27 Select options This product has multiple variants. The options may be chosen on the product page
Camping Hammock Sets with Bug Net, Complete Camping Hammock Systems
Price range: $82.73 through $97.96 Select options This product has multiple variants. The options may be chosen on the product page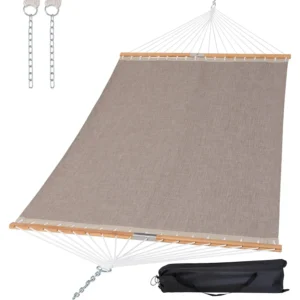
Lightweight Hammock Sets, Spreader Bar Hammock Sets
$292.43 Select options This product has multiple variants. The options may be chosen on the product page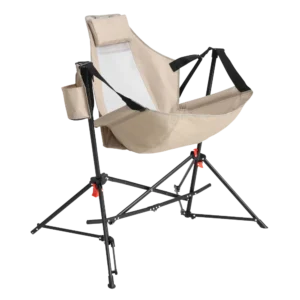
Folding Hammock Sets, Lightweight Hammock Sets
$295.80 Select options This product has multiple variants. The options may be chosen on the product page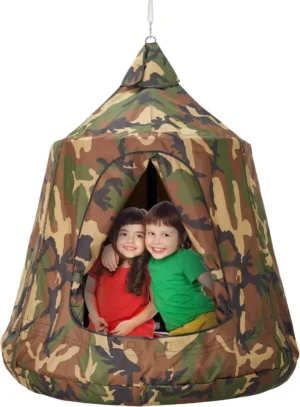

Complete Camping Hammock Systems, Hanging Egg Chair Sets
$266.73 Select options This product has multiple variants. The options may be chosen on the product page
Most Common Hammock Compression Mistakes to Avoid
Even experienced hammock campers can make packing errors that compromise gear or waste space. Avoiding these common mistakes improves both compression efficiency and hammock longevity.
Over-compression: Forcing too much compression can damage fabrics, coatings, and components. Watch for stress points and ease tension if you notice excessive strain.
Dirty packing: Compressing a dirty hammock grinds particles into fabrics, causing abrasion damage. Shake out debris before packing, especially sand and pine needles.
Wet storage: Moisture trapped in compressed hammocks leads to mildew, odors, and fabric degradation. Always dry your hammock before extended storage.
Improper suspension packing: Tangled suspension wastes time and creates frustration. Pack straps separately or use dedicated organization methods to maintain order.
Forgetting accessory organization: Bug nets, ridgelines, and guy lines need organized compression to prevent damage and tangles. Don’t just stuff these components haphazardly.
Understanding broader backpacking compact hammock guide principles helps integrate your compression strategy with your overall lightweight philosophy.
Frequently Asked Questions About Hammock Compression
How small can I realistically expect to compress my hammock?
A standard single hammock without accessories typically compresses to about 1-2 liters (the size of a large coffee mug). Complete systems including bug nets and suspension usually compress to 3-4 liters. Ultralight models achieve even smaller sizes.
Will regular compression damage my hammock over time?
When done properly, regular compression causes minimal damage. Most quality hammocks are designed for repeated compression. Avoid extreme compression, sharp creases, and storing while damp to maximize lifespan.
How should I compress a hammock with an integrated bug net?
For hammocks with attached bug nets, take care to distribute the netting around the hammock body before compression. This prevents concentrated pressure on the delicate mesh. Snake skins often work well for these integrated systems.
What’s the fastest compression method for frequent setups?
Snake skins or bishop bags offer the fastest packing solution, allowing teardown in under a minute. Traditional stuff sacks require more time but may achieve better compression.
Should I remove carabiners before compressing my hammock?
Metal hardware should ideally be separated or positioned to avoid puncturing or abrading fabric. Some compression systems include dedicated hardware pockets to address this concern.

For those prioritizing ease and speed, our quick-setup hammock sets include thoughtfully designed compression systems that balance protection with convenience.
By mastering these various compression techniques, you’ll transform your hammock camping experience—packing smaller, hiking further, and enjoying the journey with less bulk and greater convenience. The right compression method depends on your specific needs, but with these strategies, you’ll be well-equipped to optimize your hammock system for any adventure.