

Introduction: Why Proper Hanging Chair Installation Matters
Hanging chairs have become a popular addition to relaxation spaces, offering a unique blend of comfort, style, and gentle movement that traditional seating can’t match. Whether you’re planning to install a cozy reading nook indoors or create a peaceful retreat in your garden, the way you mount your hanging chair makes all the difference.
Proper installation isn’t just about aesthetics—it’s primarily about safety. A hanging chair that isn’t securely mounted can lead to serious accidents, property damage, and injuries. When installed correctly, most hanging chairs can safely support between 250-300 pounds (113-136 kg), but this depends entirely on proper mounting techniques.
The benefits of taking time to install your hanging chair correctly include:
- Enhanced safety for anyone using the chair
- Extended lifespan of both the chair and mounting hardware
- Better swinging motion and overall relaxation experience
- Peace of mind knowing your relaxation space is secure
This guide covers comprehensive installation methods for both indoor and outdoor environments, helping you transform any space into the perfect relaxation zone. Before diving into specific installation techniques, it helps to understand the hanging egg chairs complete buyers guide for a broader perspective on what to expect.
Understanding Your Hanging Chair: Types and Requirements
Different hanging chair styles come with their own specific installation needs and weight considerations. Recognizing your chair type is the first step toward a successful installation.
Common hanging chair types include:
- Egg chairs: Enclosed, cocoon-like designs typically made from rattan, wicker, or metal frames. Weight capacity: 250-350 pounds (113-159 kg)
- Macrame chairs: Handwoven cotton or polyester rope designs with bohemian aesthetics. Weight capacity: 200-250 pounds (90-113 kg)
- Hammock chairs: Canvas, cotton, or polyester fabric designs that conform to your body. Weight capacity: 250-300 pounds (113-136 kg)
- Swing chairs: Structured designs with solid seats similar to porch swings. Weight capacity: 250-300 pounds (113-136 kg)
Each chair’s design affects mounting requirements. For instance, egg chairs typically need a single, strong mounting point, while swing chairs might use two attachment points for more stability and even weight distribution.
Before installation, always review the manufacturer’s specific instructions, which supersede general advice. Pay special attention to weight limits, recommended mounting hardware, and any specific warnings about indoor versus outdoor use. The indoor outdoor hanging egg chairs have different material and hardware requirements depending on where they’ll be placed.
When selecting your chair, consider exploring various hanging egg chair sets to find options that match your installation capabilities and space requirements.
Essential Safety Considerations Before Installation
Safety should be your primary concern when installing any hanging chair. The most crucial calculation is determining total weight capacity, which includes:
- Weight of the chair itself (typically 15-40 pounds/7-18 kg)
- Maximum weight of intended users
- Dynamic weight factor (add 25-35% to account for movement and swinging)
IMPORTANT SAFETY WARNING: Static weight capacity (hanging still) differs significantly from dynamic weight capacity (swinging motion). Always plan for dynamic weight, which creates greater force on mounting points.
Proper clearance around your hanging chair is essential for safe use:
* Minimum 3 feet (0.9 m) from walls
* At least 14 inches (36 cm) side clearance on all sides
* Minimum 3 feet (0.9 m) overhead clearance for chain/rope adjustments
* Clear floor space beneath the full swing radius
Structural support is non-negotiable. Never attach hanging chairs to:
* Standard drywall without joist support
* Decorative ceiling features
* Popcorn or textured ceilings without verifying joist location
* Damaged or rotting outdoor structures
Consider consulting a professional if you:
* Are uncertain about the load-bearing capacity of your ceiling or structure
* Need to install in concrete or unusual surfaces
* Plan to hang chairs where children will use them frequently
* Have an unusually heavy chair or anticipate users approaching weight limits
For deeper understanding of weight capacities and chair designs, the ultimate guide to cushioned egg chair features provides valuable insights. Additionally, many hanging chair safety principles apply equally to hammocks, so reviewing hammock installation requirements and safety guidelines can provide complementary information.
Location Selection: Finding the Perfect Spot
Indoor Locations
When choosing an indoor spot for your hanging chair, consider these requirements:
- Ceiling height: A minimum of 7-8 feet (2.1-2.4 m) is necessary, with 9+ feet (2.7+ m) being ideal for proper swinging motion.
- Room selection: Living rooms, bedrooms, home offices, and reading nooks are popular choices. Corner installations often maximize space efficiency.
- Traffic patterns: Avoid hallways, doorways, or areas where people frequently walk, which could lead to collisions.
- Surrounding furniture: Ensure no sharp edges or hard furniture are within the swing radius.
- Flooring considerations: A soft area rug beneath can add comfort and protect flooring.
Outdoor Locations
Outdoor installations require additional considerations:
- Weather exposure: Evaluate how much sun, rain, and wind the location receives throughout the year.
- Mounting options: Porches with exposed beams, pergolas, gazebos, and sturdy tree branches all offer potential mounting points.
- Environmental factors: Consider seasonal changes, like falling leaves, that might affect your hanging chair.
- Privacy and view: Position the chair to maximize your preferred view while maintaining privacy.
- Proximity to other features: Consider distance from fire pits, grills, gardens, or water features.
If finding a suitable permanent installation spot proves difficult, consider hammock chairs with stands that don’t require ceiling or overhead mounting.

Tools and Hardware Checklist for Installation
Essential Tools
- Stud finder: To locate ceiling joists or beam centers
- Drill with appropriate bits: Include wood bits for joists/beams and masonry bits for concrete
- Measuring tape: For accurate placement and height adjustment
- Level: To ensure proper alignment of mounting hardware
- Adjustable wrench: For tightening nuts and bolts
- Ladder or step stool: Sturdy enough to support you while working overhead
- Pencil: For marking drill points
- Safety glasses: To protect eyes during drilling
Required Hardware
- Mounting bracket or heavy-duty hook: Must be rated for at least 300-350 pounds (136-159 kg)
- Eye bolt/lag screw: Size depends on installation surface, typically 3/8” diameter minimum
- Chains or rope: Weather-resistant if outdoors, with appropriate length for desired height
- Spring links or carabiners: For connecting chair to chains/ropes, rated for appropriate weight
- Ceiling plate or mounting bracket: Distributes weight across a larger area for added safety
- Lock washers and nuts: To secure eye bolts or lag screws
- Swivel mount (optional): Allows for 360-degree rotation
Quality matters significantly when it comes to hardware—never substitute lower-rated components to save money. All hardware should specify a weight rating that exceeds your total dynamic weight calculation.
Many swinging hammock chair sets include appropriate installation hardware, but verify that it meets your specific installation needs before proceeding.
Finding Structural Support: Joists, Beams, and Branches
Locating proper structural support is perhaps the most critical step in hanging chair installation. Here’s how to find secure mounting points:
Indoor Ceiling Joists
- Use a stud finder to locate joists in your ceiling (typically spaced 16 or 24 inches/40 or 60 cm apart).
- Mark the initial location where the stud finder indicates a joist.
- Move a few inches to either side and scan again to find the edges of the joist.
- Mark the center of the joist—this is your ideal drilling point.
- Verify the joist location by drilling a tiny pilot hole (1/16 inch) or using a thin nail.
- Test multiple spots along what you believe is the joist to confirm you’re truly on solid wood.
Outdoor Beams
- Visually inspect exposed beams for signs of damage, rot, or weakness.
- Measure beam thickness—support beams should be at least 4×4 inches (10×10 cm) for most chairs.
- Check how the beam is connected to the main structure; it should be securely attached.
- Identify the center of the beam for mounting rather than edges.
Tree Branches
- Select healthy, live branches at least 6-8 inches (15-20 cm) in diameter.
- Look for hardwood species like oak, maple, or hickory rather than softer woods.
- Inspect the branch for cracks, disease, or pest damage.
- Choose horizontal branches rather than angled ones for more even weight distribution.
- Test the branch by hanging your body weight (carefully) before installation.
Common mistakes to avoid:
* Installing into decorative ceiling features that aren’t structural
* Mounting too close to the end of a beam or branch
* Assuming any wooden element in a ceiling is load-bearing
* Ignoring signs of wood damage or deterioration
For more comprehensive guidance on finding proper support structures, the ultimate swinging chair installation guide provides detailed techniques for identifying safe mounting points.
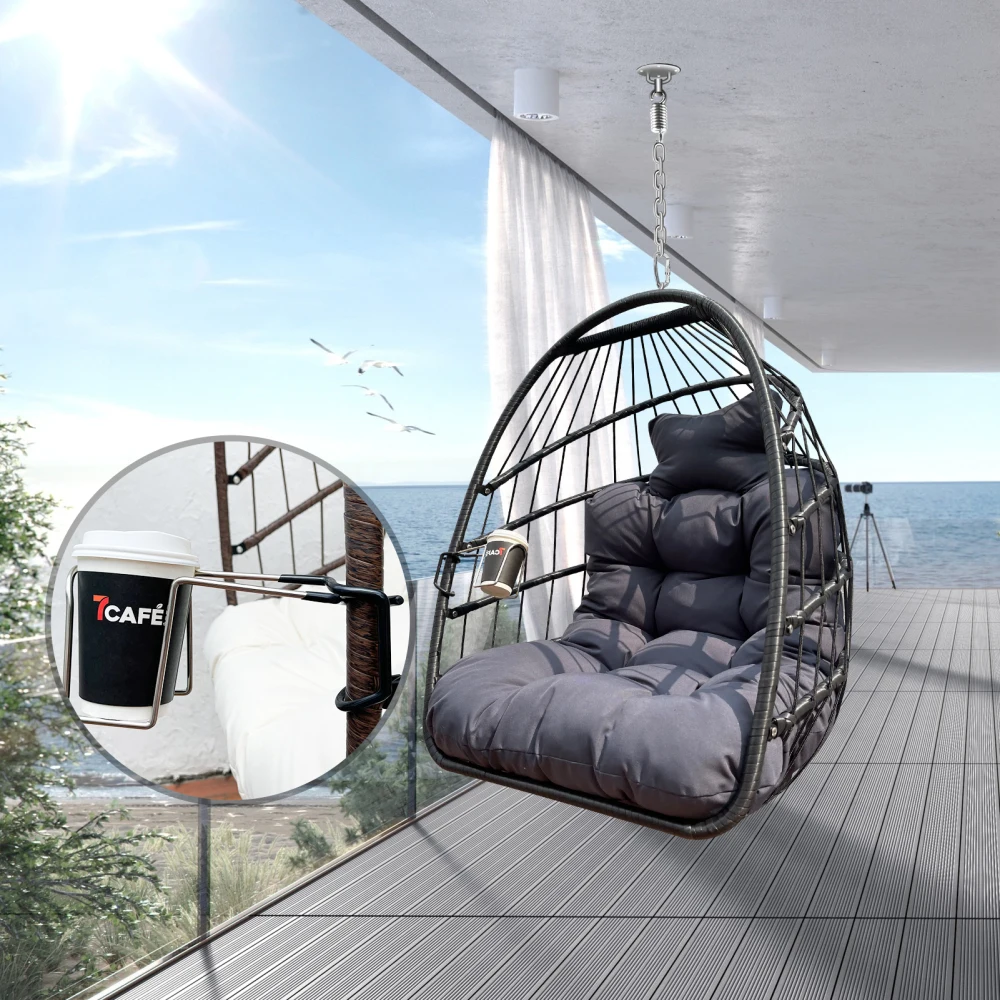
Indoor Installation: Step-by-Step Process
Follow these steps for a secure indoor hanging chair installation:
Prepare your workspace
* Clear the area beneath your installation point
* Lay out all tools and hardware within reach
* Position your ladder securely on level groundMark the mounting point
* Confirm joist location with stud finder
* Mark the center of the joist with a pencil
* Double-check measurements for centered placementDrill the pilot hole
* Select a drill bit slightly smaller than your eye bolt or lag screw (typically 1/8” to 1/4”)
* Drill slowly and straight into the marked point
* Drill to a depth slightly less than the threaded portion of your mounting hardwareInstall the mounting hardware
* For eye bolts: Thread the bolt into the pilot hole by hand initially
* Use a wrench to tighten until the eye is flush against the ceiling
* Ensure the eye is oriented in the direction the chair will hang
* For mounting plates: Attach using multiple screws into the joistAttach hanging hardware
* Connect chain or rope to the ceiling mount using a carabiner or spring link
* Adjust to desired length before connecting to the chair
* Use a swivel mount if you want 360-degree rotationSecure the chair
* Attach chair to the hanging hardware using manufacturer-recommended connection points
* Double-check all connections are closed and secured
* Test gently before full weight application
For different ceiling materials:
* Concrete ceilings: Use a hammer drill with masonry bit and concrete anchors rated for overhead use
* Vaulted ceilings: Install at the highest practical point, ensuring the mounting hardware goes directly into a joist
* Exposed beams: Drill straight up into the center of the beam rather than from the side
Once installed, your hanging chair can become a focal point of indoor relaxation. For style inspiration after installation, consider how egg chairs with cushions enhance patios and indoor spaces alike.

Outdoor Installation Methods and Techniques
Installing hanging chairs outdoors requires weather-resistant approaches and materials. Follow these methods for different outdoor locations:
Beam/Porch Installation
- Select a beam that extends from the main structure rather than decorative elements
- Measure and mark the center point of the beam
- Drill a pilot hole using a bit approximately 1/8” smaller than your eye bolt
- Install a stainless steel or galvanized eye bolt rated for outdoor use
- Secure with lock washers and nuts if the beam allows through-bolting
- Apply silicone sealant around the entry point to prevent water penetration
Tree Branch Installation
- Choose a healthy branch at least 6-8 inches (15-20 cm) in diameter
- Protect the branch with tree straps or rope padding to prevent bark damage
Use one of these methods:
* Tree strap method: Loop a commercial tree strap around the branch
* Rope wrapping technique: Use a figure-eight wrap with polyester rope
* Eye bolt method (for dead trees only): Drill through the branch and install a through-boltAlways leave room for branch growth if using permanent hardware
- Check that attachment methods don’t restrict sap flow in living trees
Weather-Resistant Considerations
- Use stainless steel or hot-dipped galvanized hardware for rust resistance
- Choose UV-resistant ropes or chains
- Consider seasonal removal in harsh winter climates
- Apply protective coatings to any exposed hardware annually
- Install slightly higher than indoor chairs to account for ground variation
For specific knot techniques when using rope:
* Bowline knots create secure loops that won’t slip
* Two half-hitches work well for adjustable connections
* Figure-eight follow-through provides maximum security for primary connections
Outdoor installations benefit from additional guidance found in resources about how to install porch hammock chairs that address weather challenges. For deeper outdoor seating options, deep seat chair hammock sets offer alternative installation approaches for porches and patios.
Testing Your Installation: Safety First Approach
Before fully enjoying your hanging chair, thoroughly test the installation with this gradual process:
Visual inspection
* Examine all connection points
* Verify hardware is fully tightened
* Check for proper alignment and orientationInitial weight test
* Apply gentle pressure using your hand
* Listen for any creaking or unusual sounds
* Look for movement in mounting hardwareProgressive loading
* Begin with a light weight (10-20 pounds/4.5-9 kg)
* Increase gradually to 50 pounds (23 kg)
* Continue adding weight until reaching approximately 75% of intended maximumMovement testing
* Apply gentle side-to-side motion
* Test forward and backward swinging
* Observe mounting point during movementFull weight test
* Sit carefully and without sudden movements
* Gradually apply full body weight
* Test minimal swinging while monitoring the mounting
Warning signs that require immediate attention:
* Any cracking or popping sounds
* Visible movement at the mounting point
* Hardware that begins to pull away from the surface
* Unexpected swinging motions or instability
* Chain or rope stretching beyond expected levels
If any issues arise during testing, remove all weight immediately and reassess your installation. It’s far better to restart the process than risk injury from a failed mounting point. For outdoor installations, consider porch swing chair sets that are specifically designed for secure outdoor placement.
Adjusting Height and Comfort: Fine-Tuning Your Setup
After confirming your installation is secure, focus on optimizing comfort through proper height adjustment:
For most adult users, the ideal seat height ranges from 18-24 inches (46-61 cm) from the floor, allowing feet to touch the ground comfortably. Children’s chairs typically hang slightly lower at 14-18 inches (36-46 cm).
Methods for adjusting height include:
- Chain adjustments: Add or remove links to achieve desired height
- Rope length modifications: Retie knots or use adjustable hitches
- S-hook extenders: Add or remove to make minor height adjustments
- Commercial height adjusters: Install specific hardware designed for easy adjustment
To enhance the swinging experience:
* Add swivel hooks between mounting point and chair for smooth rotation
* Balance the chair by adjusting hanging point position
* Level uneven chairs by shortening one side of the hanging chain/rope
* Add cushions and pillows strategically for back and neck support
The height and positioning significantly impact how comfortable your hanging chair feels. Understanding the benefits of egg-shaped hanging chairs helps explain why proper height adjustment enhances their ergonomic advantages and relaxation potential.
Ongoing Maintenance and Safety Checks
Regular maintenance ensures your hanging chair remains safe and enjoyable for years. Implement this maintenance schedule:
Monthly Checks (or before each use for occasional users):
* Inspect all hardware for signs of rust, wear, or loosening
* Check rope or chain for fraying, stretching, or damage
* Examine the mounting point for any signs of stress or pulling
* Test all connections by applying gentle pressure
* Verify chair fabric or material remains strong and undamaged
Seasonal Maintenance:
* Tighten all hardware connections
* Clean mounting hardware with appropriate materials
* For outdoor installations, apply rust inhibitor to metal components
* Check for insect damage or nesting in outdoor chairs
* Verify structural support (joist, beam, branch) remains solid
Signs Requiring Immediate Attention:
* Visible cracks in mounting hardware or support structures
* More than 1/4 inch (6 mm) of visible pull-away from ceiling
* Fraying rope that shows more than surface damage
* Squeaking or creaking during normal use
* Unusual movement or instability
When maintaining your installation, remember that certain components should be replaced rather than repaired:
* Any hardware showing cracks or significant rust
* Ropes with more than 10% thickness worn away
* Carabiners that don’t close completely
* Springs that have lost tension
For guidance on maintaining proper positioning over time, explore resources on perfectly positioning swing hammock chairs to ensure continued comfort and safety.
Can I Hang a Chair If I Rent? Alternative Solutions
Renters face unique challenges when installing hanging chairs, but several options exist:
Non-permanent Solutions:
* Freestanding hanging chair stands that require no drilling
* Over-the-door hanging systems for lightweight chairs
* Tension-mounted poles (similar to shower curtain tension rods but stronger)
* Tripod stands designed specifically for hanging chairs
* Modified photographer’s C-stands (for lightweight chairs only)
When working with landlords:
* Request written permission before installation
* Offer to have professional installation with liability insurance
* Propose to restore the ceiling to original condition upon moving out
* Consider sharing installation plans showing minimal damage
Portable options for renters include:
* Collapsible stands that can move between indoor and outdoor spaces
* Chair-stand combinations designed to break down for storage
* Doorway hanging chair mounts that install without permanent hardware
Most freestanding options support 250-300 pounds (113-136 kg), making them suitable alternatives to ceiling mounting. For rental-friendly options, explore our collection of hanging egg chair sets that include stands, eliminating the need for permanent installation.


Dark Wood Hammock Sets, Porch Swing Chair Sets
$653.82 Select options This product has multiple variants. The options may be chosen on the product page
A-Frame Stand Hammock Sets, Swinging Hammock Chair Sets
$154.62 Select options This product has multiple variants. The options may be chosen on the product page
Light Wood Hammock Sets, Swinging Hammock Chair Sets
$1,359.35 Select options This product has multiple variants. The options may be chosen on the product page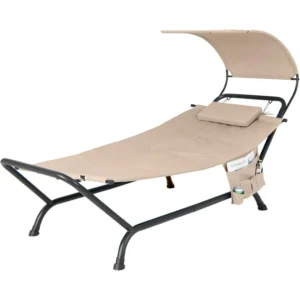
Hammock Sets with Canopy, Heavy Duty Hammock Sets
$286.31 Select options This product has multiple variants. The options may be chosen on the product page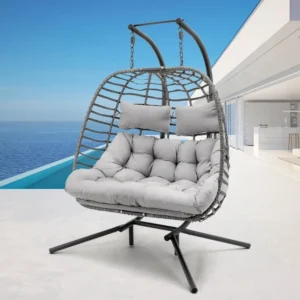 $963.29 Select options This product has multiple variants. The options may be chosen on the product page

Complete Camping Hammock Systems, Hanging Egg Chair Sets
$266.73 Select options This product has multiple variants. The options may be chosen on the product page
Troubleshooting Common Installation Problems
Even carefully planned installations sometimes encounter challenges. Here are solutions for common issues:
Problem: Chair hangs unevenly
Solution: Adjust individual chain or rope lengths until the seat sits level. For fixed-length attachments, add washers between the mounting hardware and ceiling to create a slight angle correction.
Problem: Excessive rotation during use
Solution: Install a second anchor point 4-6 inches (10-15 cm) away and connect both to the chair with a Y-shaped chain or rope configuration. Alternatively, add weight to the bottom of the chair to increase stability.
Problem: Squeaking or noise during use
Solution: Apply silicone lubricant to all moving metal parts including carabiners, S-hooks, and chain links. For rope installations, ensure all contact points are properly wrapped to prevent friction.
Problem: Chair hits the wall during swinging
Solution: Reposition the mounting point further from walls or install a small bumper on the wall at contact height. Consider a shorter chain/rope to reduce swing radius.
Problem: Mounting hardware seems to be pulling from ceiling
Solution: Stop using immediately. Reinstall with larger hardware spanning multiple joists or add a ceiling plate that distributes weight across a wider area.
Problem: Chair feels unstable
Solution: Add a stabilizing line connected to the ground or a nearby fixed point. Alternatively, install a longer hanging chain/rope to lower the chair’s center of gravity.
After resolving installation issues, focus on creating a beautiful relaxation space with tips on how to style hanging egg chairs to complement your home décor.
Is My Installation Safe? Key Questions to Ask Yourself
Use this safety checklist to evaluate your hanging chair installation:
Structural Support
– Is the mounting point attached directly to a structural element (joist, beam, branch)?
– Did you verify the structural element is intact and undamaged?
– Can the structure support at least 3-4 times the weight that will use the chair?
Hardware Security
– Is all hardware tightened completely with no visible gaps?
– Does the hardware have a weight rating that exceeds your needs?
– Are all connections secured with lock washers or locking mechanisms?
Movement Assessment
– When seated, is there minimal movement at the mounting point?
– Does the chair hang with proper clearance on all sides?
– Is the swing motion smooth without jerky movements?
Long-term Considerations
– Have you planned regular inspection intervals?
– Is the installation protected from weather damage if outdoors?
– Have you documented weight limits for all users to understand?
Child and Pet Safety
– Is the chair installed high enough to prevent small children from climbing in unsupervised?
– Are there no pinch points or sharp edges accessible?
– Is the area beneath the chair clear of hazards if someone falls?
If you answered “no” to any of these questions, address the issue before using your hanging chair. Safety must always come first. Additionally, ensure any egg chair cushions are properly secured to prevent shifting during use.
Enhancing Your Hanging Chair Experience
Once your chair is safely installed, enhance your relaxation space with these ideas:
Comfort Accessories:
* Add weather-resistant cushions and pillows for back support
* Include a small side table within arm’s reach
* Drape a soft throw blanket for cooler evenings
* Place a small basket nearby for books or devices
Creating an Atmosphere:
* Position your chair near natural light sources when possible
* Add soft lighting with string lights or a nearby lamp
* Include plants around your chair for a natural environment
* Consider a small rug beneath indoor chairs for warmth and style
Seasonal Adaptations:
* Use heavier blankets and cushions during colder months
* Add cooling accessories like small fans for summer use
* Consider weather protection for outdoor chairs, such as waterproof covers
* Adjust chair height seasonally to accommodate different clothing and comfort needs
For outdoor installations specifically, hammock sets with canopy provide additional protection from sun and light rain, extending the usability of your outdoor hanging space.
By following proper installation techniques and these enhancement tips, your hanging chair will become not just a piece of furniture, but a personal retreat where you can relax, read, nap, or simply enjoy the gentle swinging motion that makes these chairs so uniquely comforting.