
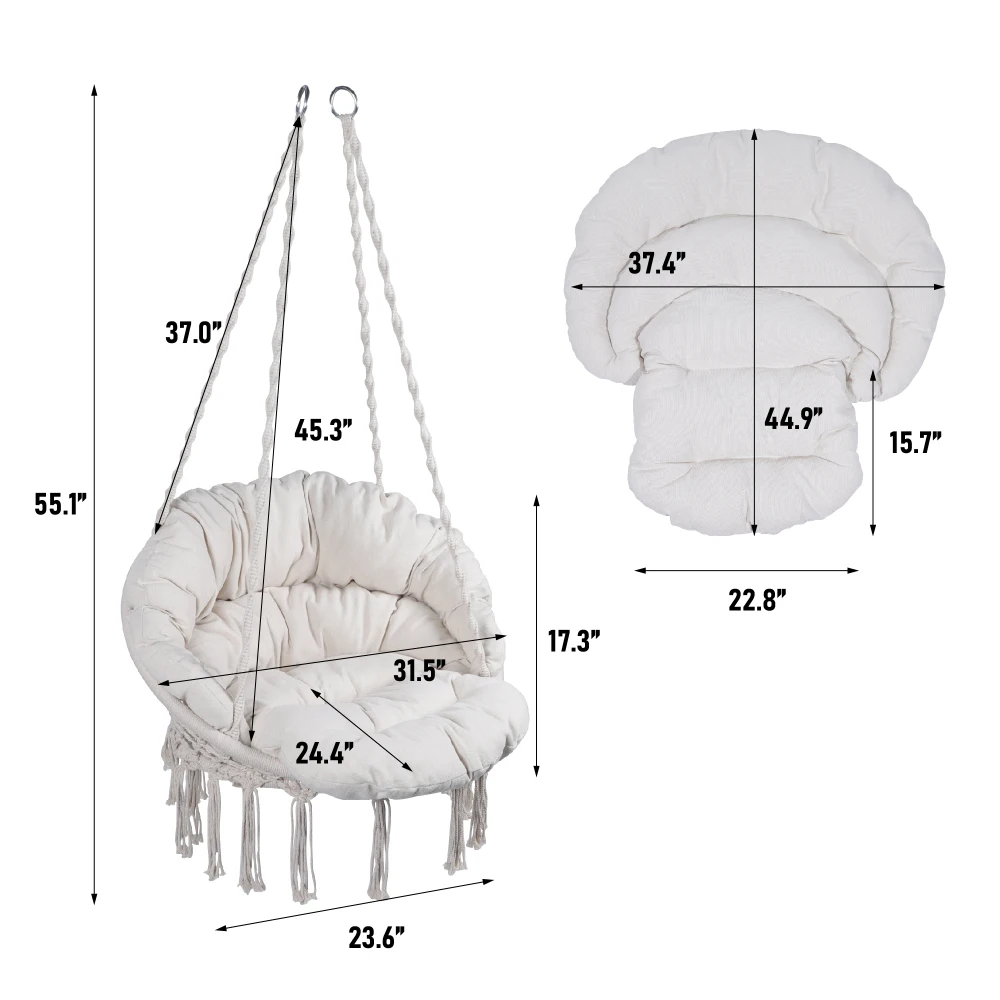
Understanding the Essentials of Swing Hammock Chair Placement
Swing hammock chairs represent the perfect fusion of function and style, offering a unique way to relax that standard furniture simply can’t match. These suspended seats—whether they’re bohemian macramé designs, modern egg chairs, or classic spreader bar styles—create an inviting retreat wherever they’re placed. But achieving that perfect setup requires more than just hanging your chair from the nearest support.
Proper positioning matters for several critical reasons:
– Safety: Prevents accidents and ensures structural integrity
– Comfort: Creates the optimal relaxation experience
– Aesthetics: Enhances your space rather than cluttering it
– Durability: Extends the lifespan of both your chair and support structure
When planning your swinging hammock chairs placement, you’ll need to consider several factors:
– Space requirements (typically 3-6 feet of clearance in all directions)
– Support structure strength (ceiling joists, tree branches, stands)
– Typical usage patterns (reading, napping, conversation)
– Environmental conditions (sun exposure, weather protection)
Finding the right balance between technical specifications and personal preferences is key to creating a hammock chair setup that’s both safe and enjoyable. With various swinging hammock chair sets available, understanding these fundamentals ensures you’ll make choices that enhance your relaxation for years to come.
Safety First: Reliable Support Systems for Your Hammock Chair
Before enjoying the gentle sway of your hammock chair, establishing a secure mounting system is absolutely essential. The last thing anyone wants is an unexpected crash to the floor or a damaged ceiling. The foundation of hammock chair safety lies in understanding weight capacities and selecting appropriate mounting points.
Support Options and Their Specifications
Ceiling Joists and Beams
– Typical weight capacity: 300-500 pounds (136-227 kg) when properly mounted
– Best for: Permanent indoor installations
– Safety consideration: Must mount directly into wooden joists, never just drywallTree Branches
– Required diameter: At least 8 inches (20 cm) for healthy, mature hardwoods
– Weight capacity: Varies by tree species and health
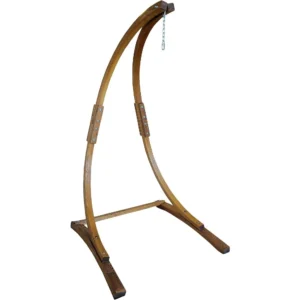
– Safety consideration: Inspect regularly for signs of disease or damageDedicated Hammock Stands
– Weight capacity: 250-350 pounds (113-159 kg) for quality stands
– Best for: Renters, flexible positioning, no drilling required
– Safety consideration: Wider base provides better stabilityPorch Beams and Pergolas
– Weight capacity: Dependent on construction quality and materials
– Best for: Creating shaded outdoor relaxation areas
– Safety consideration: Check for signs of weathering or water damage
Hardware Requirements for Secure Installation
For ceiling or beam mounting, use hardware specifically rated for overhead suspension:
– Eye bolts: Minimum 3/8-inch (10 mm) diameter, stainless steel preferred
– Mounting plates: Distribute weight across larger area for added security
– Carabiners: Look for climbing-grade with locking mechanisms
– Chain or rope: Rated for at least double your intended weight
Remember that dynamic load (movement while sitting) creates more stress than static load. Always select hardware and supports rated for at least 300 pounds (136 kg) even if you weigh significantly less.
Warning signs of unsafe supports include:
– Wood that feels soft or spongy
– Visible cracks or splits
– Creaking sounds when weight is applied
– Excessive movement or swaying of the support structure itself
Proper hanging chair installation not only keeps you safe but also provides peace of mind that allows true relaxation. For those without suitable structural mounting options, quality hammock chairs stands provide a versatile alternative that can be moved as needed.
Space Requirements: Ensuring Proper Clearance
Creating a comfortable and safe hammock chair experience requires adequate space around your suspended seat. Without proper clearance, you risk collisions with walls, furniture, or other obstacles that could cause injury or damage.
Essential Clearance Measurements
- Side Clearance: Minimum 3 feet (0.9 meters) on each side
- Height Clearance: At least 3 feet (0.9 meters) above seated height
- Swing Radius: Full extension of chair when in motion (typically 2-3 feet/0.6-0.9 meters)
- Ground Clearance: 16-24 inches (40-61 cm) depending on preferred sitting position
Clearance Chart by Chair Type
| Chair Style | Side Clearance | Total Height Needed | Swing Radius |
|---|---|---|---|
| Macramé/Fabric | 3 ft (0.9 m) | 7-8 ft (2.1-2.4 m) | 2-3 ft (0.6-0.9 m) |
| Egg Chair | 4 ft (1.2 m) | 7-8 ft (2.1-2.4 m) | 3-4 ft (0.9-1.2 m) |
| Spreader Bar | 3.5 ft (1.1 m) | 7-8 ft (2.1-2.4 m) | 3 ft (0.9 m) |
Measuring Your Space Effectively
Before installation, use these simple methods to visualize your hammock chair’s footprint:
- Use string or tape to mark the swing radius on the floor
- Hold a broom handle vertically from your intended mounting point to visualize the hanging line
- Sit in a regular chair in the space to estimate seated height
- Test clearance by swinging your arms in all directions while seated
For spaces with limited dimensions, consider:
* Mounting closer to a wall (but maintaining minimum 2-foot/0.6-meter clearance)
* Using shorter hanging ropes or chains to limit swing arc
* Selecting a more compact chair design
* Adding soft bumpers to nearby surfaces if minor contact is unavoidable
Taking time to properly measure and plan your space ensures your ultimate swinging chair installation provides the safe, relaxing experience you desire.
Indoor Positioning: Creating a Cozy Relaxation Corner
Bringing the gentle sway of a hammock chair indoors transforms ordinary rooms into extraordinary relaxation zones. The right indoor positioning enhances both the function and aesthetic appeal of your suspended seat.
Prime Indoor Locations
- Living Room Corners: Create a reading nook that becomes a conversation piece
- Bedroom Retreats: Position near windows for natural light and views
- Home Offices: Place in a corner for rejuvenating breaks
- Sunrooms: Maximize natural light for vitamin D while swinging
- Finished Basements: Convert unused space into a cozy hideaway
Indoor Installation Considerations
Finding proper ceiling support is critical for indoor installation. Most residential ceilings conceal joists—the horizontal wooden beams that support the ceiling structure. To locate these:
- Use a stud finder to identify joist locations
- Look for existing ceiling fixtures which are typically attached to joists
- In exposed beam ceilings, visually inspect the wood for size and solidity
- For concrete ceilings, special anchors rated for overhead suspension are required
Once you’ve identified your mounting point, consider these factors:
- Floor Protection: Place a small area rug beneath your hammock chair to protect flooring from scuff marks
- Lighting Design: Position near natural light sources or add a reading lamp within arm’s reach
- Traffic Flow: Ensure the chair doesn’t obstruct normal pathways through the room
- Visual Balance: Center your chair within a design zone rather than floating it randomly
Creating Your Indoor Sanctuary
Transform your indoor hammock chair area into a dedicated relaxation zone by:
* Adding a small side table for books or beverages
* Incorporating soft textures with throw pillows or blankets
* Positioning near houseplants for a natural, calming effect
* Creating a technology-free zone for genuine disconnection
For those concerned about structural mounting, A-frame stand hammock sets offer a practical alternative that requires no ceiling installation while providing the same swinging relaxation experience.
Outdoor Positioning: Maximizing Your Outdoor Relaxation
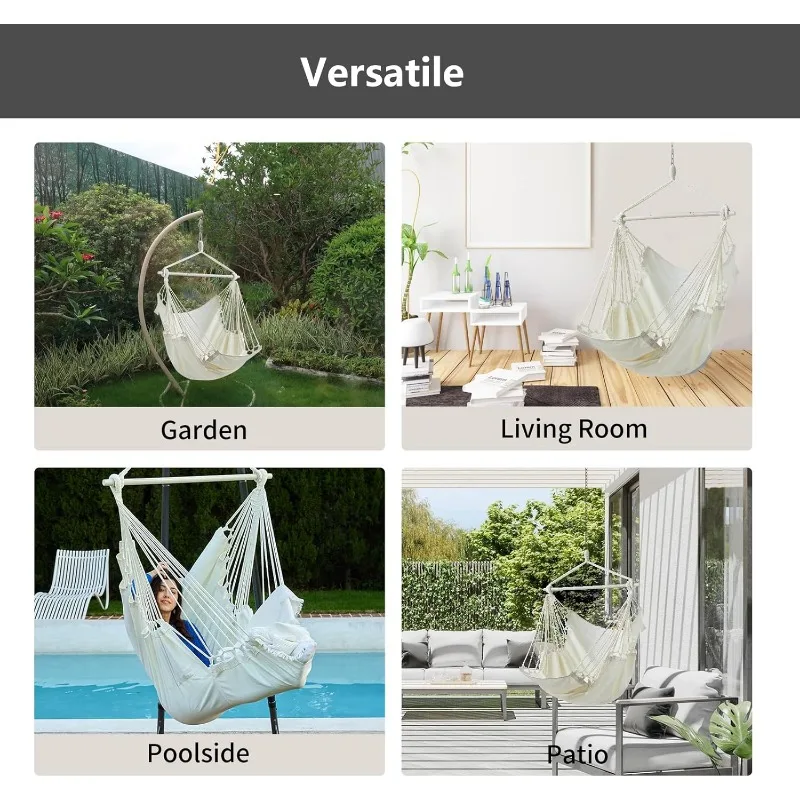
The outdoor environment offers limitless possibilities for hammock chair placement, but requires thoughtful consideration of natural elements and seasonal changes. Strategic outdoor positioning enhances both comfort and the lifespan of your relaxation haven.
Prime Outdoor Locations
- Covered Porches: Protection from direct elements with open-air feeling
- Pergolas and Gazebos: Partial shade with architectural framing
- Garden Retreats: Natural immersion among flowers and greenery
- Poolside Lounging: Convenient relaxation after swimming
- Tree-Shaded Areas: Natural canopy with cooler temperatures
Environmental Considerations
| Location | Sun Exposure | Weather Protection | Privacy Level | Best For |
|---|---|---|---|---|
| Covered Porch | Moderate | Good | Moderate | Daily use |
| Open Patio | High | Minimal | Low | Sunbathing |
| Garden Area | Adjustable | Low | High | Nature immersion |
| Poolside | High | None | Low | Social settings |
| Under Trees | Dappled | Moderate | High | Hot days |
Sun Tracking Strategy
The sun’s path dramatically affects the comfort of your outdoor hammock chair. To find the optimal position:
- Observe your intended area at different times of day
- Mark shadow patterns using physical markers or photos
- Consider seasonal sun variations (winter sun sits lower in the sky)
- Position for morning sun and afternoon shade in warmer climates
- Seek maximum sunlight in cooler climates or seasons
Weather Protection Tactics
- Install your chair under existing roof structures where possible
- Consider quick-release hanging systems for bringing chairs indoors during severe weather
- Position away from areas with water runoff or flooding concerns
- For permanent outdoor installation, choose weather-resistant hardware and materials
- Create wind breaks using structural elements or dense plantings
Patio-friendly swinging hammock chairs require special consideration for weather exposure and spatial integration. Our collection of porch swing chair sets features designs specifically engineered for outdoor durability while maintaining comfort and style.
Installation Methods: Secure Mounting Techniques
The security of your hammock chair depends entirely on proper installation techniques. Following these methodical steps ensures both safety and optimal function, regardless of your chosen mounting location.
Ceiling Joist Installation
- Locate joist: Use a stud finder to identify the center of the ceiling joist.
- Mark position: Create a small pencil mark at your chosen mounting point.
- Drill pilot hole: Use a drill bit smaller than your eye bolt (typically 1/4 inch/6mm for a 3/8 inch/10mm bolt).
- Install eye bolt: Screw the eye bolt into the pilot hole until the eye is flush with the ceiling.
- Test security: Before full installation, hang from the eye bolt briefly to verify it’s secure.
- Attach hanging hardware: Connect chain, rope, or straps using appropriate connectors.
Tools needed: Stud finder, drill, appropriate drill bit, wrench
Tree Branch Mounting
- Select branch: Choose a healthy hardwood branch at least 8 inches (20 cm) in diameter.
- Protect tree: Use tree straps at least 2 inches (5 cm) wide to distribute pressure.
- Create hanging loop: Wrap strap around branch and secure with carabiners.
- Adjust height: Set initial length before final attachment to chair.
- Test weight gradually: Apply pressure incrementally to ensure branch stability.
Tools needed: Tree straps, carabiners, ladder
Hammock Stand Assembly
- Clear flat area: Ensure installation surface is level and stable.
- Follow manufacturer instructions: Assemble frame components in specified order.
- Tighten all connections: Check that all bolts and fittings are secure.
- Position for stability: Place stand on flat ground away from edges or slopes.
- Attach chair: Connect using included hardware or carabiners.
Tools needed: Wrench set, screwdriver, level
Porch Beam Mounting
- Inspect beam: Verify structural integrity and absence of rot or damage.
- Determine orientation: Choose mounting that aligns with beam direction.
- Install heavy-duty eye bolt or hook: Drill pilot hole and secure hardware.
- Add safety backup: For extra security, wrap chain around beam as secondary support.
- Test with gradual loading: Apply weight incrementally before full use.
Tools needed: Drill, wrench, appropriate drill bit
Common Installation Mistakes to Avoid
- Mounting to decorative ceiling elements that lack structural support
- Using indoor-rated hardware for outdoor installations
- Skipping pilot holes, which can split wood and weaken connections
- Overlooking regular inspection of mounting points and hardware
- Exceeding weight capacity by allowing multiple users
For detailed guidance on specific installation scenarios, our comprehensive porch hammock chair installation guide provides step-by-step instructions with safety always as the priority.
Height Optimization: Finding Your Perfect Sitting Position

The height at which you hang your hammock chair dramatically impacts your comfort and the overall experience. Finding that perfect height requires understanding ergonomic principles and making precise adjustments based on your preferences.
Standard Height Guidelines
- Feet touching ground position: 16-18 inches (40-46 cm) from floor to seat bottom
- Ideal for: Easy entry/exit, conversational settings, shorter sessions
Best for: Social areas, dining height interaction, elderly users
Suspended “floating” position: 20-24 inches (50-61 cm) from floor to seat bottom
- Ideal for: Full relaxation, gentle swinging motion, longer sessions
Best for: Reading nooks, meditation spaces, younger users
Ergonomic seated position: Knees slightly below hip level when seated
- Creates proper spinal alignment
- Reduces pressure on lower back
- Allows for comfortable extended use
Height Adjustment Techniques
Depending on your mounting system, use these methods to fine-tune your chair’s height:
Chain Systems:
* Use links to make incremental adjustments
* Add or remove S-hooks for larger height changes
* Install a chain extender for additional length options
Rope Systems:
* Create adjustable knots (truckers hitch or adjustable grip hitch)
* Mark optimal height with colored thread or tape
* Install rope cleats for quick adjustments
Hardware Systems:
* Use turnbuckles for precise tension and height control
* Add extension hooks for lower hanging points
* Install pulleys for easy raising and lowering
Testing Your Height Setting
Before committing to a height setting, perform these simple tests:
1. Sit completely in the chair to test suspension under full weight
2. Check that your feet position feels natural (either touching floor or suspended)
3. Ensure easy entry and exit from the chair
4. Try your typical activities (reading, relaxing) to confirm comfort
5. Adjust in small increments until optimal position is found
The perfect hammock position varies based on personal preference and physical dimensions. The principles of perfect hammock depth for lounging comfort help achieve that ideal balance between support and relaxation, creating a truly personalized experience.
Comfort Enhancements: Accessories and Adjustments
Once you’ve established the perfect position for your hammock chair, adding thoughtfully selected accessories transforms a good experience into an exceptional one. These comfort enhancements adapt your chair to different uses, seasons, and personal preferences.
Essential Cushioning
- Back Support Pillows: Provide lumbar support for longer sitting sessions
- Seat Cushions: Add padding to distribute weight more evenly
- Head/Neck Pillows: Support proper alignment for reading or napping
- Material Considerations: Weather-resistant fabrics for outdoor use; plush, washable covers for indoor settings
Support Accessories
- Footrests: Position 18-24 inches (46-61 cm) from chair edge when seated
- Armrest Additions: Attach cushioned sleeves to ropes or chair sides
- Side Pockets: Add storage for books, devices, or beverages
- Canopies and Covers: Provide shade and protection for outdoor settings
Seasonal Adaptations
- Summer: Breathable cotton or mesh materials; light-colored fabrics
- Winter: Add fleece liners or heated cushions for outdoor use
- Spring/Fall: Weather-resistant, quick-drying covers for unpredictable conditions
- Storage Solutions: Weather-proof containers for accessories during off-seasons
Comfort Customization Tips
- Layer different cushion densities for personalized support
- Use adjustable ties rather than fixed attachments for flexible positioning
- Create modular systems that can be reconfigured based on activities
- Consider cup holders or small tables that attach to your chair’s frame or nearby stand
For outdoor installations, consider comprehensive weather protection for patio hammock chairs to extend both comfort and the lifespan of your setup through changing seasons and weather conditions.
Aesthetic Integration: Making Your Hammock Chair a Focal Point
Your hammock chair can be more than just comfortable—it can become a stunning design element that enhances your overall space. Thoughtful aesthetic integration creates visual harmony while making your chair a natural conversation piece.
Design Coordination Strategies
- Color Harmony: Choose chair colors that either complement or intentionally contrast with your existing décor
- Material Consistency: Match wood tones of stands with nearby furniture
- Style Alignment: Select designs that reinforce your existing aesthetic:
- Macramé for boho or coastal vibes
- Metal frames for industrial or modern spaces
- Wooden components for rustic or traditional settings
Enhancing Visual Appeal
- Disguise mounting hardware with decorative rope wrapping
- Install ceiling rosettes to hide mounting plates
- Use decorative carabiners or connecting hardware as design elements
- Consider ombré or pattern-dyed ropes for artistic hanging systems
Creating a Complete Relaxation Zone
- Position potted plants around the base to create a natural nook
- Install adjustable lighting directed at your reading area
- Add a coordinated side table within arm’s reach
- Layer textures with throws and pillows that complement your décor
Seasonal Design Refreshes
- Swap cushion covers seasonally to reflect changing colors and moods
- Add holiday-appropriate accessories without permanent changes
- Incorporate seasonal plants or flowers near your chair
- Change lighting elements to match seasonal ambiance
Our collection of deep seat chair hammock sets offers designs specifically created to serve as beautiful focal points while maintaining superior comfort for daily use.

Dark Wood Hammock Sets, Porch Swing Chair Sets
$653.82 Select options This product has multiple variants. The options may be chosen on the product page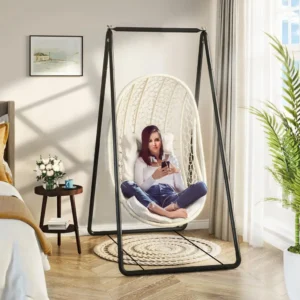
A-Frame Stand Hammock Sets, Swinging Hammock Chair Sets
$154.62 Select options This product has multiple variants. The options may be chosen on the product page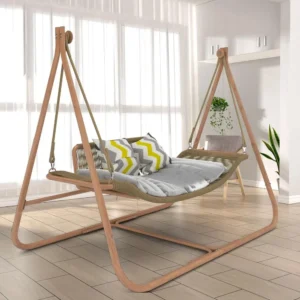
Light Wood Hammock Sets, Swinging Hammock Chair Sets
$1,359.35 Select options This product has multiple variants. The options may be chosen on the product page
Classic Wooden Stand Hammock Sets, Heavy Duty Hammock Sets
$1,061.68 Select options This product has multiple variants. The options may be chosen on the product page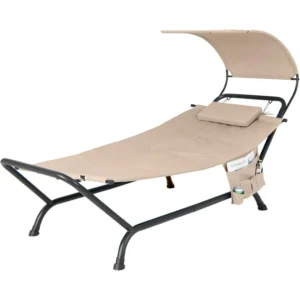
Hammock Sets with Canopy, Heavy Duty Hammock Sets
$286.31 Select options This product has multiple variants. The options may be chosen on the product page
Heavy Duty Hammock Sets, Wooden Arc Stand Hammock Sets
$878.66 Select options This product has multiple variants. The options may be chosen on the product page
Troubleshooting: Solving Common Positioning Problems
Even with careful planning, you may encounter challenges with your hammock chair setup. These solutions address the most frequent positioning issues to restore comfort and functionality.
Chair Hangs Unevenly or Tilts
Problem: One side of the chair hangs lower, creating an uncomfortable tilt.
Solution:
* Check that your mounting hardware is level
* Adjust rope or chain length on the higher side
* Verify that the chair itself hasn’t stretched unevenly
* Ensure weight is distributed evenly in the chair design
Excessive or Insufficient Swinging
Problem: Chair swings too freely or barely moves when desired.
Solution:
* For less movement: Shorten the hanging distance
* For more movement: Lengthen hanging ropes or chains
* Add stabilizing cords for directional control
* Consider the mounting point height (higher points allow more swing)
Difficulty Entering or Exiting the Chair
Problem: Chair spins away or feels unstable during entry and exit.
Solution:
* Install a stabilizing handle or grip near the chair
* Position chair near a wall or sturdy furniture for support
* Adjust height for easier access (typically lower)
* Consider a chair design with more rigid structure
Chair Hits Walls or Obstacles
Problem: When in use, the chair contacts nearby surfaces.
Solution:
* Reposition mounting point further from obstacles
* Shorten hanging length to reduce swing radius
* Install soft bumpers on potential contact points
* Create physical barriers or guides to limit swing direction
Rope Twisting or Tangling
Problem: Suspension ropes twist together during use.
Solution:
* Use a swivel mechanism between mounting point and chair
* Install separate hanging points instead of a single connection
* Add weight to the bottom of the chair for stability
* Regularly untwist ropes as part of maintenance
For chairs that consistently present positioning challenges, considering heavy duty hammock sets might provide more stability and easier adjustment options while maintaining comfort.
Maintenance for Longevity: Preserving Your Perfect Position

Regular maintenance ensures both the safety and longevity of your hammock chair setup. Creating a simple inspection routine prevents unexpected failures and preserves your perfect positioning for years to come.
Monthly Inspection Checklist
- Hardware Security:
- Tighten any loose bolts, screws, or carabiners
- Check for signs of metal fatigue or bending
Verify that all safety clips and locks function properly
Support Structure:
- Inspect ceiling mounting for any new cracks or movement
- Check tree branches for health and growth changes
Examine stand legs for stability and level positioning
Connection Points:
- Look for fraying in ropes or straps
- Check for rust or corrosion on metal components
Verify knots remain tight and properly tied
Chair Fabric and Structure:
- Look for tears, stretched areas, or sun damage
- Clean according to material specifications
- Check stitching and stress points for integrity
Seasonal Repositioning Considerations
- Spring: Inspect for winter damage; clean mold or mildew
- Summer: Check sun exposure patterns and adjust for shade if needed
- Fall: Prepare for weather changes; consider indoor relocation
- Winter: Implement weatherproofing or storage plans for severe conditions
Protection Strategies by Material
- Wood Components: Apply appropriate sealants yearly
- Metal Hardware: Use anti-corrosion sprays in humid environments
- Fabric Elements: Apply UV protectant for outdoor installations
- Rope and Cord: Replace natural fibers showing age before failure occurs
When to Replace Components
- Immediately replace any hardware showing cracks or deformation
- Swap out ropes or straps with more than 10% of fibers frayed
- Replace wooden components with any signs of splitting or soft spots
- Consider full replacement if chair fabric shows significant stretching
Understanding the different patio hammock chair materials helps you select the right cleaning and maintenance products for your specific chair type, ensuring maximum longevity with minimal effort.
From Placement to Experience: Making the Most of Your Swing Hammock Chair
The true art of hammock chair enjoyment lies in creating different experiences through intentional positioning and use. Your chair can serve multiple purposes throughout the day, each enhanced by thoughtful placement and accessories.
Creating Purpose-Driven Spaces
- Reading Retreats:
- Position near natural light but avoid direct glare
- Install adjustable task lighting for evening reading
- Arrange bookshelves or tables within arm’s reach
Orient toward pleasing views when not reading
Meditation Corners:
- Place away from household traffic and noise
- Surround with calming elements like plants or water features
- Use neutral colors and minimal visual distractions
Consider sound optimization (white noise machines, wind chimes)
Social Spots:
- Position within conversation distance of other seating
- Allow enough space for gentle swinging without hitting others
- Create pairs or groups of chairs for shared experiences
Ensure easy entry/exit for frequent movement
Relaxation Retreats:
- Maximize comfort with additional cushioning and support
- Position for optimal views (nature, television, fireplace)
- Add conveniences for extended lounging (side tables, chargers)
- Consider privacy screens or curtains for truly undisturbed rest
The advantages of swing chairs for patios extend beyond simple seating—they create dynamic living spaces that adapt to your changing needs throughout the day and across seasons.
Is a Hammock Stand or Direct Mounting Better for Your Situation?
Choosing between a dedicated hammock stand and direct structural mounting represents one of the most significant decisions in your hammock chair journey. Each approach offers distinct advantages for different living situations and preferences.
Comparative Analysis
| Factor | Hammock Stand | Direct Mounting |
|---|---|---|
| Stability | Moderate to High | Very High |
| Portability | Can be moved easily | Permanent installation |
| Installation Complexity | Simple assembly, no tools | Requires drilling and hardware |
| Space Requirements | Larger footprint needed | Minimal floor space used |
| Aesthetic Impact | Visible stand structure | Cleaner, suspended look |
| Cost | Higher initial investment | Lower hardware cost |
| Flexibility | Can be repositioned | Fixed location |
| Rental-Friendly | No damage to property | May violate lease terms |
When to Choose a Stand
- You rent your home or cannot modify structures
- You want the flexibility to move your chair seasonally
- You lack appropriate structural mounting points
- You prefer not to drill into ceilings or beams
- You want the option to use your chair both indoors and outdoors
When to Choose Direct Mounting
- You own your home and can modify structures
- You have ideal, strong mounting points available
- You prioritize maximum stability and minimal floor space
- You prefer the clean aesthetic of a floating chair
- Your desired location has ceiling height limitations
Hybrid Approaches
- Use temporary mounting hardware that clamps rather than drills
- Install permanent mounting points in multiple locations with quick-release systems
- Choose stands with additional functionality (storage, lighting, side tables)
- Consider ceiling-mounted track systems for adjustable positioning
The hanging egg chair sets in our collection include both stand-mounted and direct-hanging options, allowing you to select the approach that best matches your space and lifestyle needs.
Should You Adjust Your Hammock Chair Positioning Seasonally?
Seasonal changes affect not only the outdoor environment but also how we use our indoor spaces. Adapting your hammock chair positioning throughout the year maximizes comfort and extends the life of your relaxation investment.
Summer Positioning Strategies
- Relocate to capture morning sun while avoiding afternoon heat
- Position to maximize airflow and cooling breezes
- Seek natural shade from trees with full summer foliage
- Consider proximity to water features for cooling effects
- Use lighter, breathable cushions and covers
Winter Adjustments
- Move to capture maximum sunlight during shorter days
- Reposition away from drafty areas near doors or windows
- Consider proximity to heat sources (fireplaces, radiators)
- Add insulating cushions or washable sheepskin covers
- Adjust height slightly lower for easier entry with winter clothing
Transitional Seasons (Spring/Fall)
- Create flexible setups that accommodate temperature fluctuations
- Plan for partial sun/partial shade positions
- Consider rain protection while maintaining airflow
- Position to enjoy seasonal views (spring blooms, fall foliage)
- Use quick-dry materials for unpredictable weather
Indoor Seasonal Considerations
- Adjust positioning relative to heating/cooling vents
- Relocate based on changing natural light patterns
- Consider holiday decorations and temporary space needs
- Modify height and accessories for seasonal activities
The principles of perfect porch swing hammock comfort apply year-round but require seasonal fine-tuning to maintain optimal relaxation experiences despite changing environmental conditions.
By regularly evaluating and adjusting your hammock chair’s position, you create a consistently enjoyable retreat regardless of season or weather, maximizing both comfort and the longevity of your Outside Luxe hammock chair investment.