Understanding the Basics of Hammock Post Installation
Installing a hammock between wooden posts can create the perfect relaxation spot in your yard, but proper installation is crucial for both safety and longevity. The general rule of thumb when installing hammock posts is that one-third of the total post length should be underground. This means if you plan to have 6 feet (1.8 meters) of post above ground, your total post length should be about 9 feet (2.7 meters), with 3 feet (0.9 meters) buried.
Several important factors affect how deep your hammock posts should be:
- The height of the post above ground
- Soil composition and firmness
- Expected weight capacity
- Climate conditions in your area
- Whether you’ll use concrete reinforcement
When posts aren’t installed deep enough, they can lean, wobble, or even completely fail—potentially causing injury and certainly ruining your relaxation time. At minimum, most hammock posts should be buried at least 2-3 feet (60-90 cm) deep, but specific circumstances might require more.
Proper indoor and outdoor hammock placement isn’t just about aesthetics—it’s about creating a safe, stable structure that will provide years of enjoyment.
Critical Factors Determining Ideal Hammock Post Depth
Soil Type and Composition
The ground where you’re installing your posts plays a major role in determining proper depth:
- Clay soil: Generally provides good stability, may allow for slightly shallower depths
- Sandy soil: Offers less resistance and stability, requiring posts to be buried deeper (add 6-12 inches/15-30 cm to your minimum depth)
- Rocky soil: Can provide good stability but may make digging difficult
- Moisture levels: Consistently wet areas require deeper installation as moisture reduces soil stability
Post Height and Leverage Physics
The taller your posts extend above ground, the deeper they need to be buried. This relationship exists because of basic physics—the higher the post, the more leverage is exerted when weight is applied to the hammock.
For optimal stability:
– Posts 6-7 feet (1.8-2.1 m) above ground: minimum 2.5-3 feet (75-90 cm) in ground
– Posts 7-8 feet (2.1-2.4 m) above ground: minimum 3-3.5 feet (90-105 cm) in ground
– Posts taller than 8 feet (2.4 m): minimum 3.5-4 feet (105-120 cm) in ground
The one-third rule works because it accounts for the proper ratio of buried post to exposed post to maintain stability under various loads.
Weight Capacity Requirements
Different hammock types create different demands on your posts:
– Single hammocks: Typically support 250-300 lbs (113-136 kg)
– Double/family hammocks: May need to support 450-600 lbs (204-272 kg)
Remember that dynamic load (getting in and out, swinging) can temporarily double the static weight. Deeper post installation provides better support for higher weight capacities. Understanding how much weight a hammock can hold helps you determine the appropriate depth for your posts.
Regional Climate Factors
The frost line—the maximum depth to which ground water freezes in winter—is crucial for permanent outdoor installations. Posts installed above the frost line can heave during freeze/thaw cycles, causing misalignment or failure.
Regional frost line examples:
– Northeast US: 36-48 inches (90-120 cm)
– Midwest US: 24-48 inches (60-120 cm)
– Southern states: 6-12 inches (15-30 cm)
– West Coast: varies significantly by elevation
Always check local building codes or contact local contractors to determine the frost line in your specific area. Proper hammock installation requirements and safety guidelines are essential for creating a secure setup.
Post Material Selection and Size Requirements
Selecting the right wood type and dimensions is just as important as proper depth for a successful hammock installation. Different materials offer varying degrees of durability, strength, and resistance to the elements.
Recommended Wood Types
| Wood Type | Pros | Cons | Expected Lifespan |
|---|---|---|---|
| Pressure-Treated Pine | Affordable, widely available, good rot resistance | Can warp, less attractive appearance | 15-20 years |
| Cedar | Naturally rot-resistant, attractive appearance, minimal warping | More expensive, slightly less strength | 20-30 years |
| Redwood | Excellent rot resistance, attractive, very stable | Most expensive, limited availability | 25-40+ years |
The pressure treatment rating is crucial—always select wood rated for “ground contact” rather than just “above ground” use for posts that will be buried.
Dimensional Requirements
The thickness of your posts directly affects their strength and stability:
– 4×4 inches (10×10 cm): Suitable only for light, temporary hammock use
– 6×6 inches (15×15 cm): Recommended standard for most permanent hammock installations
– 8×8 inches (20×20 cm): Ideal for extra-large hammocks or high-use situations
Alternative materials like metal posts or composite materials can also work well. Metal posts typically require less depth due to their greater strength, while composite materials may need the same or greater depth as wooden posts.
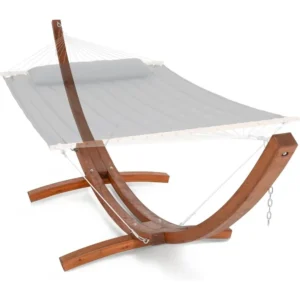
Our collection of wooden hammock stands demonstrates proper material selection principles that can be adapted for permanent post installations.
The Role of Concrete in Post Stability
Using concrete to secure your hammock posts significantly increases stability and longevity. The added mass and grip of concrete creates a solid foundation that resists movement and prevents premature post failure.
Benefits of Using Concrete
- Creates a solid foundation that distributes weight more evenly
- Prevents posts from rotating or shifting over time
- Protects wood from ground moisture, extending post life
- Can reduce required depth slightly (though depth remains important)
For outdoor hammock posts, use a high-quality, quick-setting concrete mix designed for outdoor post setting. Pre-mixed bags are convenient and ensure proper ratios.
Concrete-to-Post Ratio Guidelines
For optimal stability, the concrete footing should be:
– 3 times the width of the post in diameter
– Example: For a 6×6 inch post, dig a hole 18 inches (45 cm) in diameter
To calculate concrete needed:
1. Measure hole diameter in feet (diameter in inches ÷ 12)
2. Square this number and multiply by 0.785
3. Multiply by depth in feet
4. Result is cubic feet of concrete needed
5. One 80 lb (36 kg) bag typically yields about 0.6 cubic feet
Allow concrete to cure for at least 24-48 hours before attaching your hammock, and 72+ hours before full use. When planning a permanent hammock installation, considering heavy-duty hammock sets can help you determine the appropriate post stability requirements.
Calculating the Proper Post Depth for Your Specific Setup
To determine the ideal depth for your hammock posts, follow this step-by-step calculation process that accounts for your specific conditions.
Basic Depth Calculation
Start with this baseline formula:
1. Take the height of the post above ground
2. Divide by 2
3. Add 6 inches (15 cm) safety margin
Example: For a post extending 7 feet (2.1 m) above ground
– 7 ÷ 2 = 3.5 feet
– 3.5 feet + 6 inches = 4 feet (1.2 m) minimum depth
Soil Type Adjustments
After calculating your basic depth, adjust based on soil conditions:
– Clay/compact soil: No adjustment needed
– Loamy soil: Add 6 inches (15 cm)
– Sandy or loose soil: Add 12 inches (30 cm)
Climate/Frost Line Considerations
Your post depth should never be less than your local frost line depth, regardless of other calculations. If your calculated depth is less than the frost line, use the frost line depth as your minimum.
Safety Factor for Heavy Use
For additional security, especially with larger hammocks or frequent use:
– Single hammock, occasional use: No additional depth
– Double hammock or frequent use: Add 6 inches (15 cm)
– Extra-large hammock or constant use: Add 12 inches (30 cm)
Remember that 2 feet (60 cm) is the absolute minimum depth even in perfect conditions with concrete reinforcement. The difference between indoor hammock safety and outdoor installations is significant—outdoor posts require more careful planning due to variable ground conditions.
Step-by-Step Guide to Installing Hammock Posts at the Right Depth
Follow these detailed steps to ensure your hammock posts are installed properly for maximum stability and safety:
1. Plan and Measure Your Installation
- Mark the exact location for each post with stakes
- Measure the distance between posts (typically 12-15 feet/3.7-4.6 m for standard hammocks)
- Check for underground utilities before digging
- Ensure the area is level or adjust your plans accordingly
2. Gather Your Tools and Materials
- Post hole digger or power auger
- Shovel
- Measuring tape
- Level
- Gravel for drainage (about 4 inches/10 cm per hole)
- Concrete mix
- Mixing container and water source
- Temporary braces (2×4 lumber works well)
3. Dig the Holes Properly
- Dig holes 3 times the width of your posts (e.g., 18 inches/45 cm wide for 6×6 posts)
- Ensure you reach your calculated depth plus 4 inches (10 cm) for gravel
- Taper the holes slightly wider at the bottom for added stability
- Remove all loose soil from the hole
4. Create a Drainage Base
- Add 4 inches (10 cm) of gravel to the bottom of each hole
- Compact the gravel firmly
- This prevents water pooling that could cause premature rot
5. Set Posts with Perfect Alignment
- Place the post in the center of the hole
- Use a level on two adjacent sides to ensure the post is perfectly vertical
- Have a helper hold the post or use temporary braces to maintain position
- Double-check that posts are at equal heights and properly aligned
6. Mix and Pour Concrete
- Follow package directions to mix concrete to a thick, oatmeal-like consistency
- Pour concrete into the hole, filling to about 3-4 inches (7-10 cm) below ground level
- Use a stick to poke the concrete repeatedly to remove air bubbles
- Slope the concrete surface slightly away from the post for water runoff
7. Allow for Proper Curing
- Keep posts braced for at least 24 hours
- Mist the exposed concrete several times daily for the first 48-72 hours
- Wait at least 72 hours before attaching your hammock
- For maximum strength, allow concrete to cure for 7 days before heavy use
Achieving a professional installation similar to our classic wooden stand hammock sets requires attention to detail during each step of the process.
Alternative Anchoring Methods When Deep Posts Aren’t Possible
Sometimes the ideal post depth isn’t achievable due to rocky soil, high water tables, or other limitations. Here are effective alternatives when standard deep-post installation isn’t possible:
Underground Concrete Footings with Shorter Posts
- Dig a wider but shallower hole (24-36 inches/60-90 cm wide)
- Create a broad concrete pad 12-18 inches (30-45 cm) deep
- Embed metal brackets or post anchors in the concrete
- Attach shorter wooden posts to these anchors
- This spreads the load over a wider area rather than depending on depth
Cross-Bracing Techniques
- Install posts at standard depth but add diagonal braces
- Connect braces from halfway up the post to a ground stake or concrete block
- Install braces in both directions (forming an X shape) for maximum stability
- This counters the rocking force applied to posts during hammock use
Specialized Base Plates and Ground Anchors
- Use expanding ground anchors for temporary installations
- Consider screw-in earth anchors that provide excellent grip
- Metal base plates can distribute the load over a wider surface
- Most effective when combined with some depth (12-18 inches/30-45 cm)
Hammock Stands as an Alternative
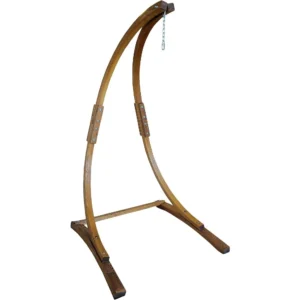
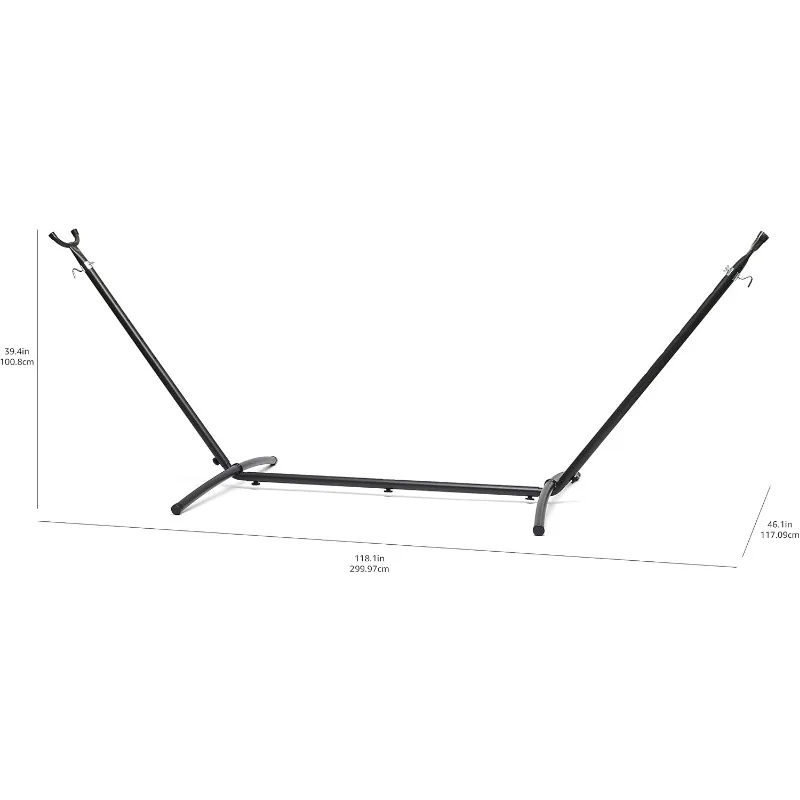
When permanent posts aren’t feasible, high-quality A-frame hammock stands offer excellent stability without requiring any digging. These provide the added benefit of portability while still ensuring safety.
Safety Testing Your Hammock Post Installation
Before trusting your hammock posts with your full weight, perform these safety checks to ensure proper installation:
Visual Inspection Checklist
- Posts appear perfectly vertical from all angles
- No visible gaps between post and concrete
- No cracks in concrete footing
- Wood shows no signs of splitting or damage
- Hardware connections are tight and secure
Weight Testing Protocol
- After concrete has fully cured (minimum 72 hours):
- Apply gentle sideways pressure to each post (it should feel completely rigid)
- Hang a weight of 50 lbs (23 kg) from the hammock attachments for 1 hour
- Check for any movement or shifting
- Increase to 100 lbs (45 kg) for another hour
- Inspect posts again before applying full body weight
Warning Signs of Inadequate Installation
- Any visible leaning or movement of posts
- Cracking sounds when pressure is applied
- Soil pulling away from around the post
- Concrete footing cracking or shifting
- Hardware pulling away from wood
Ongoing Maintenance
- Inspect posts visually every 3-4 months
- Check more frequently after severe storms
- Look for signs of wood rot, especially at ground level
- Reapply weather sealant to exposed wood annually
- Test stability before each season of heavy use
Proper indoor and outdoor hammock safety requires ongoing vigilance, not just initial installation care.
Troubleshooting Common Post Depth Issues
Even with careful installation, problems can develop over time. Here’s how to identify and address the most common issues:
Posts Leaning Over Time
Problem: Posts gradually tilt inward when hammock is used.
Causes: Insufficient depth, poor soil compaction, or inadequate concrete.
Solution: For minor leaning, install diagonal braces. For significant leaning, you may need to reinstall posts at greater depth with more substantial concrete footings.
Concrete Cracking or Breaking Down
Problem: Visible cracks in concrete footing or crumbling concrete.
Causes: Poor mixing, freezing during curing, or undersized footing.
Solution: Remove damaged concrete, enlarge hole, and repour with proper techniques and weather conditions. Consider adding reinforcement wire to new concrete.
Soil Erosion Around Posts
Problem: Soil washing away from post base.
Causes: Poor drainage or improper grading.
Solution: Create a slight mound around posts to direct water away. Add more concrete to cover exposed areas, sloping away from the post.
Frost Heave Effects
Problem: Posts rise slightly during winter months.
Causes: Installation above frost line or water pooling around posts.
Solution: Temporary bracing during winter months. For permanent fix, reinstall posts below frost line with proper drainage.
For situations where existing posts can’t be adequately repaired, consider our selection of A-frame stand hammock sets as a reliable alternative.
Dark Wood Hammock Sets, Porch Swing Chair Sets
$653.82 Select options This product has multiple variants. The options may be chosen on the product pageA-Frame Stand Hammock Sets, Swinging Hammock Chair Sets
$154.62 Select options This product has multiple variants. The options may be chosen on the product pageLight Wood Hammock Sets, Swinging Hammock Chair Sets
$1,359.35 Select options This product has multiple variants. The options may be chosen on the product pageClassic Wooden Stand Hammock Sets, Heavy Duty Hammock Sets
$1,061.68 Select options This product has multiple variants. The options may be chosen on the product pageHammock Sets with Canopy, Heavy Duty Hammock Sets
$286.31 Select options This product has multiple variants. The options may be chosen on the product pageHeavy Duty Hammock Sets, Wooden Arc Stand Hammock Sets
$878.66 Select options This product has multiple variants. The options may be chosen on the product page
Frequently Asked Questions About Hammock Post Installation
Can I use existing trees instead of posts?
Yes, mature trees (10+ inches/25+ cm in diameter) can support hammocks, but use tree-friendly straps rather than screws or nails to prevent damage. Be sure trees are healthy and firmly rooted.
How far apart should hammock posts be placed?
Typically 12-15 feet (3.7-4.6 m) apart, depending on your hammock length. The distance should be about 2 feet (60 cm) less than the total length of your hammock to allow for proper sag.
Do hammock posts need to be angled or straight?
Posts should be installed perfectly vertical. The pull from the hammock will naturally create some tension, but the posts themselves should start straight to maintain maximum strength.
How long will properly installed posts last?
With pressure-treated lumber rated for ground contact, proper drainage, and concrete reinforcement, hammock posts typically last 15-20 years. Cedar or redwood can last 20-30+ years with proper maintenance.
Can I remove and relocate posts after installation?
Posts set in concrete are generally permanent. For relocatable options, consider sleeve systems where a metal sleeve is concreted in place and wooden posts can be removed, or explore free-standing best places to put hammock options.

Summary: Ensuring Your Hammock Posts Stand Strong for Years to Come
Proper hammock post installation is a balance of depth, material quality, and installation technique. Remember these key takeaways:
- The standard one-third rule provides a good starting point—one-third of total post length should be underground
- Never install posts less than 2 feet (60 cm) deep, even with concrete reinforcement
- Always consider your soil type, local frost line, and expected weight capacity
- Use pressure-treated 6×6 lumber (minimum) rated for ground contact
- Concrete footings significantly improve stability and longevity
- Allow adequate curing time before using your hammock
- Test thoroughly before applying full weight
By following these guidelines, you’ll create a hammock installation that provides safe, stable enjoyment for many years. The extra time spent on proper depth and installation will pay dividends in durability, safety, and peace of mind while you relax in your perfectly hung hammock.


