
Why Choose a Lightweight Hammock for Camping? The Benefits
Switching from traditional tents to lightweight hammocks has become increasingly popular among campers and backpackers for very good reasons. When you’re heading into the wilderness, every ounce matters, and hammocks offer significant weight savings compared to conventional shelters. Most quality camping hammocks weigh between 10-24 ounces (280-680 grams), while even lightweight one-person tents typically weigh 2-4 pounds (0.9-1.8 kg) at minimum.
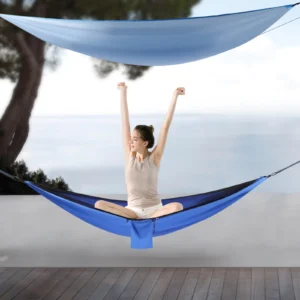
The comfort advantage of hammocks is unmatched. Unlike sleeping on hard, uneven ground, hammocks contour to your body, eliminating pressure points that cause tossing and turning. The gentle swaying motion also promotes deeper, more restful sleep after a long day on the trail. Many campers report falling asleep faster and waking up without the usual backaches that accompany ground sleeping.
Setup speed is another compelling benefit. While tent setup involves finding flat ground, clearing rocks and sticks, and dealing with poles and stakes, hammock setup is remarkably simple:
- Find two suitable trees
- Wrap the straps
- Clip in your hammock
- Adjust to desired height
Most experienced hammockers can complete this process in under 3 minutes—roughly 75% faster than the average tent setup.
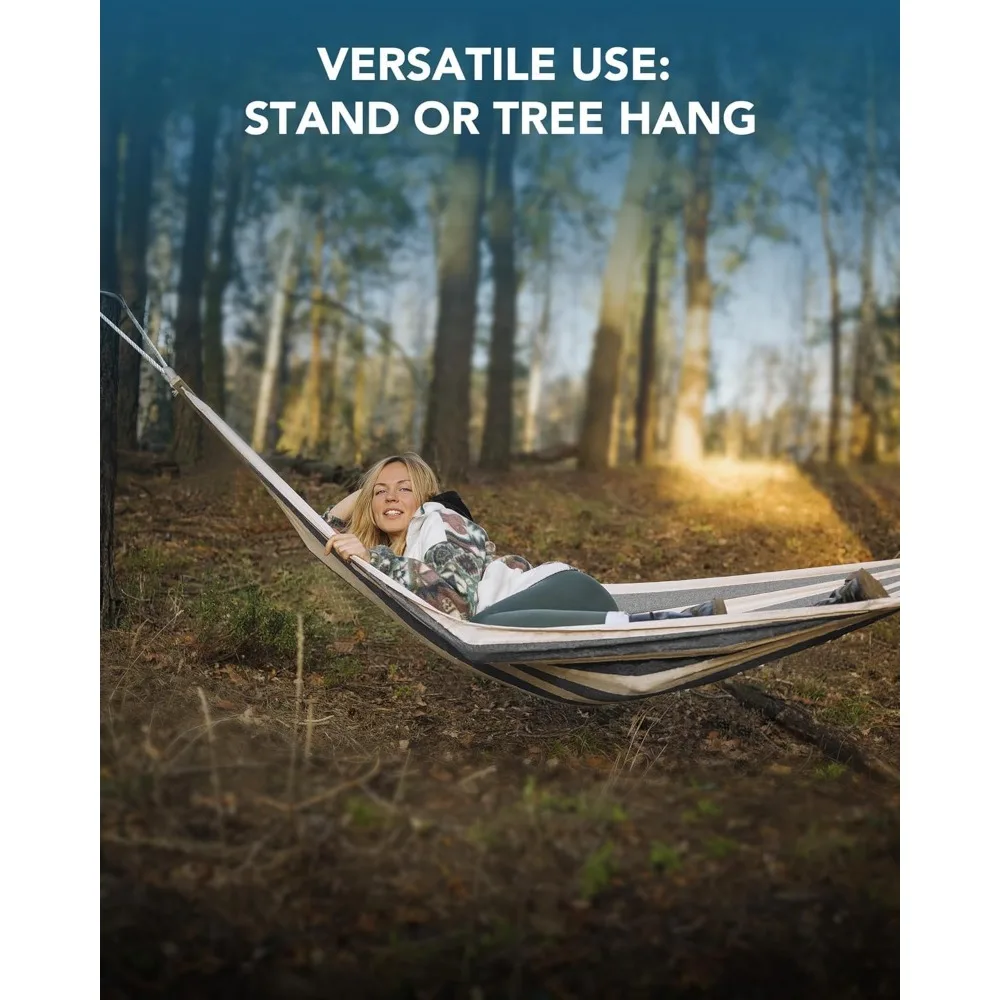
The versatility of ultralight camping hammock sets is remarkable. While tents require relatively flat, debris-free terrain, hammocks can be hung virtually anywhere with proper anchor points. This opens up camping possibilities on hillsides, rocky terrain, or areas with wet ground that would be uncomfortable or impossible for tent camping.
When comparing hammocks to traditional camping options, the connection to nature is noticeably enhanced. Being suspended above the ground provides a unique perspective, improved airflow, and better protection from ground-dwelling insects. There’s something magical about gently swaying while watching stars between tree branches—an experience impossible from inside a tent.
From an environmental perspective, proper hammock use follows leave-no-trace principles more easily than tents. With appropriate wide tree straps, hammocks cause minimal impact to the surrounding environment. Learning whether it’s okay to leave your hammock outside for extended periods helps ensure you’re practicing sustainable outdoor recreation.
Our Top Picks: The Best Lightweight Hammocks for Camping Sites
After extensive field testing in various environments, we’ve curated a selection of premium lightweight hammocks that deliver exceptional performance for camping. These options represent the best balance of weight, durability, comfort, and features for different camping styles.
For Ultralight Backpackers
When every ounce counts on long-distance treks, these hammocks provide maximum weight savings without sacrificing comfort:
- Featherlight Solo Hammock
- Weight: 9.5 oz (270 g)
- Capacity: 350 lbs (159 kg)
- Packed size: 4” × 4” (10 cm × 10 cm)
- Material: 20D ripstop nylon
Features: Integrated stuff sack, ultralight carabiners
Trail Minimalist Pro
- Weight: 10.2 oz (290 g)
- Capacity: 400 lbs (181 kg)
- Packed size: 4.5” × 5” (11.5 cm × 12.5 cm)
- Material: Proprietary lightweight ripstop fabric
- Features: Multiple attachment points, quick-deploy system
For those concerned about insects, several camping hammock sets with bug net protection offer peace of mind without significant weight penalties. These integrated systems eliminate the need to carry and set up separate bug protection.
All-in-One Systems
For campers who prefer convenience and comprehensive solutions, these complete camping hammock systems include everything needed for immediate setup:
- Expedition Complete System
- Weight: 3.2 lbs (1.45 kg) complete system
- Components: Hammock, rainfly, bug net, suspension straps, stakes
- Setup time: Under 5 minutes
Features: Modular design allows use of only needed components
Adventure Ready Package
- Weight: 2.8 lbs (1.27 kg) complete system
- Components: Double hammock, hex rainfly, detachable bug net, premium straps
- Packed size: 9” × 6” (23 cm × 15 cm)
- Features: Color-coded components for intuitive setup
Understanding proper hammock weight capacity guidelines is essential when selecting the right option. Most quality camping hammocks provide capacity ratings with built-in safety margins, but it’s important to choose one rated at least 25% above your actual weight.
How to Choose the Perfect Lightweight Camping Hammock
Selecting the ideal lightweight camping hammock involves several important considerations that will significantly impact your comfort and overall experience.
Weight and Packed Size
The primary appeal of lightweight hammocks is their portability. Consider your specific camping style:
* Ultralight backpacking: Look for hammocks under 12 oz (340 g)
* Weekend camping: Hammocks under 20 oz (570 g) offer good balance
* Car camping: Weight becomes less critical; focus on comfort features
Packed size is equally important—look for options that compress to the size of a softball or smaller to maximize pack space efficiency.
Material Quality
The fabric determines durability, comfort, and weight. Most high-quality camping hammocks use nylon with different denier ratings:
* 10-20D: Ultralight but requires careful handling
* 30-40D: Good balance of weight and durability for most users
* 70D+: Maximum durability but heavier
Ripstop construction prevents small tears from spreading and should be considered a must-have feature for any camping hammock.
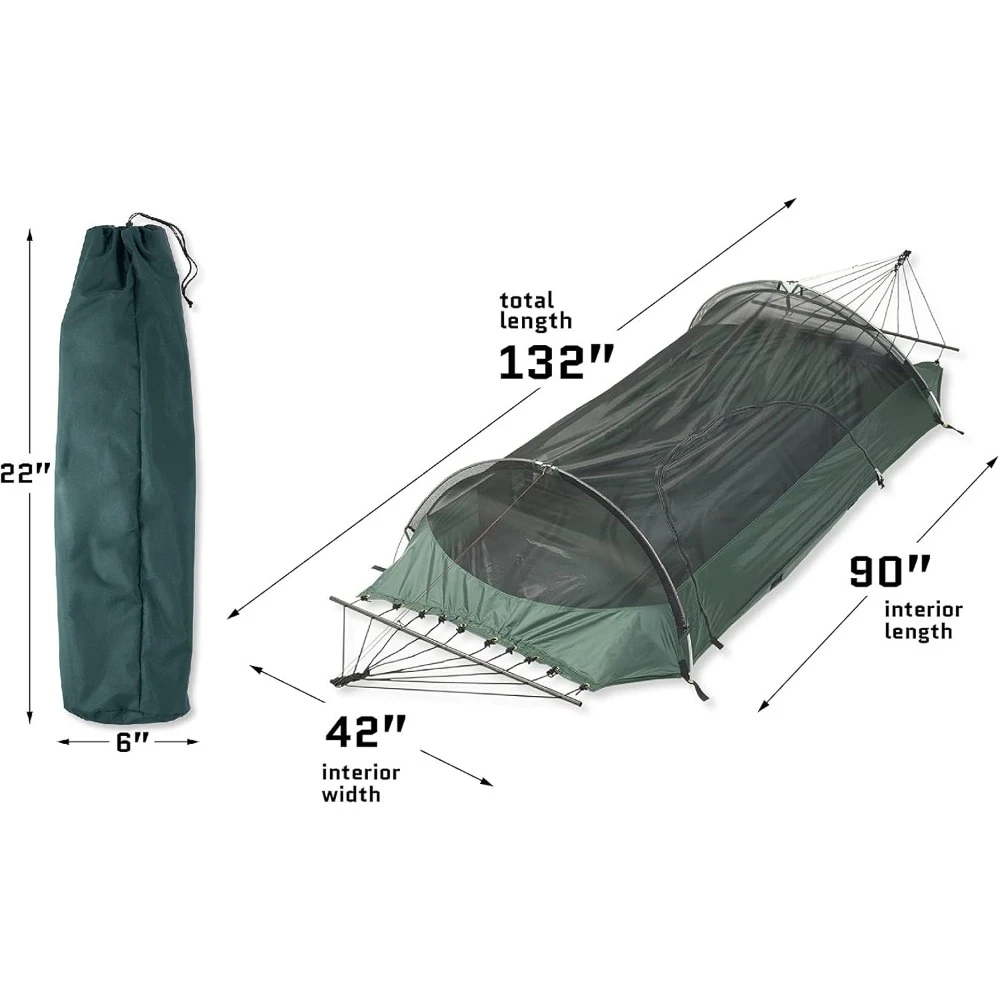
Dimensions Matter
Hammock size significantly affects comfort. For comfortable diagonal positioning:
* Length: Choose at least 8-10 feet (2.4-3 m) for average height users
* Width: Single hammocks should be at least 4-5 feet (1.2-1.5 m) wide
* For taller users: Add 2 feet (60 cm) to hammock length beyond your height
Suspension Systems
The hammock installation requirements and safety guidelines should inform your suspension system choice. Look for:
* Tree-friendly straps at least 1.5 inches (3.8 cm) wide to distribute pressure
* Adjustable systems that allow fine-tuning without retying knots
* Weight rating that exceeds your hammock’s capacity rating
Integrated vs. Modular Systems
Consider whether you prefer:
* Integrated systems: Convenient all-in-one solutions with built-in bug nets and attachment points
* Modular systems: More versatile for adapting to different conditions but require purchasing separate components
For versatile camping situations, many outdoor enthusiasts find that lightweight hammock sets offer the best combination of features while maintaining reasonable pack weight.
Essential Accessories for Hammock Camping
To transform a simple hammock into a complete shelter system, several key accessories deserve consideration.
Suspension Systems
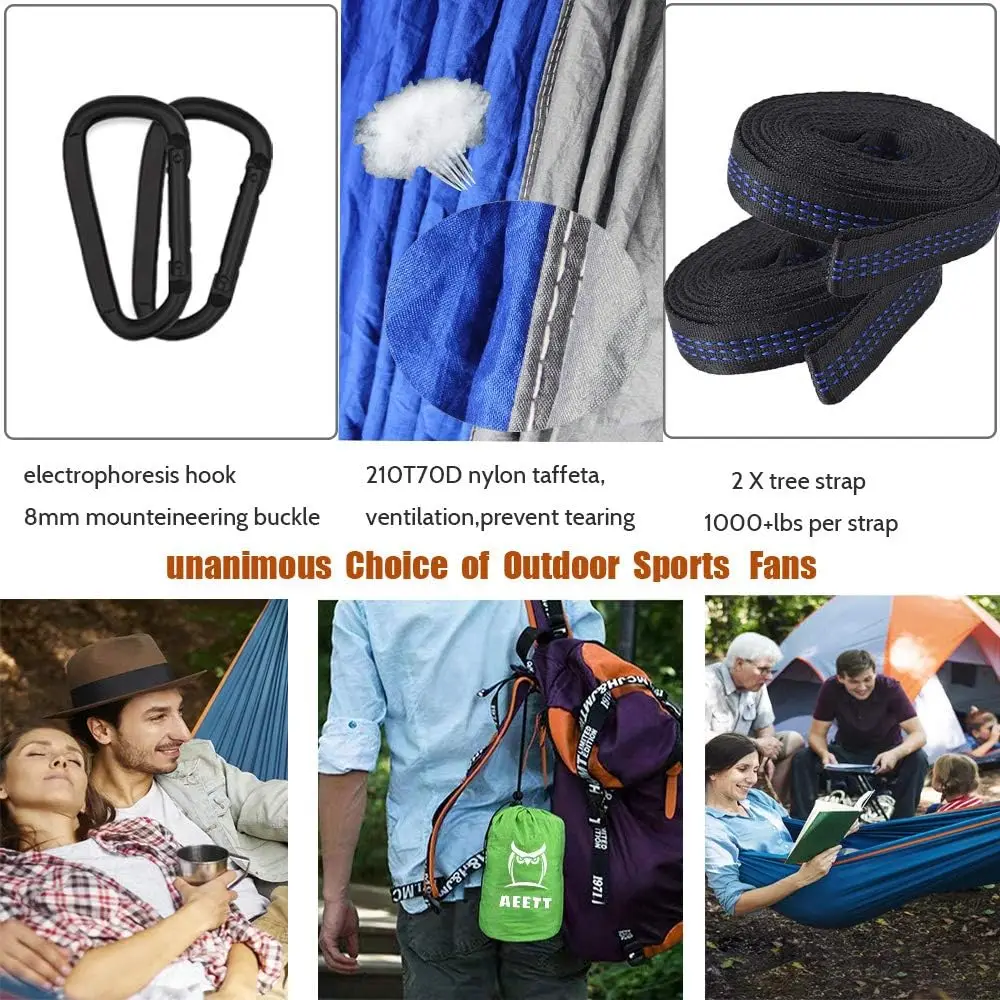
Quality straps are the foundation of safe hammock camping:
* Tree straps should be at least 1.5 inches (3.8 cm) wide to prevent bark damage
* Daisy-chain systems offer multiple attachment points for easy adjustment
* Whoopie slings provide precise tension adjustment with minimal weight penalty
* Combined weight capacity should exceed hammock rating by at least 30%
Weather Protection
To stay dry in unpredictable conditions:
* Rainflies/Tarps: Look for silnylon or silpoly materials for lightweight waterproof protection
* Coverage: Minimum 8×10 feet (2.4×3 m) for adequate coverage during angled rain
* Ridgeline: Separate structural ridgeline prevents sagging when wet
* Configurations: Diamond, hexagonal, and rectangular tarps offer different coverage-to-weight ratios
Insulation Systems
Unlike tents, hammocks require under-insulation to prevent “cold butt syndrome”:
* Underquilts: Hang beneath the hammock, providing loft and warmth without compression
* Summer: 40-60°F (4-15°C) rating
* 3-season: 20-40°F (-7 to 4°C) rating
* Winter: Below 20°F (-7°C) rating
* Topquilts: Specialized sleeping bags designed for hammocks without compressed insulation
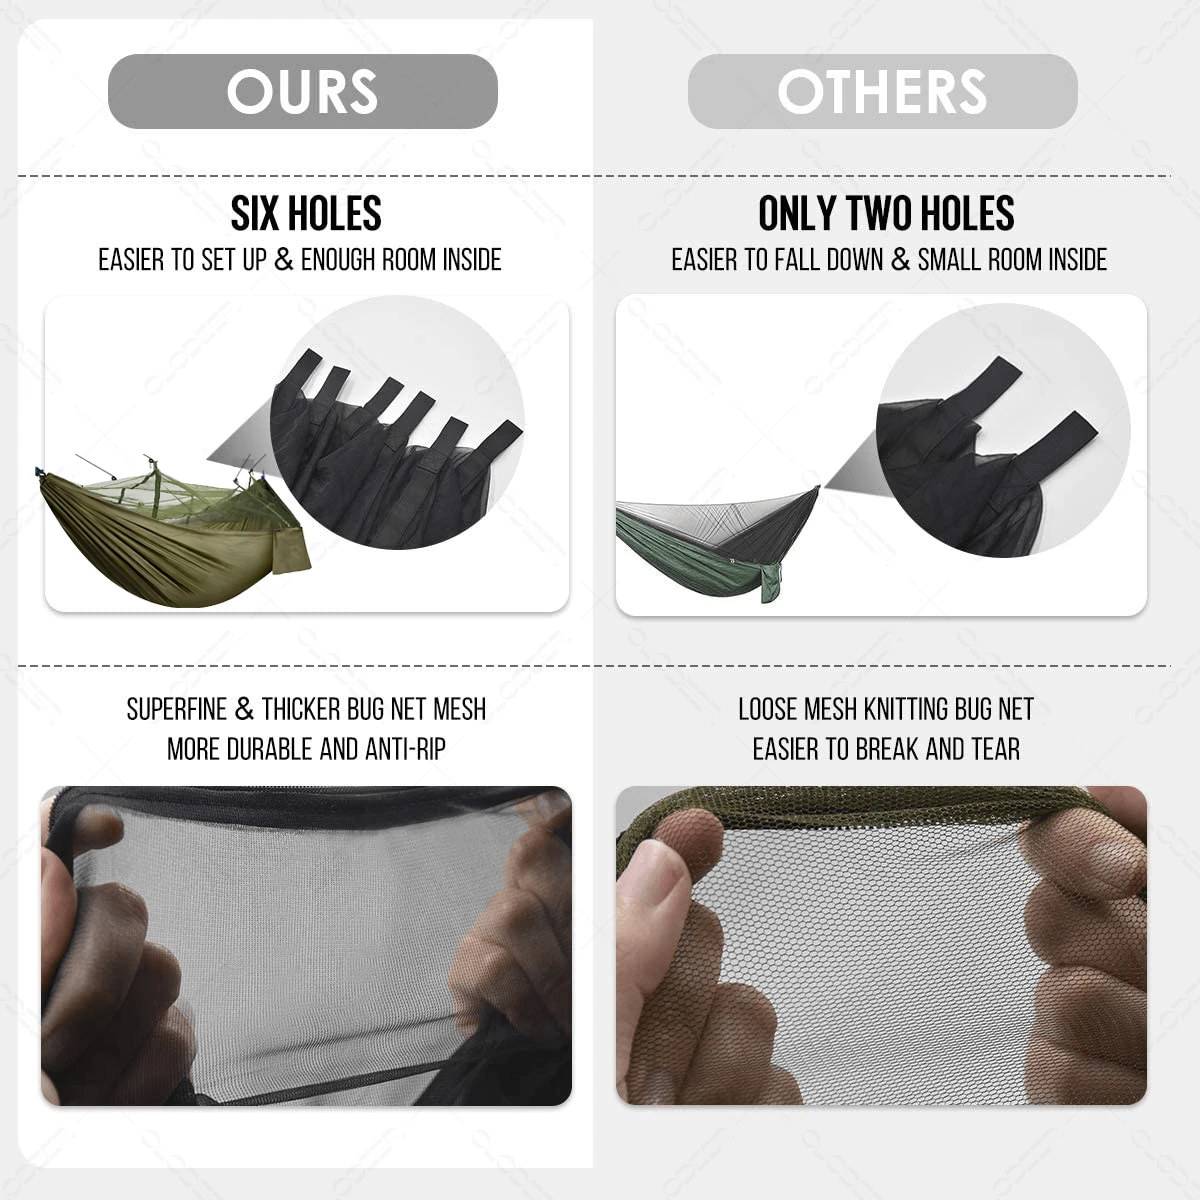
Insect Protection
Options for keeping bugs at bay include:
* Integrated bug nets that zip or unzip as needed
* Separate bug nets that envelop the entire hammock
* Permethrin treatment for temporary protection
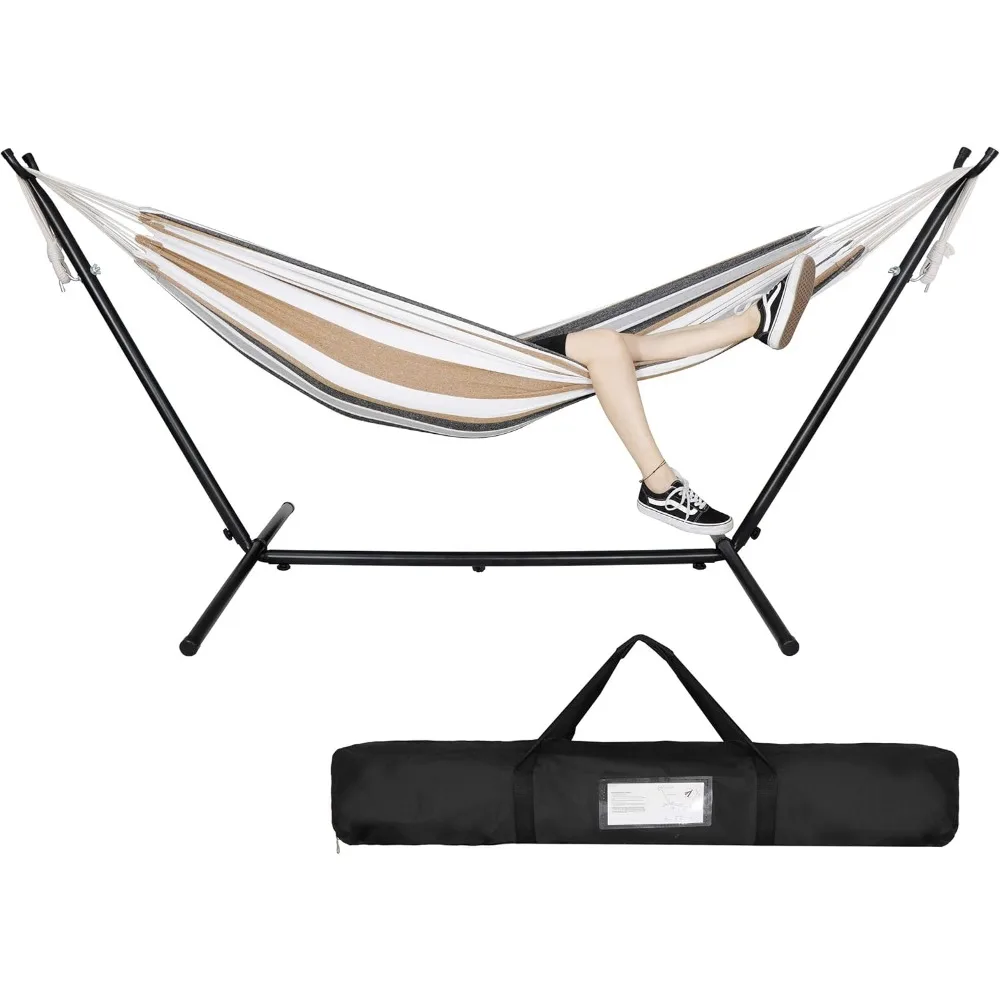
For a complete setup without the hassle of purchasing components separately, camping hammocks with stands provide an all-in-one solution that’s particularly valuable when suitable trees aren’t available or when following strict indoor outdoor hammock safety guidelines.
Setup Guide: How to Hang Your Lightweight Hammock at a Campsite
Setting up your hammock correctly ensures both comfort and safety during your camping adventure. Follow these steps for the perfect hang every time.
1. Choose the Right Location
Start by identifying ideal locations for your hammock setup:
* Find healthy trees 12-15 feet (3.7-4.6 m) apart with at least 8-inch (20 cm) diameter
* Check for widow-makers (dead branches) or hazards overhead
* Ensure there are no sharp objects beneath your hammock
* Consider morning sun position if you want natural wake-up warmth
* Look for natural wind breaks when possible
2. Attach Your Suspension System
Install your straps with these techniques:
* Wrap tree straps around trees at approximately 5-6 feet (1.5-1.8 m) high
* Ensure straps are flat against bark (not twisted) to distribute pressure evenly
* Secure according to your specific suspension system’s instructions
* Verify there is no rubbing or potential for strap damage
3. Hang Your Hammock
Achieve the proper hang with these guidelines:
* Connect hammock to suspension at appropriate points
* Adjust height so the hammock sits at chair height (about 18 inches/45 cm off ground) before loading
* Aim for a 30-degree angle from the horizontal in your suspension lines
* Test weight gradually, checking for any issues before fully committing
4. Perfect Your Diagonal Lay
For maximum comfort:
* Position yourself at roughly a 30-degree angle from the hammock’s centerline
* This creates a flatter, more ergonomic sleeping position
* Your head should be slightly higher than your feet (about 8-10 inches/20-25 cm)
* Fine-tune suspension tension until you achieve desired sag
Understanding perfect hammock placement in various settings helps you adapt these principles to different environments. For beginners, quick-setup hammock sets can simplify the learning process with intuitive designs and clear instructions.
Hammock Camping vs. Tent Camping: Which Is Better?
Both hammock and tent systems have distinct advantages depending on your camping style, location, and personal preferences.
Hammock Advantages
- Superior Comfort: 78% of users in a recent outdoor enthusiast survey reported better sleep quality in hammocks vs. tents
- Site Flexibility: Can camp on rocky, rooted, or sloped terrain unsuitable for tents
- Weight Savings: Typical complete hammock systems weigh 1-2 pounds (0.45-0.9 kg) less than comparable tent setups
- Ventilation: Natural airflow reduces condensation issues common in tents
- Quick Setup: Average setup time is 2-3 minutes vs. 5-10 minutes for most tents
- No Ground Impact: Leaves minimal trace when proper straps are used
Hammock Limitations
- Tree Dependency: Requires appropriate anchor points (though stands can address this)
- Learning Curve: Proper setup techniques take practice for maximum comfort
- Insulation Challenges: Requires specialized underquilts for cold weather
- Limited Privacy: Less enclosed than tents (though tarps can help)
- Partner Proximity: Couples generally need individual hammocks
Tent Advantages
- Weather Protection: More consistent protection in extreme conditions
- Privacy: Full enclosure for changing clothes and personal space
- Gear Storage: Larger protected space for equipment
- Universal Placement: Can be set up in treeless environments
- Familiar Experience: Most campers already know how to use tents
Tent Limitations
- Ground Dependent: Requires relatively flat, obstacle-free terrain
- Condensation Issues: Limited airflow creates moisture problems
- Weight Penalty: Typically heavier than comparable hammock systems
- Pressure Points: Ground sleeping creates discomfort despite pads
For minimalists focused on weight reduction, mastering efficient ultralight hammock packing techniques can further enhance the advantages hammocks offer over traditional tent systems.
Weather Considerations for Hammock Camping
Successfully hammock camping in various weather conditions requires specific techniques and equipment adjustments.
Rain Protection
Staying dry requires proper tarp setup:
* Position rainfly 8-12 inches (20-30 cm) above hammock for adequate ventilation
* Set up with a minimum 8-inch (20 cm) drip line extending beyond hammock ends
* Consider these configurations based on conditions:
* Light rain: Diamond pitch for weight savings and ventilation
* Moderate rain: Hexagonal pitch for better coverage
* Heavy storms: Full rectangle with doors for maximum protection
* Install drip lines on suspension to prevent water tracking to hammock
Wind Management
Handle breezy conditions with these approaches:
* Orient hammock with the foot end facing prevailing winds to minimize sway
* Lower tarp edges on windward side to create wind barrier
* Use natural terrain features and vegetation as windbreaks
* Consider a winter sock accessory for extreme conditions
Cold Weather Techniques
Combat cold temperatures with proper insulation:
* Full-length underquilt rated for 10-15°F (5-8°C) below expected nighttime lows
* Top quilt or sleeping bag rated appropriately for conditions
* Consider layering options for temperature regulation
* Use a properly sized tarp to block heat-robbing winds
The significant differences between outdoor weather management and controlled environments make safe indoor hammock hanging much simpler but requires different considerations.

Camping Hammock Sets with Bug Net, Ultralight Camping Hammock Sets
$139.72 Select options This product has multiple variants. The options may be chosen on the product page
Double / Two Person Hammock Sets, Rope Hammock Sets
Double Traditional Cotton Rope Hammock with Extension Chains – 450 lbs Capacity for Backyard & Patio$292.98 Select options This product has multiple variants. The options may be chosen on the product page
Folding Hammock Sets, Quick Setup Hammock Sets
Price range: $305.52 through $583.27 Select options This product has multiple variants. The options may be chosen on the product page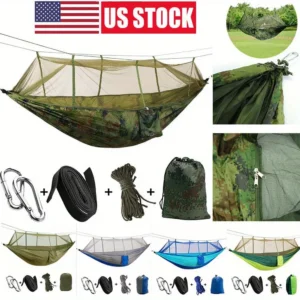
Camping Hammock Sets with Bug Net, Complete Camping Hammock Systems
Price range: $82.73 through $97.96 Select options This product has multiple variants. The options may be chosen on the product page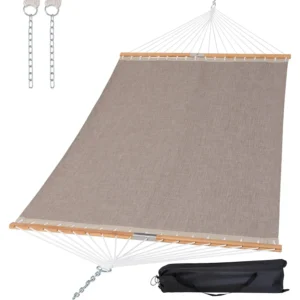
Lightweight Hammock Sets, Spreader Bar Hammock Sets
$292.43 Select options This product has multiple variants. The options may be chosen on the product page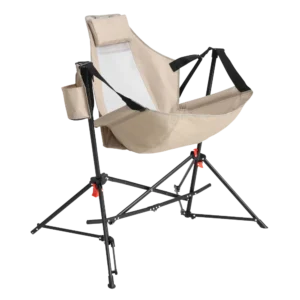
Folding Hammock Sets, Lightweight Hammock Sets
$295.80 Select options This product has multiple variants. The options may be chosen on the product page
Tips for Comfortable Hammock Camping
Maximize your hammock camping comfort with these expert techniques:
- Master the diagonal lay: Position yourself at approximately 30 degrees from centerline to create a flatter sleeping surface that eliminates the “banana” curve
- Adjust suspension tension: The perfect sag allows your body to flatten the hammock when lying diagonally—not too tight, not too loose
- Use a small inflatable pillow: Position under your neck rather than head for proper spinal alignment
- Create a “foot box”: Bundle extra fabric under your knees to support your legs in a natural position
- Prevent shoulder squeeze: Ensure hammock width is adequate for your frame and use proper diagonal positioning
- Organize essentials: Attach a lightweight ridgeline organizer for keeping small items (headlamp, phone, glasses) within easy reach
- Enter and exit strategically: Sit in middle, then swing legs in; reverse for exit to prevent flipping
Creating a truly perfect hammock haven comes from practicing these techniques and gradually refining your system based on personal preference and body type.
Advanced Hammock Setups for Experienced Campers
Once you’ve mastered basic hammock camping, these advanced techniques can expand your capabilities and comfort in challenging situations.
Hammock Camping Without Trees
When suitable trees aren’t available, these alternatives work well:
* Lightweight portable hammocks with stands designed specifically for camping
* Rock climbing anchor systems for rocky areas (requires proper training)
* Vehicle attachment points using specially designed straps
* Trekking pole structures with appropriate guylines for open areas
Multiple Hammock Configurations
Group camping becomes more social with these arrangements:
* Stacked hammocks using the same trees (when ground space is limited)
* Star pattern configurations around a central fire or common area
* Side-by-side setups with shared tarp coverage for couples or families
Cold Weather Extreme Setups
Winter hammocking requires comprehensive systems:
* Full coverage winter tarps with doors on both ends
* Underquilt protectors to block wind infiltration
* Secondary “door” tarps to create a nearly enclosed system
* Layered underquilt systems rated to -20°F (-29°C) or below
Ultralight Minimalist Approaches
For long-distance hikers focused on absolute weight reduction:
* Half-length underquilts paired with sleeping pads for foot insulation
* Poncho-tarps that double as rain gear and hammock protection
* Multi-use suspension systems that eliminate redundant hardware

Caring for Your Lightweight Camping Hammock
Proper maintenance extends the life of your hammock investment and ensures reliable performance when you need it most.
Cleaning Guidelines
Different hammock materials require specific care:
* Nylon hammocks: Hand wash with mild soap in lukewarm water, air dry completely
* Polyester hammocks: Machine washable on gentle cycle, hang to dry
* Avoid: Bleach, fabric softeners, or harsh detergents that can degrade waterproof coatings
* Clean suspension straps separately with gentle brushing to remove dirt
Storage Best Practices
Between adventures:
* Store hammocks loosely in a dry, cool place—not compressed in stuff sacks
* Hang in a suitable indoor location to prevent creasing
* Ensure complete drying before long-term storage to prevent mold and mildew
* Keep away from direct sunlight, extreme temperatures, and high humidity
Inspection and Maintenance
Regular checks prevent unexpected failures:
* Examine stitching for signs of strain or fraying
* Check suspension components for wear, especially at friction points
* Test carabiners for proper gate action and signs of metal fatigue
* Reinforce any developing weak points before they fail in the field
Frequently Asked Questions About Lightweight Hammocks for Camping
Are hammocks safe for camping?
Yes, when properly installed with appropriate weight-rated equipment. Modern camping hammocks have weight capacities ranging from 300-500 pounds (136-227 kg), providing substantial safety margins when used correctly.
Can I sleep comfortably all night in a hammock?
Absolutely. Many campers report better sleep quality than on the ground. The key is proper setup, diagonal positioning, and appropriate insulation underneath.
What if I’m a side sleeper?
Side sleeping is possible in hammocks with proper diagonal positioning and adequate width. Many dedicated side sleepers actually report better comfort in hammocks than on the ground.
How do I stay warm in a hammock?
Underquilts are essential as they provide uncompressed insulation beneath you. Sleeping pads compress under body weight, reducing their effectiveness in hammocks.
Can two people share a hammock?
While double two-person hammock sets exist, most couples find individual hammocks more comfortable for sleeping, though sharing for lounging works well.
How long does it take to set up a hammock camping system?
With practice, a complete system (hammock, underquilt, tarp) can be set up in 3-5 minutes—often faster than a typical tent.
Hammocking Responsibly: Environmental and Ethical Considerations
Practicing responsible hammock camping helps preserve natural areas and ensures continued access for future outdoor enthusiasts.
Tree Protection
Minimize your impact on trees with these practices:
* Always use tree-friendly straps at least 1.5 inches (3.8 cm) wide
* Never hang from saplings or trees less than 8 inches (20 cm) in diameter
* Avoid trees with soft or thin bark that damages easily
* Inspect and remove straps fully when breaking camp
Leave No Trace Principles
Apply these specific practices to hammock camping:
* Set up in established camping areas when possible
* Avoid creating new social trails to hammock spots
* Pack out all trash, including seemingly biodegradable items
* Minimize disturbance to plants and ground cover around trees
The principles that govern ethical indoor and outdoor hammock placement apply even more stringently in natural settings where ecosystem impact must be minimized.
Why Premium Lightweight Hammocks Are Worth the Investment
The difference between budget and premium hammocks becomes apparent after just a few trips. Quality lightweight hammocks offer several advantages that justify their higher price point:
Superior materials last substantially longer—typical premium hammocks retain full structural integrity for 5-7 years of regular use compared to 1-2 seasons for budget options. The specialized fabrics in high-end models provide better strength-to-weight ratios, allowing for lighter packs without sacrificing safety.
Premium construction techniques like reinforced stitching at stress points, bar-tacking, and ripstop patterns prevent small damage from becoming catastrophic failures in the backcountry. When you’re miles from civilization, this reliability becomes priceless.
The comfort difference is immediately noticeable. Higher-end hammocks use fabrics specifically engineered for optimal body contouring, breathability, and texture. This translates to better sleep quality—essential for enjoying multi-day outdoor adventures.
User Experiences: What Campers Say About Switching to Hammocks
Many outdoor enthusiasts report similar experiences when transitioning from traditional ground sleeping to hammock camping.
“The first night was an adjustment,” reports Michael, a long-distance hiker. “I made rookie mistakes with my hang angle, but by the second night, I was sleeping better than I ever had on the trail. After a week, I gave away my tent.”
New hammock campers often struggle initially with finding the proper diagonal position but quickly adapt. Most report the biggest surprise being temperature management—underestimating the need for underneath insulation even on mild nights.
Adventure photographers particularly appreciate the flexibility of hammock camping. “I can set up in locations that would be impossible for tents,” says Lisa, a wildlife photographer. “This has allowed me to capture dawn moments that would otherwise require hours of hiking in the dark.”
The learning curve is real but surprisingly short. Most users report feeling confident with their setups after just 2-3 nights, with continuous improvement as they refine their systems to personal preferences.
Outside Luxe hammocks have been designed with these user experiences in mind, incorporating features that address common challenges while maintaining the lightweight portability that draws campers to hammock camping in the first place.