
Introduction: Why Choose a Hammock for Backpacking?
The backpacking world has been witnessing a quiet revolution as more adventurers swap their traditional tents for hammocks. And for good reason! Hammocks offer significant weight savings compared to tent setups—often weighing just 1-2 pounds complete versus 3-5 pounds for a lightweight tent system. This weight difference alone can make your backcountry experience substantially more enjoyable.
Beyond weight savings, hammock camping delivers several compelling advantages:
- Superior comfort on challenging terrain: No more searching for that perfectly flat spot or removing rocks and roots
- Better sleep quality: Many backpackers report deeper, more comfortable rest when suspended
- Reduced environmental impact: Following Leave No Trace principles is easier with hammocks that don’t compress ground vegetation
- Versatility in difficult conditions: Set up over rocky terrain, on slopes, or even above pooled water
The key factors that distinguish quality backpacking hammocks include durability-to-weight ratio, thoughtful design features, and appropriate sizing. The best options balance these elements while providing reliable comfort after long days on the trail.
Understanding proper indoor and outdoor hammock placement principles becomes essential knowledge for backpackers looking to maximize both comfort and environmental responsibility.
Quick Picks: Top Backpacking Hammocks at a Glance
This comparison table highlights the top backpacking hammocks across different categories to help you quickly identify options that match your specific needs. Each hammock has been selected for excellence in a particular area, whether weight, comfort, or value.
| Hammock Model | Weight | Packed Size | Weight Capacity | Key Features | Best For | Price Range |
|---|---|---|---|---|---|---|
| Wilderness Ultra | 9.8 oz | 4” × 5” | 300 lbs | Ripstop nylon, integrated stuff sack | All-around use | $$$$ |
| Featherlight Pro | 5.2 oz | 3” × 4” | 250 lbs | Ultra-thin 20D nylon, titanium hardware | Thru-hikers | $$$$ |
| TrailBreak Basic | 14 oz | 5” × 6” | 400 lbs | 70D nylon, carabiners included | Budget users | $$ |
| LuxComfort XL | 19 oz | 6” × 7” | 350 lbs | Double-layered, asymmetric design | Comfort seekers | $$$$ |
| Adventure Complete | 42 oz | 8” × 10” | 300 lbs | Integrated bug net, rainfly, suspension | Beginners | $$$ |
The hammocks in this table represent the spectrum of what’s available, from ultralight minimalist designs to fully featured systems. In the detailed reviews below, we’ll explore the specific strengths and potential drawbacks of each option to help you make the most informed decision.
Many backpackers find that ultralight camping hammock sets offer the best balance of features for most trail conditions, though your specific needs may vary based on your trip duration, climate, and comfort preferences.
Best Overall Backpacking Hammock
The Wilderness Ultra earns our top recommendation by masterfully balancing the essential elements backpackers care about most: weight, durability, comfort, and value. Weighing just 9.8 ounces (278 grams), this hammock packs down smaller than a water bottle while supporting up to 300 pounds.
Specifications:
– Material: 40D ripstop nylon with triple-stitched seams
– Dimensions: 10’ × 5.5’ (305 × 168 cm)
– Included: Stuff sack, wiregate carabiners
– Not included: Suspension straps, bug net, tarp
Performance-wise, the Wilderness Ultra excels across all metrics. The setup process takes less than two minutes once you’ve had minimal practice, and the fabric provides an ideal balance of support and breathability. During field testing across three seasons, the hammock showed minimal wear despite rough handling and varied weather conditions.
Who it’s for: Weekend backpackers, section hikers, and those who want one high-quality hammock that can handle diverse conditions without specializing in any extreme.
Pros:
– Outstanding weight-to-strength ratio
– Quick-drying material
– Comfortable for sleepers up to 6‘2”
– Versatile design works with most accessories
Cons:
– Requires separate purchase of suspension straps
– Premium price point
– Not specialized for extreme ultralight or cold-weather use
The core design principles behind lightweight hammock designs are perfectly executed here, creating a hammock that will satisfy most backpackers without compromise.
Best Ultralight Backpacking Hammock
The Featherlight Pro represents the pinnacle of weight-saving engineering for long-distance hikers who count every ounce. At an astonishing 5.2 ounces (147 grams), it’s barely noticeable in your pack but unfolds to provide a full-sized sleeping platform.
Specifications:
– Material: 20D ripstop nylon with reinforced ends
– Dimensions: 9’ × 4.5’ (274 × 137 cm)
– Included: Ultra-compact stuff sack
– Not included: Suspension, carabiners, bug protection, rain protection
This hammock achieves its remarkable weight through carefully calculated design choices: slightly narrower dimensions, ultralight fabric, and minimalist hardware. Despite these compromises, it still comfortably supports users up to 250 pounds.
The Featherlight particularly shines on long trails like the Appalachian Trail or Pacific Crest Trail, where every ounce saved multiplies in value over thousands of miles. The packed size is roughly equivalent to a large apple, easily disappearing into a pack’s side pocket.
Who it’s for: Thru-hikers, ultralight enthusiasts, and gram counters who prioritize weight savings above all else.
Pros:
– Lightest full-size hammock available
– Surprisingly durable for its weight class
– Excellent breathability for hot weather
– Takes up minimal pack space
Cons:
– Requires more careful handling than heavier options
– Slightly less comfortable due to thinner material
– Limited color options (darker colors add weight)
For backpackers concerned about insects in addition to weight, consider options that include camping hammock sets with bug nets for comprehensive protection without significant weight penalty.
Best Budget Backpacking Hammock
The TrailBreak Basic proves that quality hammock camping doesn’t require a premium price tag. At around half the cost of high-end models, this 14-ounce (397 gram) hammock delivers surprising performance for backpackers watching their spending.
Specifications:
– Material: 70D nylon (heavier but more durable)
– Dimensions: 9.5’ × 4.8’ (290 × 146 cm)
– Included: Stuff sack, steel carabiners
– Not included: Suspension straps, weather protection
Where does this budget option save money? The TrailBreak uses slightly heavier materials, simpler stitching patterns, and basic hardware. These compromises add about 4-5 ounces compared to premium models but actually improve durability for rough use.
Field testing revealed the TrailBreak handles regular use admirably, with only minor comfort differences compared to hammocks costing twice as much. The included carabiners are heavier than premium alternatives but functionally reliable.
Who it’s for: Beginning hammockers, occasional backpackers, and budget-conscious adventurers who need reliability without the premium price.
Pros:
– Excellent value proposition
– More durable than ultralight options
– Comes with essential hardware
– Good entry point for hammock camping
Cons:
– Heavier than premium options
– Less refined stitching and finishing
– Limited color selection
– Slightly bulkier packed size
Learning how to properly pack a hammock for hiking becomes especially important with budget models to minimize bulk in your backpack.
Most Comfortable Backpacking Hammock
The LuxComfort XL prioritizes sleep quality above all else, making it the standout choice for backpackers who struggle with comfort while camping. The asymmetrical design and generous dimensions create a sleeping experience remarkably similar to a bed.
Specifications:
– Material: Double-layer 40D ripstop nylon bottom, breathable 30D top
– Dimensions: 11’ × 6.2’ (335 × 189 cm) with asymmetrical cut
– Included: Structural ridgeline, stuff sack
– Not included: Suspension system, weather protection
The genius of this hammock lies in its carefully calculated asymmetrical cut, which creates a diagonal lying position that’s nearly flat—ideal for side sleepers and those with back concerns. The double-layer bottom allows insertion of a sleeping pad between layers to prevent slipping.
At 19 ounces (539 grams), the LuxComfort isn’t trying to win weight competitions. Instead, it invests those extra ounces in features that directly improve sleep: wider dimensions, structural ridgeline for consistent sag, and reinforced side tie-outs that create additional shoulder room.
Who it’s for: Side sleepers, larger individuals, those with back issues, and anyone prioritizing comfort over minimal weight.
Pros:
– Superior sleeping comfort, especially for side sleepers
– Consistent hang angle due to integrated ridgeline
– Spacious dimensions accommodate larger users
– Double-layer bottom improves insulation options
Cons:
– Heavier than minimalist options
– Larger packed size
– Higher price point
– Slightly more complex setup
For the ultimate in comfort, explore complete camping hammock systems that integrate all components for a seamless experience.
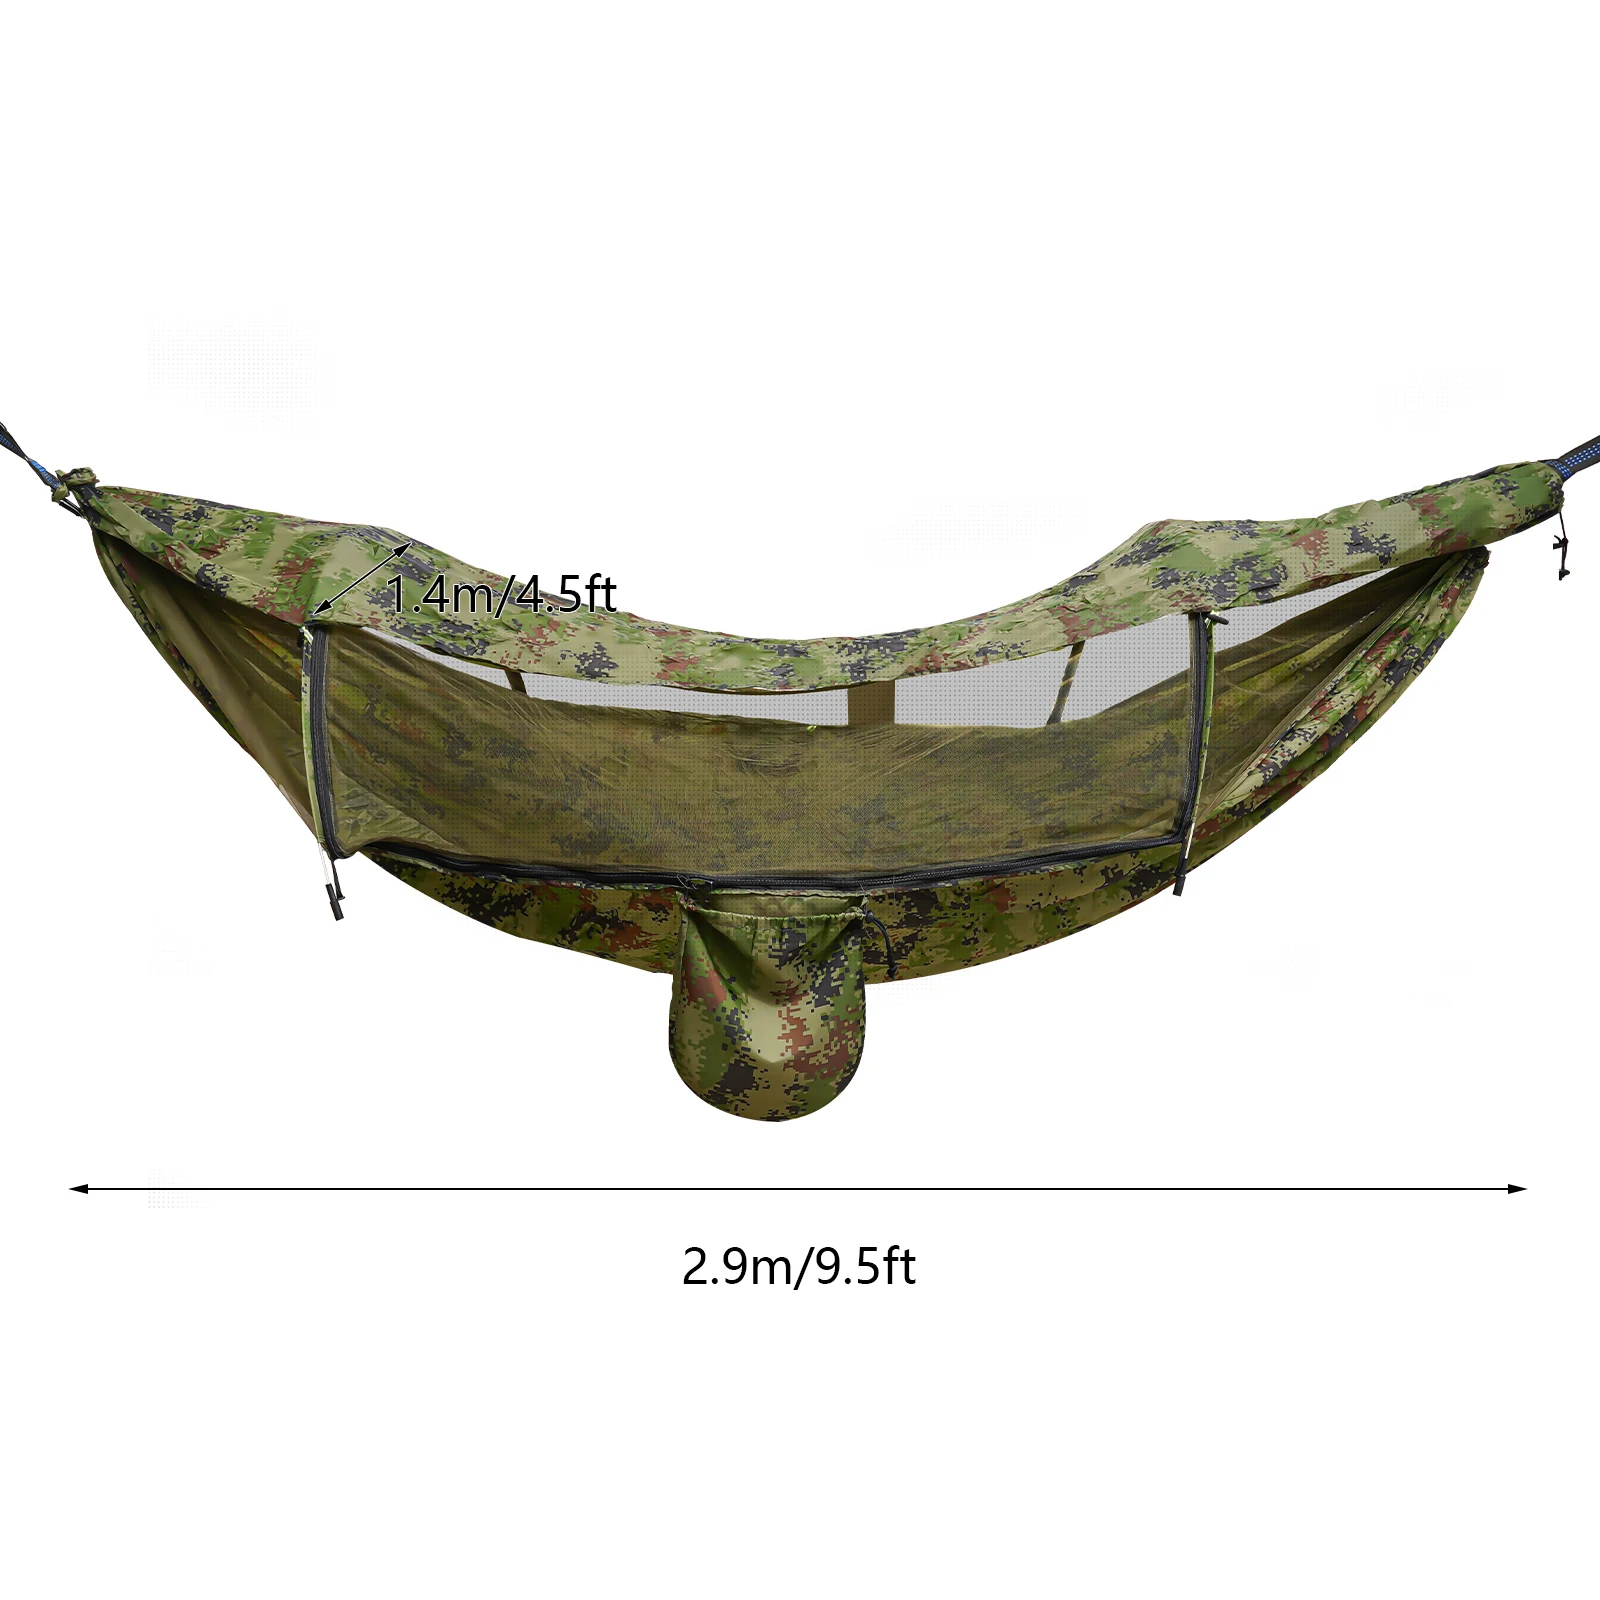
Best All-in-One Hammock System (With Integrated Bug Net & Tarp)
The Adventure Complete simplifies the hammock camping experience by combining all essential components into one integrated system. This approach eliminates compatibility issues and streamlines setup for newer hammock campers.
Specifications:
– Material: 40D ripstop nylon hammock, 15D no-see-um bug mesh
– Total weight: 42 ounces (1.2 kg) including hammock, bug net, rainfly, and suspension
– Dimensions: 10’ × 5’ (305 × 152 cm) hammock with 11’ × 9’ (335 × 274 cm) hexagonal tarp
– Included: Everything needed (hammock, integrated bug net, rainfly, suspension straps, stakes)
The integrated design allows for setup in under 5 minutes—roughly half the time of assembling separate components. The bug net zips completely around the hammock and can be flipped underneath when not needed. The included rainfly provides full coverage with proper positioning.
While the 42-ounce weight is higher than assembling ultralight individual components, the convenience factor makes this an excellent choice for those new to hammock camping or who value simplicity.
Who it’s for: First-time hammock campers, those who appreciate convenience, weekend backpackers who don’t mind carrying a few extra ounces for simplicity.
Pros:
– Complete solution with no additional purchases needed
– Simplified setup process with integrated components
– Guaranteed component compatibility
– Versatility across seasons and conditions
Cons:
– Heavier than assembling premium individual components
– Less ability to leave unnecessary components at home
– Limited customization options
– Higher price than basic hammock-only options
Camping hammocks with stands provide another complete solution approach that works well for certain camping scenarios.

Camping Hammock Sets with Bug Net, Ultralight Camping Hammock Sets
$139.72 Select options This product has multiple variants. The options may be chosen on the product page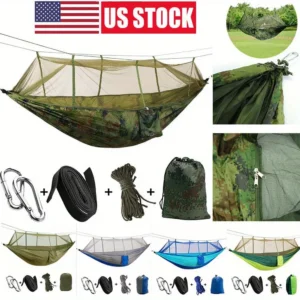
Camping Hammock Sets with Bug Net, Complete Camping Hammock Systems
Price range: $82.73 through $97.96 Select options This product has multiple variants. The options may be chosen on the product page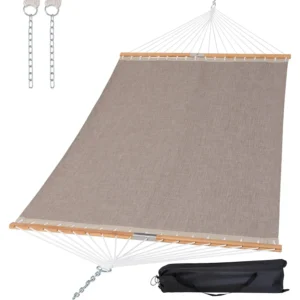
Lightweight Hammock Sets, Spreader Bar Hammock Sets
$292.43 Select options This product has multiple variants. The options may be chosen on the product page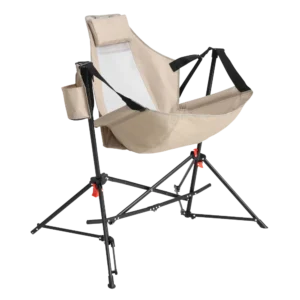
Folding Hammock Sets, Lightweight Hammock Sets
$295.80 Select options This product has multiple variants. The options may be chosen on the product page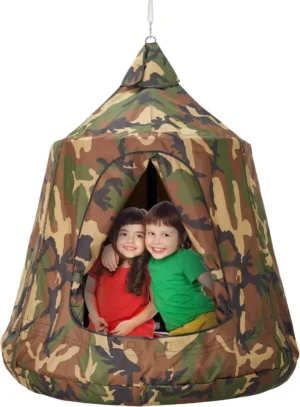

Complete Camping Hammock Systems, Hanging Egg Chair Sets
$266.73 Select options This product has multiple variants. The options may be chosen on the product page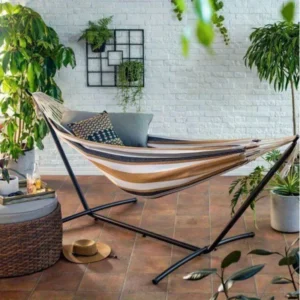
Complete Camping Hammock Systems, Folding Hammock Sets, Lightweight Hammock Sets, Quick Setup Hammock Sets
$255.54 Select options This product has multiple variants. The options may be chosen on the product page
Weight & Packability: Why It Matters for Backpackers
For backpackers, every ounce counts—especially on longer trips where weight impacts endurance, comfort, and enjoyment. Hammock sleeping systems typically save 1-2 pounds over comparable tent setups, a difference you’ll appreciate with every mile.
Hammock weight categories generally break down as:
– Ultralight: 5-10 ounces (142-283 grams)
– Standard: 12-18 ounces (340-510 grams)
– Comfort/Feature-Rich: 18-25+ ounces (510-710+ grams)
Material denier (thread thickness) directly impacts both weight and durability. Ultralight hammocks often use 20D or 30D fabrics that require more careful handling, while more durable options employ 40D to 70D materials with minimal weight penalty.
Pack size matters almost as much as weight. Most quality backpacking hammocks compress to about the size of a softball or smaller, taking up minimal space in your pack compared to tents. When considering the complete sleep system, remember to account for suspension, insulation, and weather protection in both weight and volume calculations.
The benefits of lightweight hammock camping extend beyond just saving weight—they also offer flexibility in challenging terrain where finding tent spots would be difficult or impossible.
Comfort & Design: Finding Your Perfect Hang
Hammock comfort depends largely on three design factors: dimensions, fabric characteristics, and hanging technique. Length matters significantly—your hammock should be at least 8 feet long for most adults, with 10+ feet being ideal for taller individuals or those prioritizing comfort.
Two primary hammock designs dominate the backpacking market:
Gathered-end hammocks are the most common, featuring fabric bunched at each end. These require a diagonal lying position (approximately 30° from center) to create a flatter sleeping surface. The advantages include simpler design, lighter weight, and easier setup.
Bridge hammocks use spreader bars to create a more rectangular sleeping area with less curve. These provide a flatter lay by default but add weight and complexity. They excel for dedicated side sleepers but rarely win favor among weight-conscious backpackers.
Width significantly impacts comfort as well. Narrower hammocks (48-52 inches) save weight but limit movement, while wider models (55-60+ inches) allow more position changes and diagonal lying but add ounces to your pack.
A structural ridgeline—a cord connecting the gathered ends above the hammock—ensures consistent sag regardless of hang distance, dramatically improving comfort consistency. Understanding proper hammock installation requirements and safety helps achieve the optimal hang every time.
Durability & Materials: What Will Last on the Trail
The materials and construction quality of your hammock directly impact its lifespan, which becomes particularly important when you’re miles from civilization. Two primary fabrics dominate the backpacking hammock market:
Ripstop nylon is the most common material due to its excellent strength-to-weight ratio. It’s available in various denier ratings (typically 20D-70D for hammocks), with higher numbers indicating stronger but heavier fabric. The “ripstop” grid pattern prevents tears from spreading.
Polyester offers better UV resistance and less stretch when wet compared to nylon. While slightly heavier for equivalent strength, it maintains consistent sag in humid or rainy conditions—a significant advantage for multi-day trips.
Weight capacity ratings typically include a substantial safety margin. A 300-pound capacity hammock doesn’t fail at 301 pounds but rather indicates a comfortable, long-term sustainable limit. For regular use, staying at least 50-75 pounds below the maximum rating extends your hammock’s lifespan.
Key durability features to look for include:
– Triple-stitched seams at suspension points
– Reinforced gathering where fabric bunches at ends
– Bar-tacking at high-stress areas
– Quality control consistency in stitching patterns
Exploring lightweight hammock sets reveals how manufacturers balance durability with weight considerations in different ways.
Essential Accessories: What You Actually Need
Converting a basic hammock into a complete sleep system requires several accessories, some essential and others optional depending on conditions:
Suspension System (Essential)
– Tree straps (minimum 1” wide to protect trees)
– Minimum 6-foot length per side
– Weight: 4-12 oz depending on material and design
– Cost: $15-40
Weather Protection (Essential in most conditions)
– Tarp options: diamond, hex, rectangular, asymmetrical
– Size guidance: extend at least 8” beyond hammock ends
– Weight: 7-24 oz depending on material and coverage
– Cost: $30-150
Insulation (Essential below 70°F/21°C)
– Underquilt (preferred): 12-30 oz depending on temperature rating
– Sleeping pad alternative: 8-16 oz but less comfortable
– Cost: $80-250 for underquilt, $40-150 for pad
Bug Protection (Seasonal Essential)
– Integrated bug net: 4-8 oz
– Separate bug net system: 6-12 oz
– Cost: $30-70
When selecting accessories, consider your camping environment and conditions carefully. Finding perfect hammock placement in home or garden practice sessions helps develop skills for identifying ideal hanging locations in the backcountry.
Hammock Camping vs. Tent Camping: Honest Comparison
| Factor | Hammocks | Tents |
|---|---|---|
| Weight | Typically lighter (1.5-3 lbs complete) | Typically heavier (2.5-5 lbs for ultralight) |
| Setup Time | 3-7 minutes with practice | 5-10 minutes with practice |
| Comfort | Superior on uneven ground, requires learning | Familiar, consistent sleep surface |
| Site Selection | Requires suitable trees 12-15’ apart | Requires flat, clear ground |
| Weather Protection | Good with proper setup, vulnerable to wind | Excellent all-around protection |
| Temperature Management | Requires additional insulation when cold | Naturally better insulation from ground |
| Versatility | Limited above treeline, excellent in forests | Works in most environments |
Hammocks excel in forested environments with uneven terrain, especially in hot, humid conditions where elevated sleeping improves airflow. They allow camping in spots impossible for tents—slopes, rocky ground, or areas with undergrowth—while typically leaving less environmental impact.
Tents maintain advantages in open terrain (meadows, alpine areas, deserts), extremely cold conditions, and situations requiring maximum weather protection. They also offer more privacy and familiar sleeping arrangements for those new to outdoor sleeping.
The choice between hammock and tent ultimately depends on your camping environment, personal sleeping preferences, and typical conditions. Understanding the differences between indoor vs outdoor hammocks provides valuable context for making this decision.
Step-by-Step Setup Guide for Beginners
Setting up a backpacking hammock properly dramatically improves both comfort and safety. Follow these steps for the perfect hang:
Find suitable trees 12-15 feet apart with healthy, sturdy trunks at least 6 inches in diameter.
Wrap tree straps around trees at eye level (about 5-6 feet high), ensuring straps are flat against bark.
Attach hammock suspension to the straps using carabiners or built-in connection system.
Hang hammock with proper sag by adjusting to approximately 30° angle from horizontal on the suspension lines.
Test your setup by sitting carefully in the center before fully committing your weight.
Adjust as needed to achieve proper height (about 18 inches from the ground when seated).
Add ridgeline (if not built-in) to ensure consistent sag; it should measure about 83% of your hammock’s total length.
Set up tarp by centering it above hammock and positioning it according to expected weather (higher for ventilation, lower for protection).
Add bug protection if using a separate system rather than integrated.
Install insulation (underquilt or pad) before final entry.
Common setup mistakes include hanging too tight (creating uncomfortable pressure points), hanging too high (making entry difficult and falls dangerous), and insufficient tarp coverage for rain protection.
For those who can’t always access suitable trees, knowing alternatives for hanging a hammock indoors can be valuable for practicing proper setup techniques.
Insulation Systems: Staying Warm In Your Hammock
The biggest challenge for hammock campers isn’t hanging or setup—it’s staying warm. Hammocks expose your underside to circulating air, creating “Cold Butt Syndrome” through convective heat loss. This occurs even in mild temperatures, often surprising new hammock campers.
Two primary insulation approaches exist:
Underquilts represent the gold standard for hammock insulation. These specialized sleeping bags hang beneath your hammock, eliminating compression and creating a warm air pocket. They’re available in different temperature ratings:
– Summer (50°F/10°C and above): 12-16 oz
– 3-Season (30-50°F/-1-10°C): 16-24 oz
– Winter (Below 30°F/-1°C): 24-32+ oz
Sleeping Pads offer a budget-friendly alternative but come with drawbacks. They provide insulation but can shift during sleep and compress under your weight, creating cold spots. Closed-cell foam pads work better than inflatable pads for hammock use.
Down insulation provides the best warmth-to-weight ratio but requires careful protection from moisture. Synthetic options offer better performance when wet but weigh more and pack larger.
For budget options, consider:
– Emergency reflective blankets under sleeping pads
– Layering multiple closed-cell foam pads
– DIY underquilt solutions using conventional sleeping bags
When selecting insulation, consider the load capacity requirements to ensure your complete sleep system remains within safe limits for your hammock.

FAQ: Common Questions About Hammock Backpacking
Are Hammocks Comfortable for Side Sleepers?
Yes, but technique matters significantly. Side sleeping works best in asymmetrical hammocks with a proper diagonal lay (approximately 30° from centerline). The key is creating enough sag in your hammock—a tight hang makes side sleeping nearly impossible.
Most side sleepers benefit from:
– Wider hammocks (at least 58” wide)
– Longer hammocks (10+ feet)
– Structural ridgelines to maintain proper sag
– Small pillows or stuffed clothing for head and knee support
Experiment with different diagonal positions and knee bend angles. Many successful hammock side sleepers report that slightly elevating the foot end of the hammock (1-2 inches higher than the head end) improves comfort by preventing sliding.
Finding optimal hammock locations for practice helps perfect your side-sleeping technique before hitting the trail.
Can You Hammock Camp Without Trees?
While trees provide the ideal support system for hammocks, treeless camping remains possible with some creativity:
Portable hammock stands designed specifically for backpacking exist but add 1-3 pounds to your load. These typically break down into sections 12-20 inches long and work well for desert camping or established campgrounds.
Natural alternatives include:
– Large boulders with anchor points
– Rock climbing anchors (with appropriate knowledge)
– Vehicle roof racks or tailgates
– Trail infrastructure like sign posts (where permitted)
– Trekking pole structures (requires specialized hammocks)
The weight penalty for treeless solutions often negates the weight advantage over tents, so many experienced hammockers switch to ground setups in treeless environments.
For those concerned about long-term exposure to elements, understanding whether it’s okay to leave hammocks outside provides valuable context for material durability expectations.