
Introduction: The Perfect Quilted Hammock Project
Creating your own quilted hammock is one of the most rewarding outdoor DIY projects you can undertake. A quilted hammock combines the comfort of traditional hammock design with the added benefits of insulation and padding through quilting techniques. Unlike standard hammocks, quilted versions feature layers of fabric with batting sandwiched between them, creating a cocoon of comfort that cradles your body.
Why make your own quilted hammock?
– Complete customization of size, color, and comfort level
– Superior insulation for cooler weather camping
– Enhanced durability through reinforced construction
– Significant cost savings compared to premium models
– Personal satisfaction of creating your own outdoor retreat
Throughout this guide, we’ll walk you through every step of the process—from selecting the perfect materials to hanging your finished creation. Understanding proper indoor-outdoor hammock placement will help you design your hammock with the right features for your intended location.
Whether you’re an experienced seamster or trying your first major sewing project, this comprehensive guide will equip you with everything needed to create a hammock that rivals commercial options in comfort, durability, and style.
Understanding Quilted Hammock Design Principles
Quilted hammocks represent a significant improvement over traditional single-layer fabric designs. The quilted construction creates a multi-layer system that offers several distinct advantages over standard hammocks or separate hammock/underquilt setups.
The core difference lies in the integrated design. While a traditional hammock might require a separate underquilt for insulation, a quilted hammock incorporates this warming layer directly into the structure. This integration creates a more efficient thermal envelope that traps warm air around your body.
Key benefits of quilted construction include:
– Thermal efficiency through elimination of air gaps between hammock and underquilt
– Enhanced comfort from padding that prevents pressure points
– Improved durability as the quilting prevents batting shifts and clumping
– Simplified setup with no separate components to adjust
The basic construction involves a sandwich of materials: an outer layer (typically weather-resistant), insulating batting in the middle, and a comfort layer against your body. The quilting stitches run through all layers, securing them together while creating channels that control insulation distribution.
Looking at quilted fabric hammock sets can provide inspiration for your DIY project, though making your own allows for customization that factory production simply can’t match.
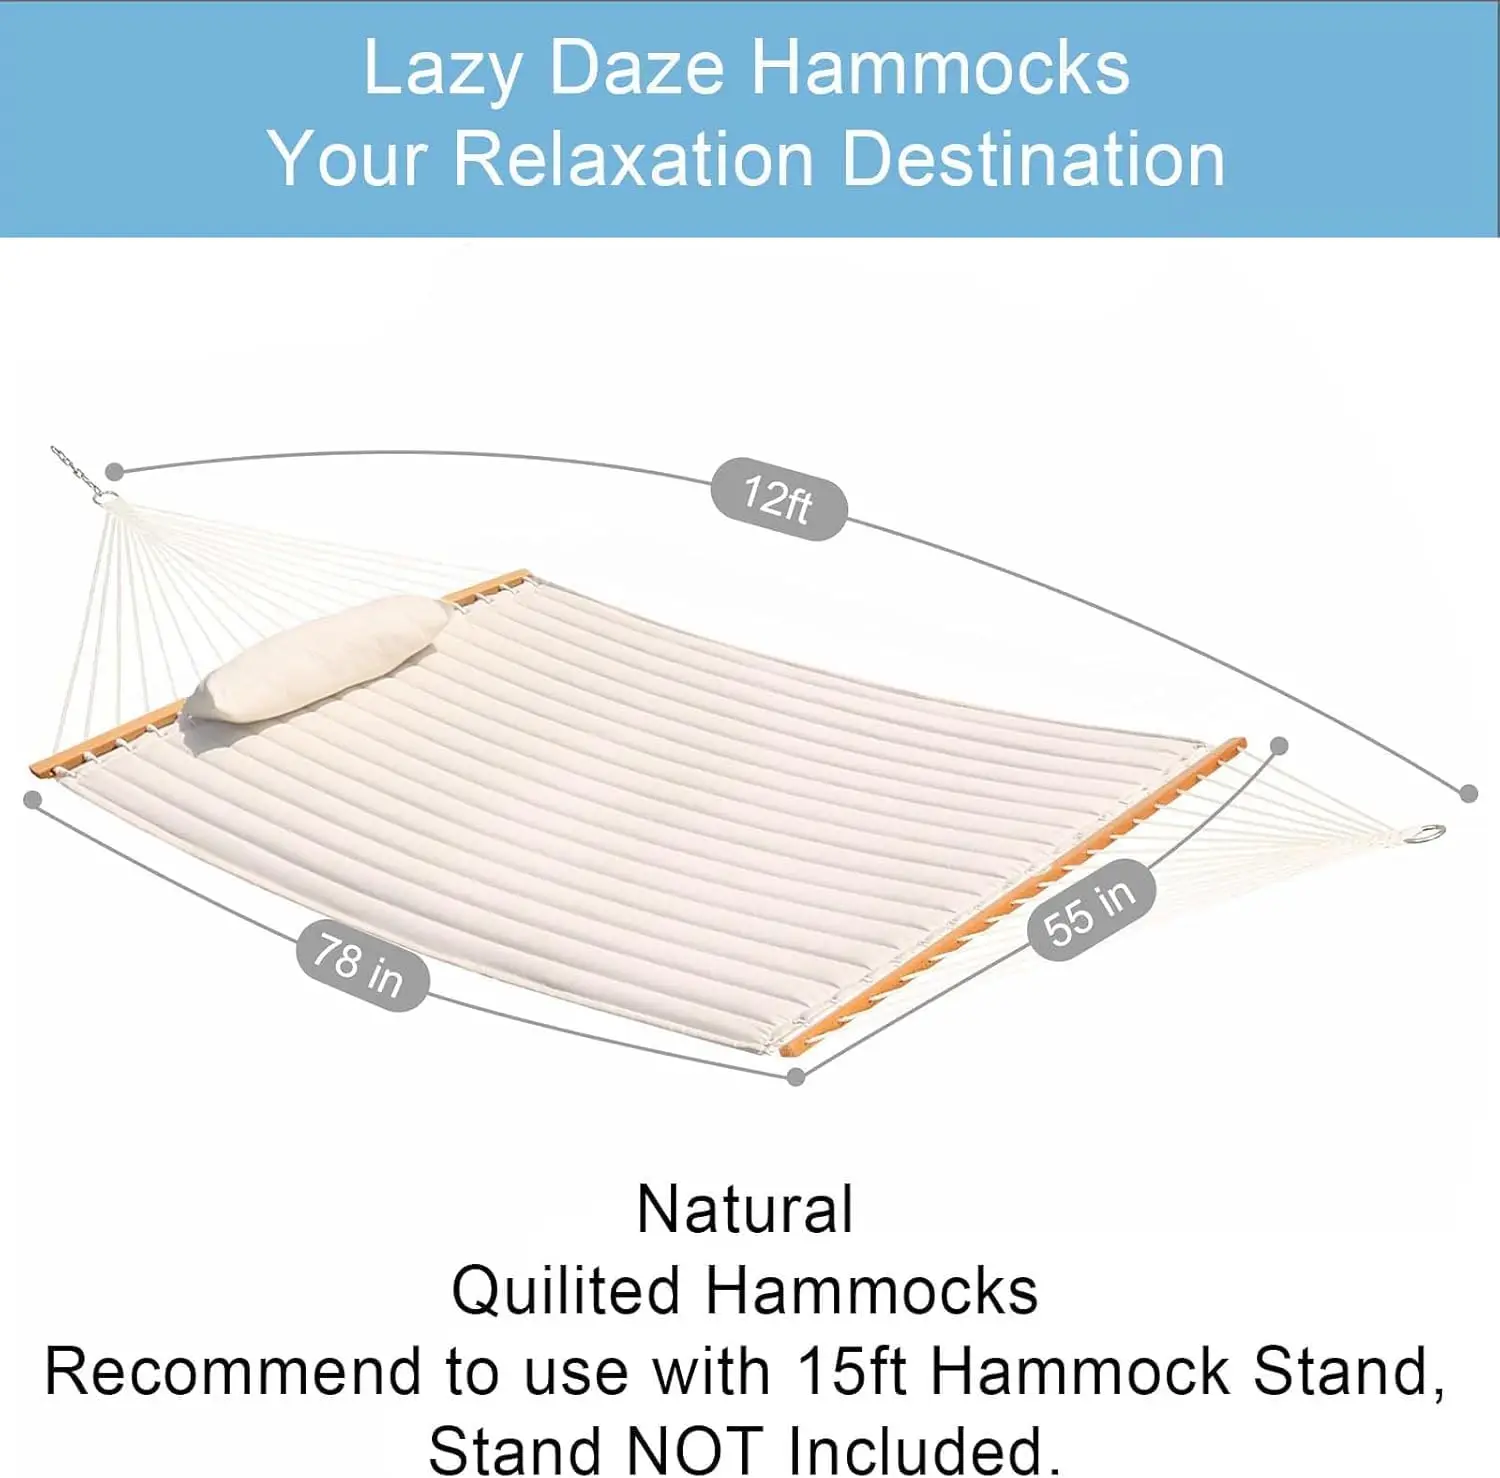
Planning Your Project: Measurements and Specifications
Before purchasing materials, you need to determine the optimal dimensions for your quilted hammock. The perfect size depends primarily on your height and weight, along with how you prefer to lie in your hammock.
For comfortable use, follow these general measurement guidelines:
– Length: Your height plus 2-3 feet (for diagonal lying position)
– Width: 55-60 inches for a single user, 65-70 inches for a roomier feel
– Fabric allowance: Add 8-12 inches to both dimensions for seams and channels
A person who is 5‘10” (178 cm) would typically need a hammock with finished dimensions of approximately 8‘10” × 55” for comfortable solo use.
These dimensions affect not just comfort, but also stability and weight capacity. A wider hammock provides more fabric to wrap around you, creating a more secure feeling, while proper length ensures you can achieve the optimal diagonal lay without foot or head compression.
Understanding the differences between indoor vs outdoor hammocks can help you adjust your measurements based on where you plan to use your creation most frequently. Indoor hammocks can sometimes be slightly smaller as they’re often used in more controlled environments.
Selecting the Perfect Materials
The materials you choose will determine your hammock’s weight, durability, comfort, and weather resistance. Each layer serves a specific purpose and requires careful consideration.
Outer Fabric Options
| Material | Weight | Water Resistance | Durability | Best For |
|---|---|---|---|---|
| 1.9 oz Ripstop Nylon | Light | Moderate (DWR coating) | Good | General use |
| 2.2 oz Ripstop Nylon | Medium | Good | Excellent | Heavy use |
| 1.6 oz HyperD | Light | Excellent | Very good | Ultralight |
| 70D Polyester | Medium | Very good | Excellent | All-weather |
For the outer layer, ripstop nylon between 1.6-2.2 oz provides an excellent balance of strength and weight. Look for fabrics with DWR (Durable Water Repellent) coating for added weather protection.
Inner Fabric Options
The inner fabric touches your skin, so comfort is paramount. Consider these options:
– Soft nylon taffeta (1.1-1.6 oz) for a silky feel
– Breathable ripstop for better temperature regulation
– Brushed polyester for maximum comfort in cooler conditions
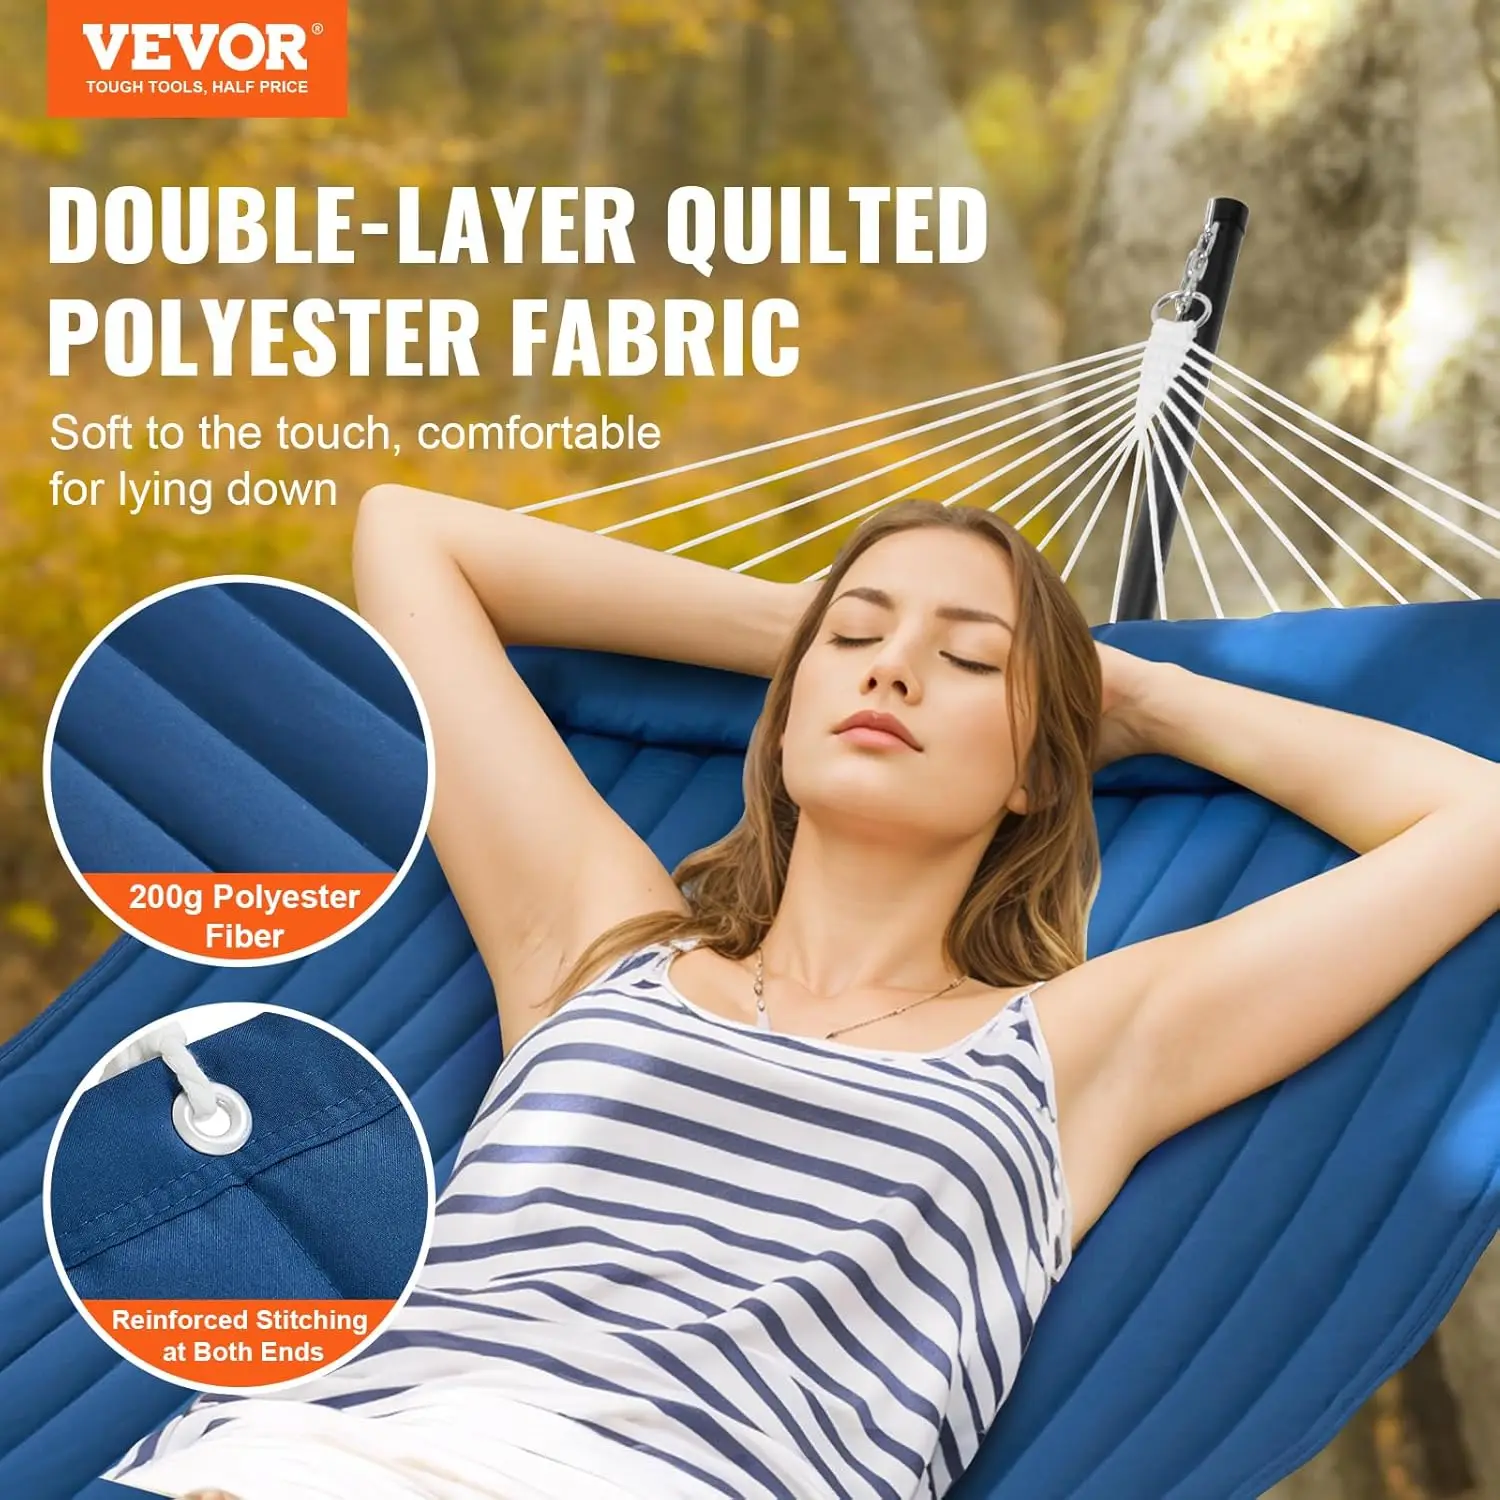
Insulation Types
Your insulation layer determines warmth and loft:
– Polyester batting (2.5-5 oz): Affordable, easy to work with, moderate insulation
– Climashield synthetic insulation: Premium option, excellent warmth-to-weight ratio, maintains loft when compressed
– Multiple thin layers: Creates better loft than one thick layer
Thread and Hardware
- Thread: Use bonded polyester thread (#69 or V-69) for strength and UV resistance
- Suspension components: 7/64” or 1/8” shock cord for gathering ends
- Webbing: 3/4” or 1” polyester webbing for hanging points
The importance of proper material selection cannot be overstated, as it directly impacts lightweight hammock durability and overall performance. Investing in quality materials upfront will significantly extend the life of your DIY hammock.
Essential Tools and Supplies Checklist
Before beginning construction, gather these essential tools and supplies:
Sewing Equipment
- Sewing machine capable of handling multiple fabric layers
- Walking foot attachment (strongly recommended for even feeding)
- Size 90/14 or 100/16 needles for thick materials
- Bobbins and quality polyester thread
Cutting and Measuring
- Sharp fabric scissors or rotary cutter with mat
- Clear ruler (24” or longer)
- Fabric marking pen or chalk
- Measuring tape
Assembly Aids
- Fabric clips (preferred over pins for synthetic materials)
- Safety pins for basting layers
- Spray adhesive (optional for basting)
- Iron for pressing seams
Finishing Tools
- Lighter or heat tool for sealing synthetic edges
- Small scissors for thread trimming
- Seam ripper (for inevitable corrections)
Having the right tools on hand before starting will make the construction process significantly more enjoyable and lead to better results.
Preparation: Measuring and Cutting Your Materials
Proper preparation is crucial for a successful quilted hammock. Let’s break down the measuring and cutting process:
Calculating Fabric Requirements
- Start with your desired finished dimensions (from the planning section)
- Add seam allowances:
– 1 inch on each side for side hems
– 3-4 inches on each end for suspension channels - Calculate total fabric needed:
– Outer layer: Length + 8” × Width + 2”
– Inner layer: Same as outer layer
– Insulation: Length + 6” × Width + 2”
Cutting Process
- Lay your fabric on a flat, clean surface
- Measure and mark your dimensions using chalk or fabric marker
- Ensure corners are square using the 3-4-5 triangle method
- Cut carefully with sharp scissors or rotary cutter
- Label each piece immediately to avoid confusion
When handling synthetic fabrics, be extra careful to avoid stretching during cutting. Many experienced hammock makers working with ultralight hammock setup techniques recommend cutting synthetic fabrics on a hard surface rather than fabric-on-fabric to prevent shifting.
For the insulation layer, cut it slightly smaller than the fabric layers (approximately 1” smaller on all sides) to reduce bulk in the seams. This will make construction easier while maintaining full insulation where it matters most.
Creating the “Quilt Sandwich” and Basting
Now it’s time to layer your materials and secure them together before quilting. This step, often called creating a “quilt sandwich,” is crucial for preventing shifting during the quilting process.
Layering Process
- Lay the outer fabric on a clean, flat surface, wrong side up
- Position the insulation layer centrally on top
- Place the inner fabric on top, right side up
- Smooth each layer carefully to eliminate wrinkles
Basting Methods
You have several options for securing your layers:
Pin Basting
– Place safety pins every 4-6 inches across the entire surface
– Start from the center and work outward
– Use curved safety pins designed for quilting if available
Spray Basting
– Use temporary fabric adhesive spray in a well-ventilated area
– Apply lightly to prevent gumming up your needle
– Press layers together from center outward
Thread Basting
– Use large, temporary stitches to secure layers
– Particularly useful around edges
– Can be combined with pins for extra security
Common issues during this stage include fabric bunching and insulation shifting. Take time to properly align all edges and corners, and don’t rush the basting process. A well-basted project will make the quilting stage much easier.
Quilting Techniques for Maximum Durability
The quilting pattern you choose affects both the aesthetics and structural integrity of your hammock. Let’s explore the most effective techniques:
Quilting Pattern Options
Straight-Line Grid
– Simplest and fastest approach
– Lines spaced 4-6 inches apart in both directions
– Creates consistent insulation distribution
– Easiest for beginners
Channel Quilting
– Parallel lines running lengthwise
– Allows insulation to shift slightly for better conforming to body
– Good balance of simplicity and function
Diamond Pattern
– Diagonal lines creating diamond shapes
– Excellent structural integrity
– More visually interesting
– Requires more precision
Quilting Process
- Start in the middle of your hammock and work outward
- Use a walking foot to prevent layers from shifting
- Set stitch length slightly longer than normal (3-3.5mm)
- Maintain even tension and speed
- Secure beginning and end of each line with backstitching
Looking at spreader bar hammock sets can provide inspiration for effective quilting patterns, though your gathered-end design will have different structural needs.
Common Quilting Challenges
- Fabric puckering: Reduce pressure foot tension and ensure even feeding
- Skipped stitches: Use appropriate needle size and reduce speed
- Batting shifts: Add more basting points in problem areas
- Thread tension issues: Test on scrap materials before quilting your hammock
Take breaks during the quilting process to prevent fatigue, as tired hands can lead to mistakes. Remember that the quilting not only keeps your insulation in place but also determines how your hammock will distribute weight.
Finishing Edges and Creating Strong Channels
The edges and suspension channels of your quilted hammock must be finished properly to ensure durability and safety. These areas experience the most stress and require reinforced construction.
Edge Finishing Methods
- Trim edges evenly, leaving 1 inch for seam allowance
- Fold edge over 1/2 inch and press (use low heat for synthetics)
- Fold again 1/2 inch, creating a double-fold hem
- Stitch close to inner fold with straight stitch
- Add a second parallel stitch line for reinforcement
Channel Construction
The channels at each end will hold your suspension system and must be exceptionally strong:
- Fold over 3-4 inches at each end
- Create a double-fold hem as with the edges
- Stitch close to inner fold
- Add 2-3 additional rows of stitching parallel to the first
- Consider box stitching or X-pattern reinforcement at stress points
Understanding proper hammock installation requirements will help you design channels strong enough to withstand the forces your suspension system will experience.
Quality Check
Before proceeding, inspect all seams and edges:
– Check for skipped stitches or weak points
– Ensure all edges are fully enclosed to prevent fraying
– Test channel strength by pulling firmly
– Reinforce any areas that seem questionable
Taking extra time on edge finishing and channel construction will dramatically extend the life of your hammock and ensure safety during use.
Suspension System Assembly and Attachment
The suspension system connects your hammock to anchor points and must be both strong and adjustable. Several options are available, each with advantages.
Suspension Options
Webbing System
– 1” polyester webbing with buckles
– Easiest adjustment for beginners
– Less prone to stretching when wet
– Wider surface area protects trees
Whoopie Sling System
– Lightweight Amsteel or Dyneema rope
– Adjustable loop design
– Excellent strength-to-weight ratio
– Requires learning special knots/techniques
Combination System
– Tree straps plus adjustable suspension
– Often the most versatile solution
– Provides tree protection and easy adjustment
Attachment Process
Cut suspension components to length:
– Tree straps: 4-6 feet each
– Main suspension line: 6-10 feet each end (depending on system)For gathered-end attachment:
– Thread shock cord through channel
– Create a secure loop with cord
– Attach suspension to loop using carabiner or continuous loopReinforcement techniques:
– Add bar tacking at connection points
– Consider sewing webbing directly to hammock for permanent attachment
– Test all connection points before full weight loading
Testing is crucial – gradually apply weight to ensure all connection points hold securely before fully trusting your suspension system.
Hanging Your Quilted Hammock Safely
Proper hanging technique ensures both comfort and safety. Follow these guidelines for optimal hammock setup.
Selecting Anchor Points
- Choose trees at least 6 inches in diameter
- Ensure trees/posts are healthy and firmly rooted
- Space anchor points 12-15 feet apart (adjustable based on hammock length)
- Avoid dead trees, young saplings, or unstable structures
Hanging Techniques
- Attach tree straps at approximately 5-6 feet height
- Connect your suspension system to the straps
- Aim for a 30-degree angle from horizontal to hammock
- Adjust height so hammock sits 18-24 inches off ground when empty
- Test weight gradually before fully getting in
Finding the perfect hang often requires adjustment. Too tight, and you’ll feel compressed; too loose, and you’ll sag uncomfortably. Understanding whether it’s safe to hang hammocks indoors can help you apply these same principles to interior hanging.
Tree Protection
Always use wide straps (minimum 1 inch, preferably 1.5-2 inches) to distribute pressure on tree bark. Never use rope directly against tree bark, as it can cause damage. Position straps to avoid rubbing on branches or weak areas of the trunk.
Care and Maintenance for Longevity
Proper care will extend the life of your DIY quilted hammock for years. Follow these guidelines for maintenance:
Cleaning Protocols
- Spot cleaning: Use mild soap and cold water to target specific stains
- Full cleaning (when necessary): Hand wash in bathtub with gentle detergent
- Drying: Air dry completely before storage; never machine dry
- Avoid harsh chemicals that can degrade fabric and waterproof coatings
Storage Best Practices
- Store loosely, not tightly compressed
- Keep in cool, dry place away from direct sunlight
- Use a breathable storage bag to prevent moisture buildup
- Never store when damp or wet
Regular Inspection
Check these areas before each use:
– Seams and stitching for signs of wear
– Suspension components for fraying or damage
– Channel areas for stretching or tearing
– Insulation for clumping or shifting
Knowing whether it’s okay to leave hammocks outside will help you make informed decisions about storage versus outdoor installation.
Enhancing Your Quilted Hammock: Customizations and Add-ons
Once you’ve mastered the basic quilted hammock, consider these enhancements to improve functionality and comfort:
Functional Enhancements
Built-in Ridgeline
– Attach a structural line between suspension points
– Maintains consistent sag regardless of hanging distance
– Perfect attachment point for accessories
Storage Solutions
– Add small fabric pockets on sides for personal items
– Create a matching stuff sack from leftover fabric
– Sew gear loops on edges for hanging accessories
Weather Protection
– Design an integrated sleeves for bug net attachment
– Add tie-outs for connecting to rain protection
Comfort Customizations
Pillow Integration
– Sew a small sleeve at head end to insert pillow
– Create a small attached pillow from extra insulation
– Add adjustable cords to position pillow perfectly
Entry/Exit Modifications
– Reinforce center edges for easier entry
– Add color-coding to identify foot/head ends
– Create slight asymmetry for better diagonal lay
Hammock sets with canopy can provide inspiration for designing integrated weather protection systems for your DIY hammock.


Quilted Fabric Hammock Sets, Spreader Bar Hammock Sets
$195.67 Select options This product has multiple variants. The options may be chosen on the product page
Hammock Sets with Canopy, Heavy Duty Hammock Sets
$286.31 Select options This product has multiple variants. The options may be chosen on the product page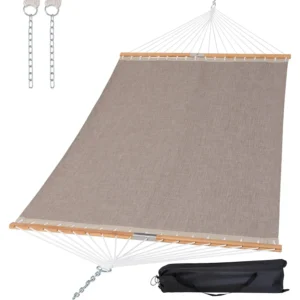
Lightweight Hammock Sets, Spreader Bar Hammock Sets
$292.43 Select options This product has multiple variants. The options may be chosen on the product page
Double / Two Person Hammock Sets, Heavy Duty Hammock Sets, Quilted Fabric Hammock Sets, Spreader Bar Hammock Sets
$240.11 Select options This product has multiple variants. The options may be chosen on the product page

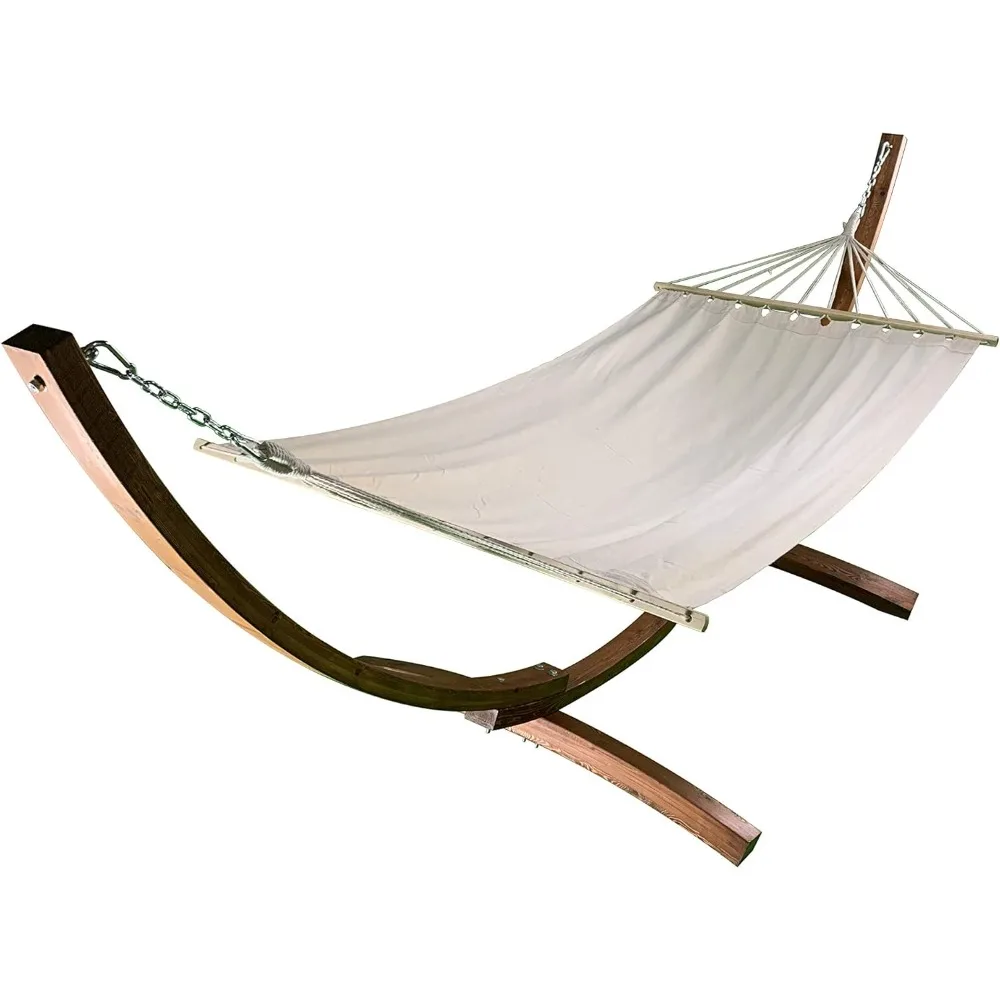
Hammock Sets with Canopy, Light Wood Hammock Sets, Wooden Arc Stand Hammock Sets
$660.25 Select options This product has multiple variants. The options may be chosen on the product page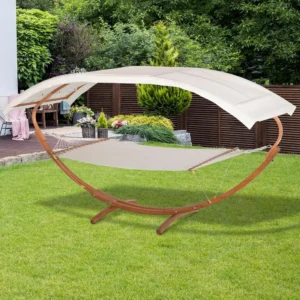
Classic Wooden Stand Hammock Sets, Hammock Sets with Canopy, Heavy Duty Hammock Sets
$705.06 Select options This product has multiple variants. The options may be chosen on the product page
Aesthetic Customizations
Don’t forget visual enhancements:
– Contrasting thread for decorative quilting patterns
– Appliqué designs from complementary fabrics
– Edge binding in accent colors
These modifications not only improve functionality but also create a truly personalized hammock experience.
Troubleshooting Common Quilted Hammock Issues
Even with careful construction, you may encounter some issues with your DIY hammock. Here are solutions to common problems:
Material Issues
Fabric Slippage
– Problem: Layers shifting after use
– Solution: Add additional quilting lines in problem areas
Insulation Bunching
– Problem: Batting clumps in certain areas
– Solution: Add more quilting lines; consider channel quilting to allow controlled shifting
Cold Spots
– Problem: Inconsistent warmth
– Solution: Check for compressed insulation; add additional layer in problem areas
Structural Problems
Asymmetrical Hanging
– Problem: One side hangs lower than the other
– Solution: Adjust suspension lengths; check for uneven stretching
Channel Stretching
– Problem: End channels stretching out of shape
– Solution: Reinforce with additional stitching; consider hardware reinforcement
Diagonal Lay Difficulties
– Problem: Can’t get comfortable on diagonal
– Solution: Ensure hammock is hung with proper sag; check overall dimensions

Most issues can be remedied with minor adjustments to either the hammock construction or hanging technique. Don’t hesitate to make modifications to improve comfort and performance.
Why DIY Quilted Hammocks Outperform Store-Bought Options
Creating your own quilted hammock offers advantages that mass-produced options simply cannot match:
Customization Advantages
Your DIY hammock is built specifically for:
– Your exact height and weight
– Your preferred sleeping position
– The climate where you’ll use it most
– Your aesthetic preferences
Quality Control Benefits
When you build it yourself:
– You can inspect every stitch and seam
– You choose premium materials beyond what’s economically viable for mass production
– You can reinforce high-stress areas based on your usage patterns
– You determine the exact insulation weight for your climate needs
Finding the perfect hammock depth for lounging comfort becomes much easier when you can customize every aspect of your hammock’s design.
The sense of accomplishment from creating your own high-performance outdoor gear is immeasurable. Your DIY quilted hammock represents the perfect blend of functionality, personalization, and craftsmanship—something no store-bought hammock can provide.