
Introduction: Understanding the Importance of Proper Hammock Installation
Setting up a hammock might seem as simple as finding two trees and throwing up some rope, but proper installation requires careful attention to ensure both safety and comfort. A well-installed hammock creates a relaxing haven, while an improperly set up one can lead to accidents, injuries, or damage to your property.
Proper hammock installation encompasses three key elements:
* Safety first – preventing falls and injuries
* Comfort – achieving the ideal hanging angle and height
* Durability – protecting both your hammock and anchor points
Different hammock types require specific installation approaches. Whether you’re setting up a traditional Brazilian hammock, a spreader bar model, or a camping hammock, understanding proper hammock placement significantly impacts both safety and comfort.
Critical components of a successful setup include:
* Strong, appropriately-spaced anchor points
* Properly rated suspension hardware
* Correct hanging height and angle
* Adequate clearance from surroundings
In this guide, we’ll walk through everything you need to know about installing your hammock safely, from initial assessment to final testing, ensuring you can relax with complete peace of mind.
Pre-Installation Safety Assessment
Before attempting to hang your hammock, take time to perform a thorough safety assessment. This crucial step helps identify potential problems before they lead to accidents or damage.
Hammock Inspection Checklist:
- Examine fabric for tears, holes, or weak spots
- Check seams for loose threads or separation
- Inspect attachment points for fraying or wear
- Verify all hardware is present and in good condition
- Look for mold, mildew, or sun damage
Always verify your hammock’s weight capacity before use. Most single hammocks support 250-400 pounds (113-181 kg), while double hammocks typically handle 400-500 pounds (181-227 kg). Remember that manufacturer ratings often represent static weight, so apply a safety margin when considering dynamic movement.
Anchor point evaluation is equally important. Trees should be healthy with no signs of disease or damage. Indoor mounting locations need to connect to structural elements, not just drywall or decorative features.
Environmental factors matter too. Consider ground surface conditions beneath your hammock (is it rocky or uneven?), weather exposure, and potential hazards in the swing radius. Comprehensive safety assessment for different environments can help identify issues you might otherwise overlook.
When in doubt about structural strength or installation complexity, don’t hesitate to consult professionals, especially for permanent indoor installations or when working with unusual materials.
Essential Measurements for Perfect Hammock Setup
Achieving the perfect hammock hang requires understanding a few key measurements that work together to create both safety and comfort.
The Ideal Hanging Distance
The optimal distance between anchor points depends on your hammock’s length. As a general rule:
1. Add 2 feet (61 cm) to your hammock’s total length
2. This sum represents the minimum distance between anchors
3. Maximum distance shouldn’t exceed 2 feet (61 cm) beyond this minimum
For example, a 13-foot (396 cm) hammock would need anchors spaced between 15-17 feet (457-518 cm) apart.
Optimal Height and Angle
The “30-degree rule” creates the perfect balance between comfort and stability:
* Suspension lines should form approximately a 30-degree angle with the horizontal
* When seated, your hammock should sit about 18 inches (45 cm) off the ground
* When lying down, your lowest point should clear the ground by 8-10 inches (20-25 cm)
Different hammock styles require slight adjustments to these measurements. Perfect hammock placement in various settings might require some experimentation:
- Brazilian/gathered-end hammocks need more sag (looser hang)
- Spreader bar hammocks require more tension (tighter hang)
- Chair hammocks need greater height for proper leg clearance
Remember to account for stretching that occurs with use, especially with cotton hammocks. Initial installation should be slightly higher than your target height to accommodate this natural stretching.
Choosing Perfect Anchor Points: Trees, Posts, and Structures
Selecting appropriate anchor points is perhaps the most critical decision in your hammock installation process. Your chosen supports must safely handle both static weight and dynamic movement.
Tree Selection Guidelines
When using trees as anchors, follow these important criteria:
* Diameter: Minimum 8 inches (20 cm) for healthy, mature trees
* Type: Hardwoods generally provide better support than softwoods
* Health: No signs of disease, leaning, or root instability
* Bark condition: Intact, not flaking or peeling excessively
Always protect trees by using wide hammock straps (at least 1.5 inches/3.8 cm wide) that distribute pressure. Never use rope directly on bark, as it can cause damage by cutting into the tree’s protective layers.
Posts and Structural Supports
For permanent installations, consider these specifications:
* Wood posts: Minimum 4×4 inches (10×10 cm), pressure-treated, set 2+ feet (61+ cm) deep in concrete
* Metal posts: Schedule 40 pipe minimum 3 inches (7.6 cm) diameter
* Spacing: Follow the ideal distance guidelines from the previous section
For decks and porches, always anchor to structural elements like support beams or joists, never to railings or decorative components. Identifying safe anchor points in indoor settings requires locating solid structural elements behind finished surfaces.
When suitable natural anchor points aren’t available, consider using dedicated hammock stands designed specifically to support the weight and movement of hammocks safely.
Essential Hardware for Safe Hammock Installation
Using appropriate hardware ensures your hammock stays securely in place while preventing damage to both the hammock and anchor points.
Suspension Systems
- Tree straps/webbing: Minimum 1.5 inches (3.8 cm) wide with 1,000+ pound (454+ kg) breaking strength
- Chains: Use only marine-grade or stainless steel rated for overhead suspension
- Ropes: Minimum 3/8-inch (0.95 cm) diameter, UV-resistant polyester or nylon (avoid cotton ropes that deteriorate)
Connection Hardware
- Carabiners: Look for climbing-rated (kN-rated) or marine-grade with locking gates
- S-hooks: Minimum 3/16-inch (0.5 cm) thick steel with safety ratings
- Quick links: Ensure they’re rated for at least 3× your hammock’s weight capacity
Mounting Hardware (For Permanent Installations)
- Eye bolts: Use only forged (not cast) bolts with closed eyes
- Lag screws: Minimum 3/8-inch (0.95 cm) diameter, penetrating at least 3 inches (7.6 cm) into solid wood
- Heavy-duty hooks: Look for weight ratings of 300+ pounds (136+ kg)
For installation and maintenance, keep these tools on hand:
* Tape measure
* Level
* Stud finder (for indoor installations)
* Appropriate wrenches or screwdrivers
* Drill with appropriate bits (for permanent installations)
Develop a regular inspection routine for all hardware components, checking for rust, wear, or deformation. Complete systems with properly rated hardware often provide the safest option for those new to hammock setup, ensuring all components work together seamlessly.
Tree-to-Tree Hammock Installation Guide
The most common and versatile hammock setup uses trees as natural anchor points. Follow these steps for a secure, tree-friendly installation:
Select appropriate trees using the criteria from the previous section, ensuring they’re within the recommended distance range for your hammock.
Wrap tree straps around trunks at approximately 5-6 feet (152-183 cm) height:
* Position straps horizontally (not at an angle)
* Ensure straps lie flat without twisting
* Place them high enough to achieve proper hammock height after sagSecure the suspension system:
* Thread strap ends through their corresponding buckles or loops
* If using daisy chain straps, select the appropriate loop for your desired distance
* For adjustable systems, leave room for later adjustmentsConnect hammock ends to the suspension:
* Use appropriate carabiners or connection hardware
* Ensure all connections are securely closed and locked
* Double-check that the hammock is centered between treesAdjust tension and height:
* Aim for the 30-degree angle mentioned earlier
* Ensure both sides are balanced in height
* Remember that the hammock will stretch when weightedTest gradually:
* Apply light pressure first
* Sit carefully in the center before fully reclining
* Listen for any unusual sounds that might indicate stress
Common tree installation mistakes include hanging the hammock too tight (creating excessive strain) or using narrow ropes that damage bark. For those who frequently camp or travel with their hammocks, lightweight options designed specifically for tree installation offer convenient, tree-friendly features.
Post and Structural Installation Methods
Creating permanent hammock supports provides reliable hanging points when suitable trees aren’t available or for dedicated hammock spaces.
Installing Permanent Posts
Plan post placement using your hammock’s ideal distance requirements.
Prepare the holes:
* Dig at least 2 feet (61 cm) deep for standard installations
* For sandy soils, increase depth to 3 feet (91 cm)
* Make holes 3 times the width of your postsSet posts in concrete:
* Place about 6 inches (15 cm) of gravel at the bottom for drainage
* Position posts with temporary bracing to ensure they’re plumb
* Pour concrete and allow to cure fully (typically 48+ hours)Add mounting hardware:
* Install eye bolts or heavy-duty hooks
* Position hardware at appropriate height (typically 4-6 feet/122-183 cm)
* Drill pilot holes to prevent wood splitting
Mounting to Existing Structures
For decks, porches, or indoor installations:
Locate structural elements:
* Use a stud finder for indoor walls
* Identify main support beams, not decorative elements
* Never attach to railings or banistersInstall appropriate hardware:
* Use through-bolts when possible (with washers on both sides)
* For wood structures, use lag screws that penetrate at least 3 inches (7.6 cm)
* For masonry, use expansion anchors rated for overhead suspensionApply weatherproofing for outdoor installations:
* Seal around hardware with silicone caulk
* Use rust-resistant hardware
* Consider removable hardware that allows for seasonal storage
When permanent installations aren’t feasible, wooden hammock stands provide attractive, stable alternatives that can be moved as needed.
Indoor Hammock Installation Techniques
Installing a hammock indoors creates a year-round relaxation spot, but requires careful attention to structural support.
Finding Strong Support Points
Locate wall studs or ceiling joists:
* Use a stud finder to identify structural elements
* Mark center points to ensure accurate hardware placement
* Wall studs are typically 16 or 24 inches (41 or 61 cm) apartSelect appropriate hardware:
* For walls: Heavy-duty eye bolts or hammock hooks
* For ceilings: Swing hangers or ceiling hooks with expansion plates
* Always choose hardware rated for at least 3× your hammock’s weight capacityInstallation process:
* Drill pilot holes sized for your hardware
* For drywall, ensure hardware penetrates at least 2.5 inches (6.4 cm) into studs
* Use socket wrenches rather than pliers for more secure tighteningFor different wall materials:
* Wood studs: Direct mounting with lag screws or through-bolts
* Metal studs: Use toggle bolts or specialized anchors
* Concrete or brick: Use expansion anchors or epoxy anchors
Never install hammocks into drywall alone, hollow doors, or decorative moldings. Identifying optimal indoor locations for hammock installation helps ensure both safety and proper function.
For temporary or rental situations, consider door frame hammock kits or freestanding indoor hammock stands that don’t require permanent modifications.
Hammock Stands: Assembly and Proper Use
Hammock stands offer the ultimate flexibility for hammock placement, requiring no trees or permanent installation while providing consistent support.
Benefits of Using Hammock Stands
- Portable and repositionable
- No damage to trees or structures
- Consistent, reliable setup
- Can be used where suitable anchor points don’t exist
- Many stands fold for storage
Types of Hammock Stands
- Metal tube frames (typically steel or aluminum)
- Wooden arc or beam designs
- Portable folding frames for camping
- Chair hammock stands (single-point suspension)
- Heavy-duty stands for extra weight capacity or multiple users
Assembly Guidelines
Most stands follow similar assembly steps:
1. Identify all parts and hardware before beginning
2. Assemble the base structure first
3. Add support arms or suspension points
4. Tighten all connections securely
5. Place on level, stable surface
Surface and Stability Requirements
- Always place stands on flat, level ground
- For outdoor use, consider ground anchors for additional stability
- Indoors, protect flooring with furniture pads
- Allow adequate clearance for the hammock’s swing arc
Different hammock types require compatible stands – ensure your stand is rated for your specific hammock style and length. Detailed information on ensuring stand stability can help prevent tipping or collapse.

Safety Testing Your Hammock Setup
After installation, thorough testing ensures your hammock is safe before full use.
Visual Inspection Process
Examine these critical areas:
* Anchor points for signs of stress or movement
* Hardware for proper closure and positioning
* Suspension system for twists or snags
* Hammock fabric for even tension
* Clearance from surrounding objects
Gradual Weight Testing
Follow this sequence to test safely:
1. Apply gentle pressure with hands
2. Sit carefully in the center, keeping feet on the ground
3. Shift weight gradually from side to side
4. Finally, recline fully and test normal usage
During testing, listen for unusual sounds like creaking or popping and watch for any visible movement of anchor points.
Warning Signs to Watch For
- Visible bending of hardware
- Creaking or popping sounds
- Movement of posts or anchor points
- Excessive stretching of fabric
- Sagging closer to the ground than expected
Establish a regular inspection routine, checking your setup at least monthly for outdoor installations and before each use for portable systems. Understanding safe hammock weight limits helps prevent overloading your setup.
Troubleshooting Common Hammock Installation Problems
Even careful installations sometimes need adjustments. Here are solutions to common issues:
1. Hammock Hangs Too Low
- Shorten the suspension system on both sides equally
- Raise the anchor points if possible
- Add chain or rope extensions to raise connection points
- Consider using a ridgeline to maintain proper sag
2. Excessive Swinging or Instability
- Ensure anchor points are sturdy and not moving
- Check that all hardware is properly tightened
- Add a stabilizing ridgeline between hammock ends
- Position hammock at a lower height
- Consider angling anchor points slightly inward
3. Anchor Points Too Far Apart
- Use longer suspension straps or extensions
- Install intermediate anchor points if possible
- Consider a portable stand as an alternative
- Look for longer hammock models designed for wider spacing
4. Hammock Sits Unevenly
- Adjust suspension length to equalize height on both sides
- Check that anchor points are at the same height
- Ensure suspension systems are identical on both ends
- Look for stretching in older hammocks that may need replacement
For situations where traditional hammocks prove problematic, hammock chairs with stands offer an alternative relaxation option that requires less space and simpler installation.

Dark Wood Hammock Sets, Porch Swing Chair Sets
$653.82 Select options This product has multiple variants. The options may be chosen on the product page
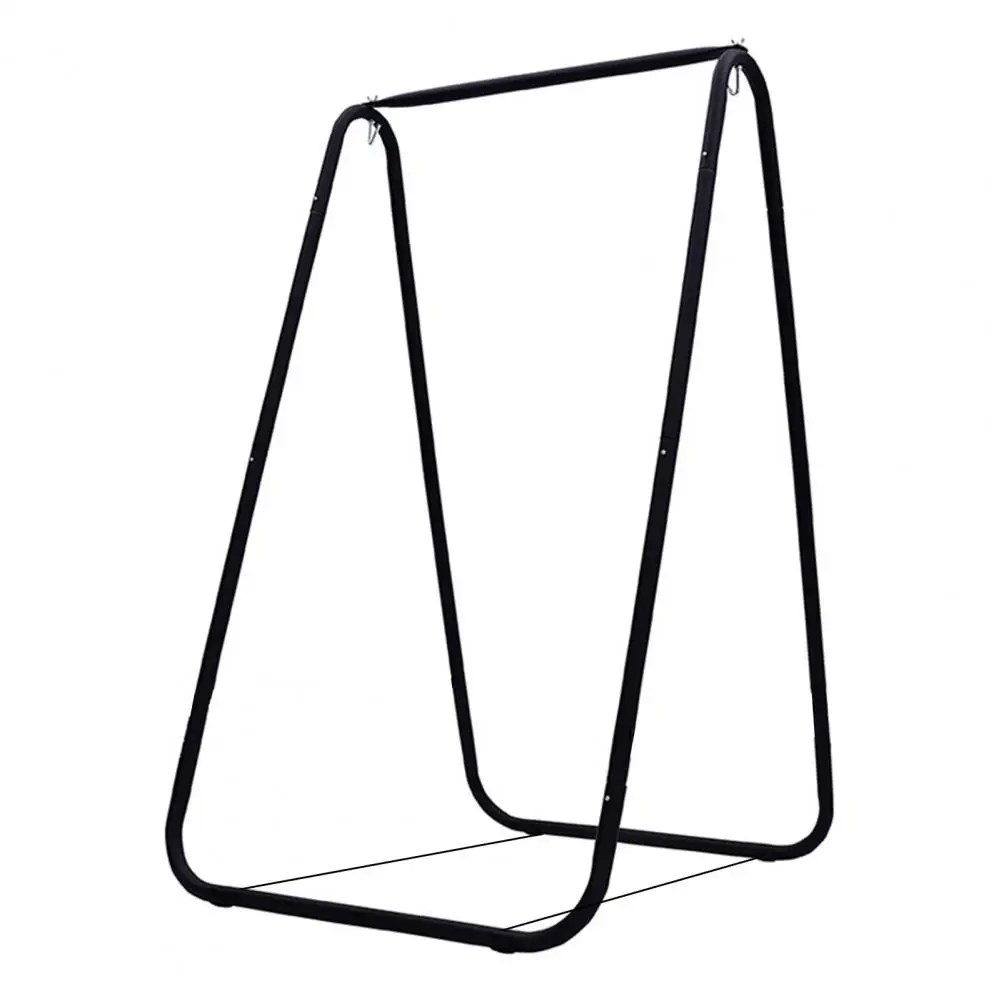
A-Frame Stand Hammock Sets, Swinging Hammock Chair Sets
$154.62 Select options This product has multiple variants. The options may be chosen on the product page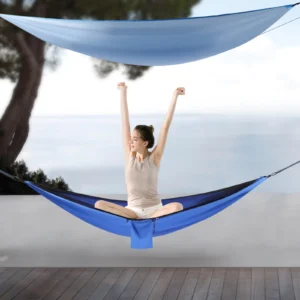
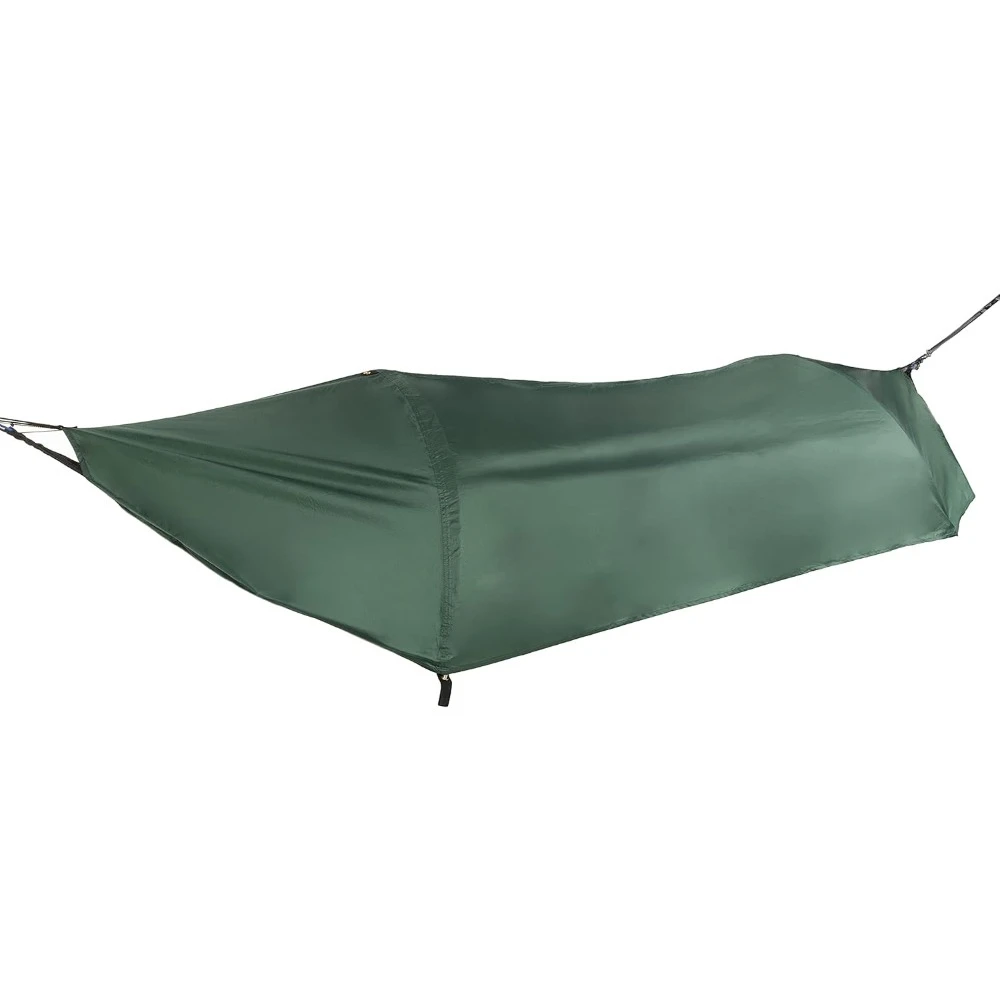
Camping Hammock Sets with Bug Net, Ultralight Camping Hammock Sets
$139.72 Select options This product has multiple variants. The options may be chosen on the product page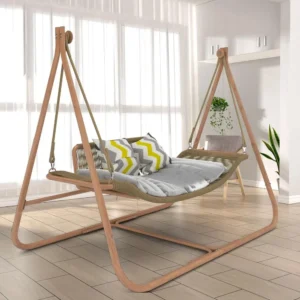
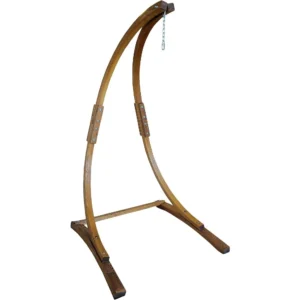
Light Wood Hammock Sets, Swinging Hammock Chair Sets
$1,359.35 Select options This product has multiple variants. The options may be chosen on the product page
Quilted Fabric Hammock Sets, Spreader Bar Hammock Sets
$195.67 Select options This product has multiple variants. The options may be chosen on the product page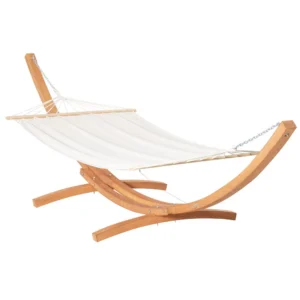
Classic Wooden Stand Hammock Sets, Heavy Duty Hammock Sets
$1,061.68 Select options This product has multiple variants. The options may be chosen on the product page
Hammock Care and Maintenance for Longevity
Proper maintenance ensures both safety and longevity for your hammock installation.
Regular Maintenance Schedule
Monthly checks:
* Inspect all hardware for rust or wear
* Tighten any loose connections
* Check suspension systems for fraying
* Examine anchor points for damage or movement
Seasonal maintenance:
* Deep clean hammock fabric according to material requirements
* Apply protective treatments to wooden components
* Replace any questionable hardware or suspension components
* Re-evaluate trees for health and stability
Material-Specific Care
- Cotton hammocks: Allow to dry completely before storage, clean with mild soap
- Polyester/nylon hammocks: Quick-drying, can be machine washed on gentle cycle
- Rope hammocks: Rinse with hose, brush gently to remove debris
- Hardware: Wipe clean, apply light oil to prevent rust
Proper care for outdoor hammock installations significantly extends their lifespan. Most outdoor hammocks should be stored during extreme weather or winter months, while hardware may need seasonal replacement depending on exposure conditions.
FAQ: Expert Answers to Common Installation Questions
Q: How much weight can a typical hammock setup support?
A: Most single hammocks support 250-400 pounds (113-181 kg), while doubles typically handle 400-500 pounds (181-227 kg). However, the actual weight capacity depends on your anchor points and hardware, which may have lower ratings than the hammock itself.
Q: What’s the safest distance between hammock anchor points?
A: The ideal distance equals your hammock’s length plus 2-4 feet (61-122 cm). For a 13-foot (396 cm) hammock, aim for 15-17 feet (457-518 cm) between anchor points.
Q: Can I leave my hammock installed outdoors year-round?
A: While hardware can often remain installed, most hammock fabrics should be stored during extended bad weather or winter months to prevent material degradation and extend lifespan.
Q: Is it safe to hang a hammock from a single point?
A: Only chair hammocks designed for single-point suspension should be hung this way. Traditional hammocks require two anchor points for proper weight distribution and stability.
Q: How can I prevent my hammock from flipping?
A: Enter a hammock by sitting in the center and keeping your weight low, then carefully swinging your legs in. For ongoing stability, lie at a slight diagonal angle rather than perfectly straight.
Q: Are hammock stands as stable as fixed installations?
A: Quality stands designed for your specific hammock type are equally safe when properly assembled and placed on level ground. However, they may allow more movement than fixed installations.

Special Requirements for Different Hammock Types
Each hammock style has specific installation considerations to optimize both safety and comfort.
Brazilian/Gathered-End Hammocks
- Installation angle: Looser hang with significant sag (30-35 degrees)
- Ideal use position: Diagonal lying position
- Special considerations:
- Need more distance between anchor points
- Fabric should form a deep curve when hung properly
- May stretch significantly with use
Spreader Bar Hammocks
- Installation angle: Tighter, flatter hang (15-25 degrees)
- Ideal use position: Horizontal, with body aligned with hammock
- Special considerations:
- More prone to tipping; install at lower height
- Requires more precise balance between anchor points
- Need less sag than Brazilian styles
Chair Hammocks
- Installation requirements: Single strong overhead anchor point
- Height considerations: Allow for feet clearance plus swing radius
- Special considerations:
- Requires stronger single anchor rated for full weight
- May need swivel hardware to prevent rope twisting
- Usually needs 7+ feet (213+ cm) vertical clearance
Camping Hammocks
- Installation focus: Lightweight, tree-friendly systems
- Special equipment: Tree straps, lightweight carabiners
- Special considerations:
- Often include integrated bug nets or rain flies requiring ridgelines
- May require underquilts or pads for insulation
- Typically designed for quick setup/takedown
For multi-person hammocks, all weight ratings and hardware specifications should be increased accordingly. Options specifically designed for different installation requirements take these variations into account, providing appropriate hardware for each style.
With proper installation following these guidelines, your hammock will provide a safe, comfortable retreat for years to come. Take your time with setup, perform regular maintenance checks, and always prioritize safety over convenience.