
Understanding A-Frame Hammocks for Your Garden
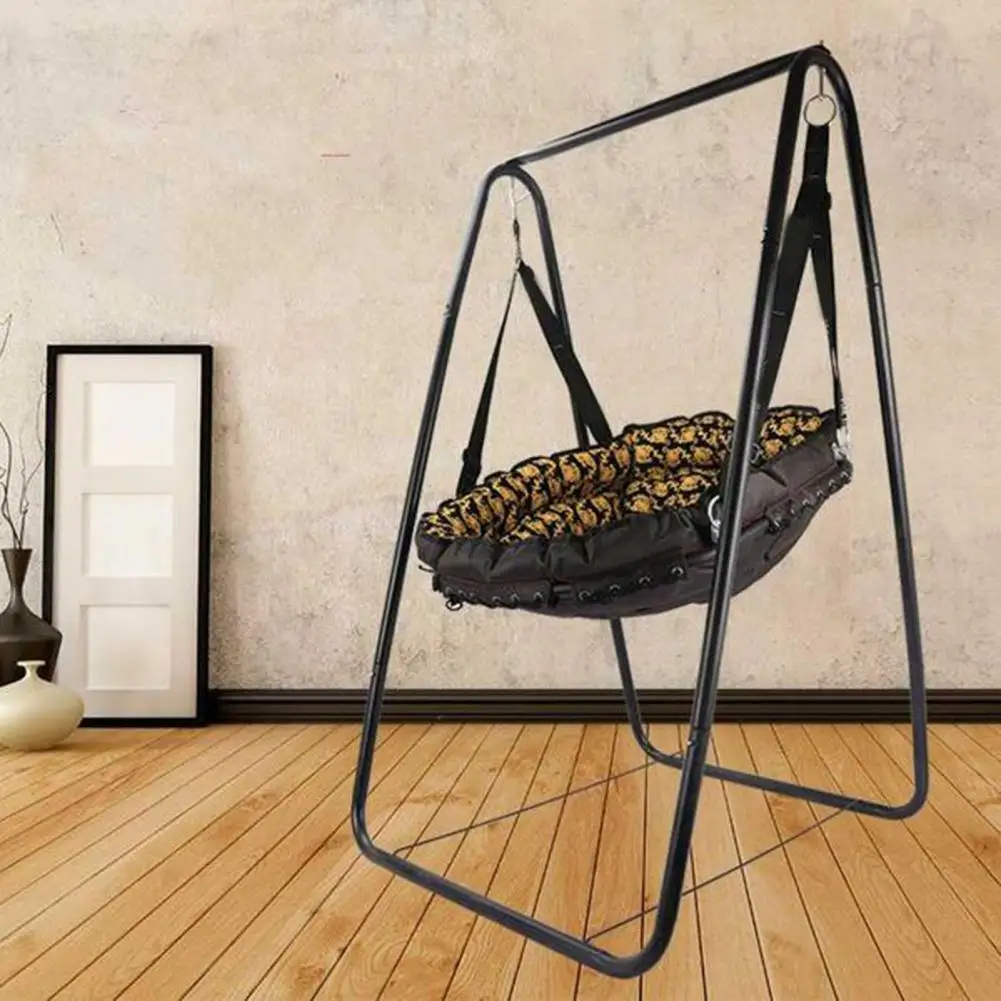
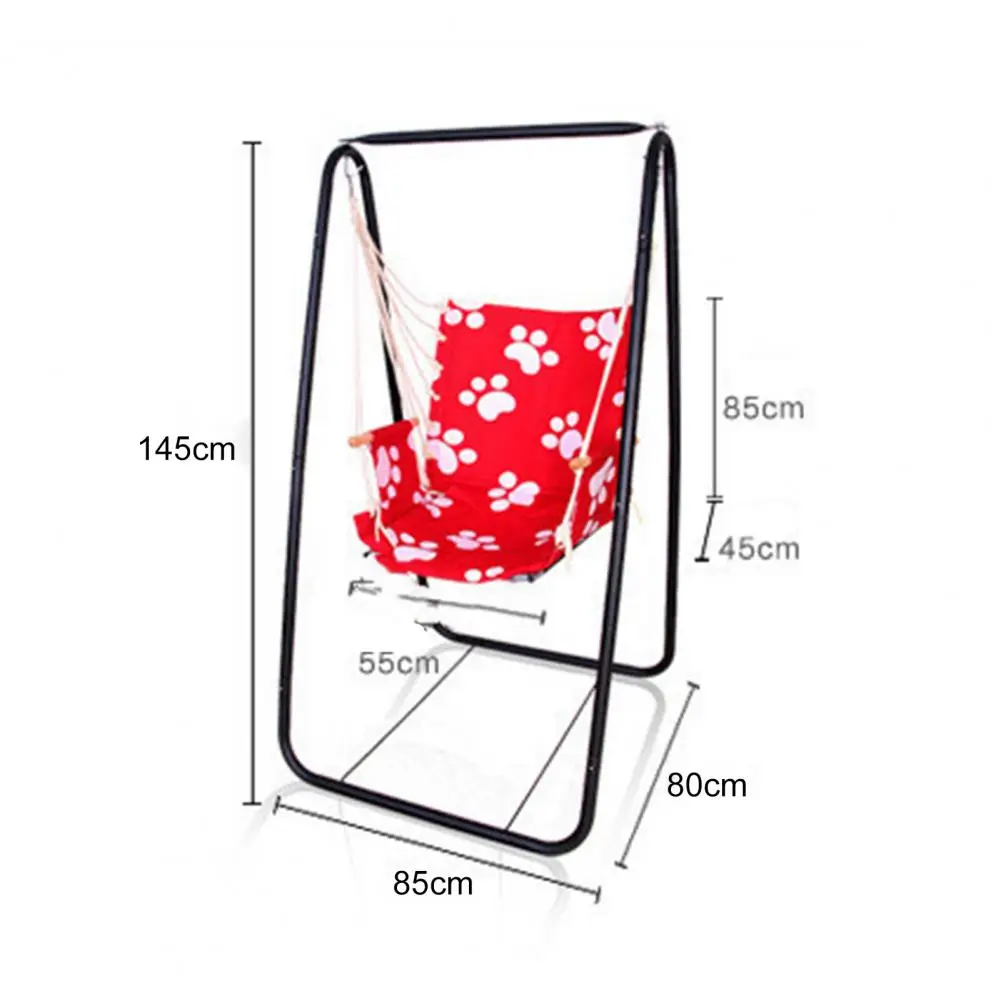
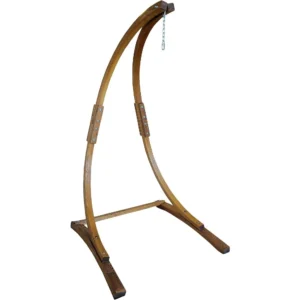
A-frame hammock stands are freestanding structures designed to hold your hammock without needing trees or fixed attachment points. These versatile structures feature a distinctive triangular shape on each end, connected by a horizontal support beam from which your hammock hangs. This design creates a self-supporting system that’s perfect for garden settings where trees aren’t available or ideally positioned.
Choosing an A-frame for your garden offers several compelling benefits:
- Versatility: Place your hammock anywhere in your garden, regardless of tree placement
- Stability: Purpose-built stands provide reliable, secure hammock support
- Aesthetic appeal: A-frames can enhance your garden’s visual appeal as decorative features
- Portability: Many designs can be moved as needed to follow sun or shade
A-frame stands typically come in three main varieties:
- Wooden A-frames: Offer natural beauty that blends with garden settings, usually 7-9 feet (2.1-2.7 meters) tall and 4-5 feet (1.2-1.5 meters) wide
- Metal A-frames: Provide maximum durability with slimmer profiles, typically 6-8 feet (1.8-2.4 meters) tall
- Hybrid designs: Combine materials for both aesthetic appeal and strength
The typical dimensions of an A-frame stand make them particularly suitable for garden settings where they can become a focal point while providing a comfortable relaxation space. Finding the right balance between indoor and outdoor hammock placement depends largely on your available space and intended usage patterns.
For those who prefer ready-made solutions, our collection of A-frame stand hammock sets offers various options to match your garden’s aesthetic while providing reliable performance.
Planning Your Garden A-Frame Hammock Setup
Selecting the ideal location for your garden A-frame hammock is crucial for both enjoyment and safety. Start by identifying a spot that meets these key criteria:
- Level ground: Essential for stability and safety
- Adequate clearance: Allow at least 2 feet (60 cm) of space around all sides of your setup
- Appealing views: Position facing pleasant garden features or landscapes
- Sun/shade balance: Consider the sun’s path throughout the day
- Privacy: Place away from neighbors’ sightlines if desired
- Protection: Some distance from sprinklers or areas prone to flooding
Level ground deserves special attention as even slight slopes can make your A-frame unstable. If your preferred location has a slight incline, consider leveling the area first or using adjustable feet on your A-frame.
For proper sizing, measure both your space and hammock carefully. For a standard 13-foot (4-meter) hammock, you’ll typically need a stand with attachment points 11-12 feet (3.3-3.7 meters) apart. The hammock should hang with a comfortable sag—not stretched tight like a tightrope.
Weight capacity is another critical consideration. Most quality A-frames support between 250-450 pounds (113-204 kg), but always check manufacturer specifications and build in a safety margin. Understanding comprehensive hammock installation requirements and safety guidelines will help ensure your setup is both comfortable and secure.
When planning placement, consider seasonal factors as well. What seems like a perfect spot in spring might become too exposed in summer or collect fallen leaves in autumn. Finding the perfect hammock placement in your home garden often requires balancing multiple factors for year-round enjoyment.
Materials and Tools Needed for A-Frame Hammock Setup
For DIY Wooden A-Frame Stands:
Lumber:
– Four 8-foot (2.4-meter) 4×4 posts for the main A-frame supports
– Two 8-foot (2.4-meter) 2×6 boards for the horizontal support beam
– Four 6-foot (1.8-meter) 2×4 boards for cross-bracing
– Optional: 1×4 boards for decorative elements
Best Wood Types for Outdoor Use:
– Cedar: Naturally resistant to rot and insects, though more expensive
– Pressure-treated pine: Affordable and durable with proper sealing
– Cypress: Excellent weather resistance with attractive grain patterns
– Redwood: Beautiful appearance with natural weather resistance
Hardware:
– Eight 4-inch (10 cm) galvanized carriage bolts with washers and nuts
– Sixteen 3-inch (7.5 cm) exterior wood screws
– Four heavy-duty eye bolts (at least 3/8-inch or 10 mm diameter)
– Two heavy-duty S-hooks or carabiners
– Four galvanized corner braces
Tools:
– Circular saw or miter saw
– Drill with bits for pilot holes
– Wrench set
– Measuring tape
– Level
– Pencil
– Sandpaper (medium and fine grit)
– Safety equipment: goggles, gloves, ear protection
For Pre-Made A-Frame Assembly:
Tools:
– Wrench set and/or Allen keys (typically included)
– Rubber mallet
– Level
– Measuring tape
Additional Items:
– Optional concrete pavers for base stability
– Weather-protective finish (for wooden stands)
– Chain or rope for height adjustments
Selecting the right materials is crucial for durability, especially for outdoor use. Understanding weatherproof A-frame hammock materials will help you make informed choices that extend the life of your hammock stand regardless of seasonal weather conditions.
Building a DIY Wooden A-Frame Hammock Stand
Pre-Construction Preparation
Before cutting any wood, ensure all your lumber is straight and free from serious defects. If using untreated wood, apply a weather-resistant primer before assembly. This preparation saves significant time compared to finishing after construction.
Cutting Instructions
- Main A-frame supports: Cut two of your 4×4 posts in half to create four pieces approximately 4 feet (1.2 meters) long. Cut one end of each piece at a 30-degree angle.
- Horizontal beam: Keep your 8-foot (2.4-meter) 2×6 boards at full length or cut to your desired stand width (typically 7-7.5 feet or 2.1-2.3 meters).
- Cross braces: Cut four pieces from your 2×4 boards, each approximately 3 feet (0.9 meters) long.
Assembly Process
Create the A-frames:
– Lay two angled 4×4 pieces on a flat surface with the angled cuts facing each other
– Position them to form an “A” shape with the bottoms about 3-3.5 feet (0.9-1.1 meters) apart
– Attach a 2×4 cross brace about 1 foot (30 cm) from the bottom using 3-inch screws
– Pre-drill holes to prevent splitting
– Repeat for the second A-frameConnect the frames:
– Stand both A-frames upright about 7 feet (2.1 meters) apart
– Place the 2×6 horizontal beam across the tops of both A-frames
– Secure the beam to each A-frame using carriage bolts, drilling through both the beam and the tops of the A-frames
– Tighten nuts and washers securelyAdd reinforcement:
– Install the remaining 2×4 cross braces diagonally between the horizontal beam and each A-frame leg
– Secure with 3-inch screws at each connection point
– Add corner braces at stress points for additional stabilityInstall hanging hardware:
– Drill pilot holes for eye bolts on the horizontal beam, positioned about 6-12 inches (15-30 cm) from each end
– Install eye bolts with washers on both sides of the beam, ensuring they’re tight
– Test by hanging from each eye bolt brieflyFinishing touches:
– Sand any rough edges to prevent splinters
– Apply at least two coats of outdoor sealant or paint
– Allow to dry completely before hanging your hammock
For those who appreciate the aesthetic appeal of wood but prefer professionally crafted options, our selection of wooden hammock stands provides reliable alternatives to DIY construction with consistent quality and design.
Assembling a Pre-Made A-Frame Hammock Stand
Unpacking and Verification
- Carefully unpack all components and lay them out on a flat surface
- Check all parts against the provided inventory list
- Inspect for any damaged components before beginning assembly
- Review the manufacturer’s instructions thoroughly
Typical Assembly Sequence
Base assembly:
– Identify the base pieces that will contact the ground
– Connect these pieces following the manufacturer’s specific order
– Hand-tighten connectors initiallyFrame construction:
– Attach vertical supports to the base
– Connect the horizontal support beam to the vertical pieces
– Add any diagonal bracing included in your kitFinal assembly:
– Verify all pieces are properly aligned
– Fully tighten all connectors using the appropriate tools
– Attach any included hammock hooks or suspension points
Most stands require 30-45 minutes for complete assembly, though this varies by design complexity.
Common Assembly Challenges and Solutions
- Misaligned holes: Slightly loosen adjacent connections to allow for proper alignment
- Difficult connections: Use a rubber mallet to gently tap pieces into place
- Unstable on first setup: Double-check that all connections are fully tightened and that the stand is on level ground
Before hanging your hammock, verify the stand’s stability by applying gentle pressure from different angles. For long-term enjoyment, consider exploring our collection of durable hammock stands or browse our complete selection of hammocks and stands for options that combine quality with ease of assembly.
Properly Hanging Your Hammock on the A-Frame
Attaching your hammock correctly to your A-frame stand is crucial for both comfort and safety. Follow these steps for optimal results:
Identify the right attachment points:
– Locate the designated hanging hooks or eye bolts on your stand
– Ensure they’re securely fastened before proceedingPrepare your hammock:
– Unfold and untangle the hammock completely
– Check that any included chains, ropes, or carabiners are in good conditionAttach the hammock ends:
– For hammocks with loops: Use S-hooks or carabiners to connect the hammock loops to the stand’s attachment points
– For hammocks with chains: Connect the chains directly to the attachment points, adjusting the link position to achieve desired height
– For rope-end hammocks: Create secure knots at the attachment points, ensuring equal length on both sidesAdjust for proper sag:
– The optimal hammock sag forms a gentle curve, not a tight line
– Aim for a 30-degree angle from the horizontal at the attachment points
– The lowest point of your hammock should rest about 18-24 inches (45-60 cm) from the ground when emptyDifferent hanging techniques:
– Traditional hammocks: Allow for significant center sag (like a smile shape)
– Spreader bar hammocks: Hang with less sag but never completely tautTest the setup safely:
– Sit on the hammock gently at first, near the center
– Gradually apply your full weight
– Test from different entry angles to ensure stability

Remember that proper hanging significantly affects both comfort and safety. Understanding how much weight your hammock can hold is essential for safe enjoyment. A correctly hung hammock distributes weight evenly across the fabric and reduces strain on both the hammock and stand.
Ensuring Safety and Stability of Your A-Frame Hammock
Safety should always be your primary concern when setting up and using an A-frame hammock. Follow these essential guidelines to prevent accidents and ensure stability:
Ground and Stability Considerations
- Place your A-frame on completely level ground
- For added stability on soft surfaces, place paver stones under each leg
- Check that all legs make full contact with the ground
- Consider using ground stakes for additional anchoring in windy areas
Weight Management
- Always stay at least 50 pounds (23 kg) under the maximum rated weight capacity
- Distribute weight evenly in the hammock
- Avoid exceeding capacity with multiple users
- Remember that dynamic movements (swinging, bouncing) create forces greater than static weight
Regular Safety Inspection Checklist
- Check all bolts and fasteners monthly for tightness
- Inspect wooden components for cracks, splinters, or rot
- Look for any bending or deformation in metal parts
- Examine attachment points for wear or stretching
- Verify that the stand remains level and doesn’t wobble
Safe Usage Practices
- Enter and exit the hammock slowly, sitting first before reclining
- Avoid standing in or jumping into the hammock
- Keep the hammock center when shifting positions
- Limit swinging motions with A-frame stands
Special Considerations for Children and Pets
- Never leave children unattended in hammocks
- Consider lower hanging heights for children
- Watch for pets that might climb or claw at hammock fabric
- Be mindful of small items that could create choking hazards
Our comprehensive indoor and outdoor hammock safety guide provides additional information for maintaining a safe relaxation environment. For those concerned about weight capacity, our selection of heavy-duty hammock sets offers enhanced stability and support for complete peace of mind.
Maintenance and Care for Longevity
Proper maintenance ensures your garden A-frame hammock will provide years of comfortable relaxation. Follow these care guidelines based on your stand’s material:
Wooden A-Frame Maintenance
- Monthly inspection: Check for cracks, splintering, or loose hardware
- Seasonal care: Apply a new coat of weather sealant every 12-18 months
- Cleaning: Gently scrub with a soft brush and mild soap solution twice yearly
- Winter protection: Either disassemble for indoor storage or cover completely with a waterproof cover
- Hardware care: Apply silicone lubricant to metal hardware annually to prevent rust
Metal A-Frame Maintenance
- Regular inspection: Check for rust spots or bent components monthly
- Cleaning: Wipe down with a damp cloth and mild detergent quarterly
- Rust prevention: Touch up any scratches or chips in the finish immediately
- Hardware tightening: Check and tighten all bolts and connections seasonally
- Winter care: Consider indoor storage or use a waterproof cover
Hammock Fabric and Suspension Care
- Regular cleaning: Follow manufacturer’s instructions for cleaning fabric
- Sun protection: Consider removing and storing the fabric portion when not in use for extended periods
- Rain exposure: Allow hammocks to dry completely before storage
- Rope inspection: Check for fraying or weak spots in ropes and replace as needed
- Chain maintenance: Wipe down chains and inspect for rust or wear
Seasonal Care Tips
Summer:
– Provide occasional shade to prevent UV damage
– Check for insect nests regularly
– Clean more frequently if tree sap or bird droppings are present
Fall:
– Remove fallen leaves promptly to prevent moisture retention
– Inspect more frequently as weather changes
– Consider earlier winter storage in harsh climates
Winter:
– In mild climates, use a breathable water-resistant cover
– In harsh climates, disassemble and store indoors
– For permanent installations, remove hammock while leaving stand
Understanding whether it’s okay to leave your hammock outside in your specific climate will help you determine the appropriate level of protection needed for your setup.

Dark Wood Hammock Sets, Porch Swing Chair Sets
$653.82 Select options This product has multiple variants. The options may be chosen on the product page
A-Frame Stand Hammock Sets, Swinging Hammock Chair Sets
$154.62 Select options This product has multiple variants. The options may be chosen on the product page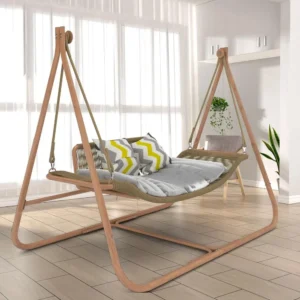
Light Wood Hammock Sets, Swinging Hammock Chair Sets
$1,359.35 Select options This product has multiple variants. The options may be chosen on the product page
Quilted Fabric Hammock Sets, Spreader Bar Hammock Sets
$195.67 Select options This product has multiple variants. The options may be chosen on the product page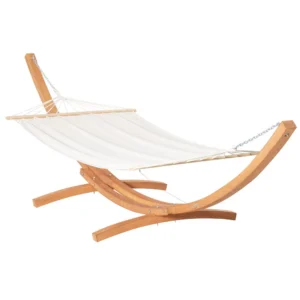
Classic Wooden Stand Hammock Sets, Heavy Duty Hammock Sets
$1,061.68 Select options This product has multiple variants. The options may be chosen on the product page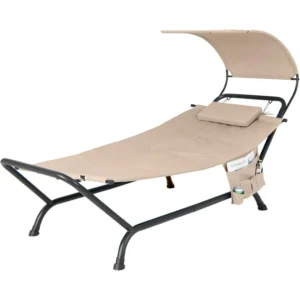
Hammock Sets with Canopy, Heavy Duty Hammock Sets
$286.31 Select options This product has multiple variants. The options may be chosen on the product page
Troubleshooting Common A-Frame Hammock Issues
Even with proper setup, you might encounter occasional issues with your A-frame hammock. Here are solutions to common problems:
Wobbling and Instability
Problem: Stand rocks or feels unstable during use.
Solutions:
– Verify the ground is completely level
– Check that all legs make full contact with the ground
– Place flat paving stones under each leg
– Tighten all bolts and connections
– Add additional cross-bracing for DIY stands
– Consider sand-filled bags on the base for temporary stability
Height Adjustment Problems
Problem: Hammock hangs too high or too low.
Solutions:
– For hammocks with chains: Adjust to different links
– For rope hammocks: Retie with shorter or longer end sections
– Add S-hooks or carabiners with chain extensions
– For wooden stands: Reposition eye-hooks (may require filling original holes)
– Consider adjustable hanging straps as an aftermarket addition
Assembly Difficulties
Problem: Parts don’t align properly during assembly.
Solutions:
– Loosen all connections and reassemble in the recommended order
– Check for warped or bent components
– Ensure you’re on level ground during assembly
– Use a rubber mallet to gently encourage alignment
– Contact manufacturer if parts appear defective
Noise Issues
Problem: Creaking or squeaking during use.
Solutions:
– Tighten all hardware connections
– Apply silicone lubricant to metal-on-metal contact points
– Add washers to reduce friction between moving parts
– Check for and sand rough wooden surfaces that rub together
– For rope noise, apply a light coating of beeswax to reduce friction
Understanding how to address wobbling issues in hammock stands can significantly improve your relaxation experience by creating a sense of security and stability.
Enhancing Your Garden A-Frame Hammock Experience
Transform your basic hammock setup into a luxurious outdoor retreat with these enhancements:
Comfort Accessories
- Add weather-resistant cushions in coordinating colors
- Include a small pillow specifically designed for hammocks
- Keep a lightweight blanket nearby for cooler evenings
- Consider a hammock pad for additional cushioning
- Use a hammock ridge line organizer for keeping essentials within reach
Shade Solutions
- Install a separate patio umbrella positioned to shade your hammock
- Add a compatible hammock canopy attachment
- Consider growing climbing plants on a nearby trellis for natural shade
- Position your A-frame near trees for dappled light
- Explore our hammock sets with canopy for integrated shade protection
Complementary Garden Elements
- Place a weather-resistant side table (16-20 inches/40-50 cm height) within arm’s reach
- Add potted plants around the base for aesthetic appeal
- Create a defined space with decorative stone or mulch beneath the stand
- Install solar path lights for evening ambiance
- Consider a small water feature nearby for relaxing sounds
Lighting Options
- String weatherproof fairy lights along the A-frame
- Place solar stake lights around the perimeter
- Add battery-operated LED lanterns on nearby tables
- Consider clip-on book lights for evening reading
- Install app-controlled smart outdoor lighting for customizable ambiance
Seasonal Decorating Ideas
- Spring: Add potted flowering plants nearby
- Summer: Incorporate tropical elements and bright colors
- Fall: Use autumn-toned pillows and a cozy throw blanket
- Winter: Add weatherproof outdoor rugs and battery-operated candles
These enhancements create a complete outdoor relaxation zone that integrates seamlessly with your garden aesthetic while maximizing comfort and enjoyment throughout the seasons.
When to Choose Alternative Hammock Support Options
While A-frame stands are versatile solutions for garden hammocks, they aren’t always the ideal choice for every situation. Consider these alternatives based on your specific needs:
Alternative Support Options
- Hammock posts: Permanent in-ground posts offer maximum stability for dedicated hammock areas
- Pergola or gazebo integration: Attach hammocks to existing garden structures for a space-efficient solution
- Wall-mounted brackets: For areas adjacent to sturdy garden walls or the house exterior
- Hammock chairs with stands: Require less space than full hammocks while providing comfortable seating
- Portable tripod stands: Offer greater mobility than A-frames but typically with lower weight capacity
When to Consider Alternatives
- Very limited space: When your garden can’t accommodate the footprint of an A-frame
- Permanent installation desired: For dedicated hammock areas that won’t need repositioning
- Extremely high weight capacity needed: In-ground posts can support greater weights
- Unique garden layouts: Irregular spaces might better accommodate other mounting options
- Aesthetic considerations: When you prefer your hammock support to blend into existing structures
Transitioning Between Options
If you’re considering switching from an A-frame to another support method:
– Evaluate the permanence of the new option
– Consider seasonal changes and how they might affect fixed installations
– Factor in the visual impact on your garden design
– Assess the cost difference between options
– Think about future garden redesigns that might affect permanent installations
Exploring the best indoor and outdoor hammock locations can help you determine whether an A-frame or alternative support system will best suit your specific environment and relaxation goals.
By carefully weighing your options and considering your garden’s unique characteristics, you can select the hammock support system that provides the perfect balance of functionality, aesthetics, and enjoyment for your outdoor space.