

Introduction: The Perfect Porch Hammock Chair Setup
A hammock chair transforms any ordinary porch into a personal retreat—a place where you can gently sway while reading a book, sipping coffee, or simply enjoying the outdoors. These versatile additions provide the perfect blend of comfort and style without taking up the space required by traditional hammocks.
Proper installation is crucial not only for your safety but also for the longevity of both your hammock chair and porch structure. While professional installation is always an option, doing it yourself offers considerable cost savings, the flexibility to customize your setup, and the satisfaction of creating your own relaxation space.
Many homeowners find that hammock chairs specifically designed for covered porches provide the ideal combination of comfort and durability. Whether you prefer a bohemian macramé style, classic canvas, or natural rope design, this guide will walk you through everything you need to know to safely install your porch hammock chair.
Research suggests that gentle swinging motion can reduce stress and improve relaxation—making a properly installed hammock chair not just a stylish addition but a wellness investment too.
Essential Pre-Installation Planning: Safety and Preparation
Before you pick up any tools, proper planning ensures both safety and satisfaction with your hammock chair installation. Take time to carefully assess your space and needs.
Weight Capacity Considerations
Understanding how much weight your hammock chair can hold is your first priority. Most standard hammock chairs support between 250-350 lbs (113-159 kg), but always check your specific model’s rating. Remember that the mounting point must exceed this capacity—ideally by 20-30% for safety margin.
Assessing Your Porch Structure
Not all porch elements are suitable for hammock chair installation. Look for:
– Exposed ceiling joists or beams (minimum 2×6 inches)
– Solid porch posts (at least 4×4 inches)
– Sturdy roof structures with accessible support elements
Warning signs that a location may be unsuitable include:
– Decorative or non-structural beams
– Signs of wood rot or damage
– Thin panels or purely decorative elements
– Loose or aging structural components
Space Requirements
For comfortable and safe use, ensure you have:
– At least 3-4 feet (0.9-1.2 meters) of clearance in all directions
– Sufficient height for the chair to hang properly (typically 7+ feet/2.1+ meters ceiling height)
– No obstacles that could interfere with the natural swinging motion
When determining your installation location, consider how setup tips for hammock chairs under roof structures might affect your specific situation. The right positioning ensures both safety and maximum enjoyment.
Tools and Hardware You’ll Need for a Secure Installation
Gathering the proper equipment before you begin will make your installation process smooth and efficient. Quality tools and hardware are investments in both safety and longevity.
Essential Tools:
- Electric drill with various bit sizes
- Stud finder (for locating ceiling joists)
- Measuring tape
- Level
- Adjustable wrench or socket set
- Step ladder with appropriate height rating
- Pencil for marking
- Safety glasses and gloves
Hardware Options:
The hardware you’ll need depends on your mounting surface:
For Wood Installation:
– Heavy-duty eye bolt (minimum 3/8-inch diameter)
– Screw eyes rated for at least 300 lbs (136 kg)
– Washers for additional support
For Concrete Installation:
– Concrete expansion anchors
– Masonry drill bits
– Heavy-duty eye bolts designed for concrete
Universal Hanging Hardware:
– Stainless steel spring (provides bounce and reduces stress on mounting points)
– Stainless steel chain or marine-grade rope (at least 1/4-inch thickness)
– Locking carabiners rated for minimum 300 lbs (136 kg)
– Swivel hook to prevent rope twisting
– S-hooks for adjustability
Weather resistance is crucial for any outdoor installation. Choose stainless steel, galvanized, or marine-grade hardware that can withstand moisture and temperature changes. Checking the load ratings is non-negotiable—each component should exceed your hammock chair’s weight capacity.
Many people find that complete porch swing chair sets include appropriate hardware specifically designed for their model, which can simplify your shopping process.
Method 1: Installing in a Wooden Porch Ceiling or Beam
Installing your hammock chair in a wooden beam or ceiling joist provides the most secure and reliable mounting method for most porches. Follow these steps carefully:
Locate the center of your ceiling joist or beam
– Use a stud finder to identify the exact center of the joist
– Mark the location lightly with a pencil
– For exposed beams, measure to find the center pointVerify your mounting point
– Double-check with the stud finder to confirm you’re drilling into solid wood
– Ensure the joist or beam is at least 2×6 inches for adequate supportDrill the pilot hole
– Select a drill bit 1/8 inch (3mm) smaller than your eye bolt’s diameter
– Drill straight up into the marked location
– Create a hole approximately 2-3 inches (5-7.6 cm) deepInstall the mounting hardware
– Screw the eye bolt into the pilot hole by hand initially
– Once resistance increases, use a screwdriver through the eye or a wrench on the nut to tighten
– Continue until the eye is flush with the ceiling surface and the eye is oriented in the direction you want the chair to faceTest for security
– Once installed, perform a pull test by hanging from the eye bolt briefly
– Watch for any movement, cracking sounds, or signs of weakness
– The hardware should feel completely solid with no movement
If you’re installing into a finished ceiling with hidden joists, the process requires extra precision. The ultimate swinging chair installation guide provides additional tips for working with various ceiling types.
Signs of proper installation include:
– The eye bolt feels immovable when tested
– No creaking or unusual sounds during testing
– The eye is completely screwed in with only the loop exposed

Method 2: Installing into a Concrete Porch Ceiling
Concrete installations require special hardware and techniques but can provide excellent stability when done correctly.
Select appropriate anchors
– Choose expansion anchors specifically rated for overhead applications
– Look for anchors rated at minimum 300 lbs (136 kg) pull-out strength
– Wedge anchors or sleeve anchors typically work best for hammock chairsGather the right tools
– Use a hammer drill with masonry bits—regular drills won’t effectively penetrate concrete
– Select a masonry bit that matches your anchor specifications
– Have a vacuum or blower ready to clear concrete dustMark and drill the hole
– Mark your installation point carefully
– Hold the drill perpendicular to the ceiling surface
– Drill to the depth specified by your anchor (typically 2-3 inches/5-7.6 cm)
– Drill about 1/16 inch (1.5mm) larger than the anchor diameterClean the hole thoroughly
– Remove all dust and debris using a vacuum or blower
– Use a brush to clean the sides of the hole
– Clean holes ensure proper anchor expansion and gripInstall the anchor and eye bolt
– Insert the expansion anchor into the hole
– Follow the specific instructions for your anchor type
– For most anchors, you’ll need to tighten a bolt that expands the anchor against the concrete
– Ensure the eye is facing the proper direction for your chairTest the installation
– Apply gradual weight to test the anchor’s holding power
– Listen for any unusual sounds
– Watch for any movement of the anchor
Common concrete installation mistakes include:
– Insufficient hole depth
– Improper cleaning of the hole
– Using anchors not rated for overhead or dynamic loads
– Drilling holes too wide
If concrete installation seems too challenging, consider browsing our hammock chairs with stands for freestanding options that don’t require ceiling mounting.
Method 3: Using a Porch Post or Stand-Alone Option
Not every porch has an ideal ceiling mounting point. Fortunately, porch posts or freestanding stands offer excellent alternatives.
Porch Post Installation
Porch posts can provide sturdy mounting points if they meet these requirements:
– Minimum 4×4 inches (10×10 cm) in size
– Structurally sound with no signs of damage
– Securely connected to both floor and ceiling structures
Installation options include:
– Wraparound Post Bracket: Specially designed hardware that encircles the post
– Through-Bolt Method: Drilling completely through the post and securing with bolts on both sides
– Heavy-Duty Eye Bolt: Similar to ceiling mounting but horizontally into the post
When using posts, install the mounting point at least 7 feet (2.1 meters) above the floor for proper hanging height and clearance.
Freestanding Stand Options
If your porch lacks suitable structural mounting points, freestanding hammock chair stands offer a perfect solution:
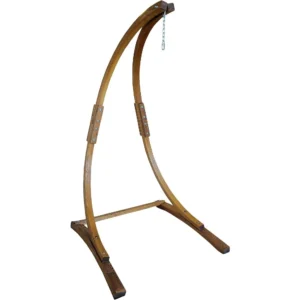
- C-Stands: Shaped like the letter C, these provide excellent stability with a small footprint
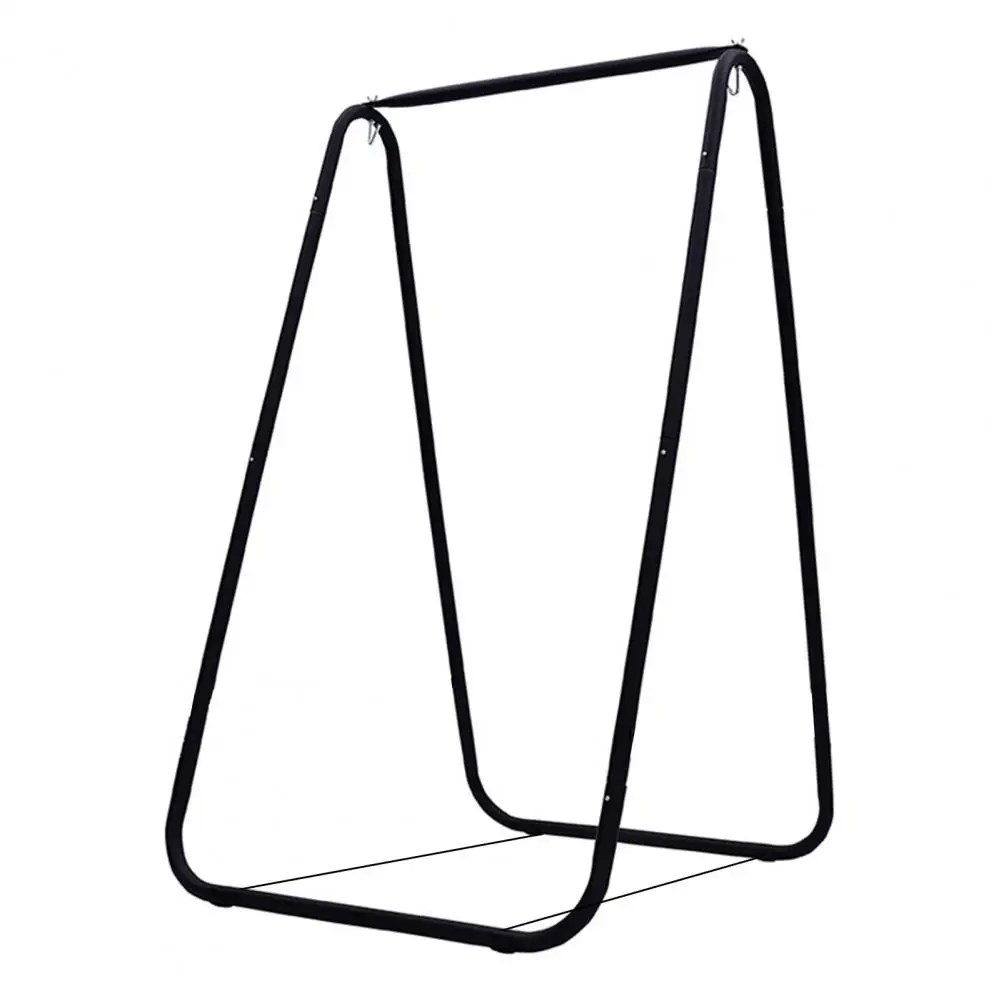
- A-Frame Stands: Wider at the base with a triangular design for maximum stability
- Adjustable-Height Stands: Allow you to customize the hanging height for different users
When selecting a stand, ensure:
– The base is wide enough to prevent tipping
– The weight capacity exceeds your requirements
– It’s designed for outdoor use if your porch is exposed
For porches with limited space, swinging hammock chair sets that include compact stands can be ideal. Additionally, understanding A-frame hammock stability guidelines helps ensure your standalone installation remains secure.
Hanging Your Hammock Chair: Height, Balance, and Comfort
Once your mounting point is secure, properly hanging your chair determines how comfortable it will be to use.
Determining the Correct Height
The ideal hanging height places the chair’s seat approximately 16-20 inches (41-51 cm) from the floor when weighted. This allows for:
– Easy entry and exit
– Proper leg positioning while seated
– Natural swinging motion
To calculate the required chain or rope length:
1. Measure from your mounting point to the floor
2. Subtract your desired sitting height (16-20 inches/41-51 cm)
3. Subtract the height of the chair itself when hanging
Creating a Comfortable Swing
A well-hung hammock chair should:
– Swing smoothly in any direction
– Return naturally to center
– Support your weight evenly without tilting
For enhanced comfort and safety, consider:
– Adding a Spring: A stainless steel spring between the mounting point and chair absorbs shock and creates a gentler swinging motion
– Using a Swivel Hook: Prevents the rope or chain from twisting during use
– Installing an Adjustable Chain: Allows you to fine-tune the height as the chair stretches over time
Testing Your Installation
Before fully enjoying your chair:
1. Test with 25% of the intended weight
2. Increase gradually to 50%, then 75%
3. Finally test with slightly more than the intended maximum weight
4. Listen for unusual sounds and watch for any movement at the mounting point
For the most enjoyable experience, consider tips for perfectly positioning your swing hammock chair based on your specific porch layout and chair design.
Safety Inspection and Maintenance Routine
Regular maintenance ensures your hammock chair remains safe and extends its lifespan.
Initial Post-Installation Safety Checklist:
- Mounting hardware is completely secure with no movement
- All connections (carabiners, swivel hooks, chains) are fully closed and locked
- Chair hangs level and balances properly when weighted
- No structural changes to the mounting surface are visible
- Swinging motion is smooth and uninhibited
- Chair supports full weight without excessive stretching
Ongoing Maintenance Schedule:
Monthly Checks:
– Inspect all hardware connections for signs of wear or corrosion
– Check rope or chain for fraying, stretching, or damage
– Ensure the mounting hardware remains tight and secure
– Verify the spring (if used) shows no signs of stretching or deformation
Seasonal Maintenance:
– Remove the chair during extreme weather if possible
– Clean all hardware components to remove dust and debris
– Apply appropriate lubricant to swivel components if they begin to stick
– Tighten any components that may have loosened over time
Replacement Indicators:
– Visible rust or corrosion on any metal parts
– Fraying or discoloration of rope components
– Creaking or unusual noises during use
– Any movement at the mounting point
– Visible cracks or splits in wooden components
For inspiration on maintaining your outdoor relaxation space, browse these 15 hammock chair ideas for ultimate relaxation that include creative maintenance solutions.
Troubleshooting Common Installation Issues
Even with careful planning, you might encounter challenges. Here are solutions to the most common problems:
Cannot Find Ceiling Joists
- Problem: Stud finder isn’t detecting joists or gives inconsistent readings.
- Solution:
- Try a higher-quality stud finder or use the knock test (solid areas sound more solid than hollow areas)
- Look for visible indicators like nail heads in the ceiling
- Access the attic space above (if possible) to locate joists from above
Hardware Feels Loose After Installation
- Problem: The eye bolt or anchor moves slightly under weight.
- Solution:
- For wood: Use a larger diameter eye bolt or reinstall in a different section of the joist
- For concrete: Clean and reinstall with a larger expansion anchor
- Add a metal plate behind wooden mounting points to distribute load
Chair Hangs at Incorrect Height
- Problem: Chair is too high or too low for comfortable use.
- Solution:
- Add an adjustable chain between the mounting point and chair
- Use S-hooks at different points to modify height
- For chairs that are too low, add a chain extender to the mounting point
Unwanted Noise During Use
- Problem: Squeaking, creaking, or grinding sounds while swinging.
- Solution:
- Add a spring to reduce pressure on the mounting point
- Apply silicone lubricant to swivel components
- Check for rubbing between chain links and eliminate contact points
Excessive Spinning
- Problem: Chair spins too much rather than swinging directionally.
- Solution:
- Install an anti-spin device or swivel restrictor
- Use two mounting points instead of one
- Add weight to the bottom of the chair
If standard solutions aren’t working, A-frame stand hammock sets offer reliable alternatives to ceiling mounting that eliminate many common installation problems.

Dark Wood Hammock Sets, Porch Swing Chair Sets
$653.82 Select options This product has multiple variants. The options may be chosen on the product page
A-Frame Stand Hammock Sets, Swinging Hammock Chair Sets
$154.62 Select options This product has multiple variants. The options may be chosen on the product page
Light Wood Hammock Sets, Swinging Hammock Chair Sets
$1,359.35 Select options This product has multiple variants. The options may be chosen on the product page
Classic Wooden Stand Hammock Sets, Heavy Duty Hammock Sets
$1,061.68 Select options This product has multiple variants. The options may be chosen on the product page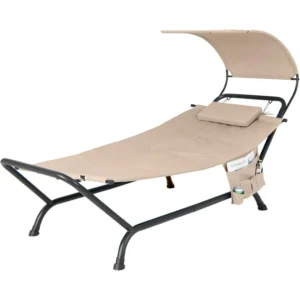
Hammock Sets with Canopy, Heavy Duty Hammock Sets
$286.31 Select options This product has multiple variants. The options may be chosen on the product page
Heavy Duty Hammock Sets, Wooden Arc Stand Hammock Sets
$878.66 Select options This product has multiple variants. The options may be chosen on the product page
Can I Install a Hammock Chair on Any Type of Porch?
While hammock chairs are versatile, not every porch is equally suitable for installation. Here’s a breakdown of different porch types and their compatibility:
Covered vs. Uncovered Porches
Covered porches provide ideal protection for your hammock chair, extending its lifespan significantly. For uncovered porches, select weather-resistant hardware and consider removing the chair during severe weather.
Wood vs. Concrete Construction
Both materials work well with proper hardware. Wood installations are generally easier for DIYers, while concrete requires special tools but often provides superior strength.
Vaulted or Angled Ceilings
These require special consideration for proper hanging angle. You may need:
– Extended chains or ropes
– Custom mounting brackets that compensate for the angle
– Specialized swivel hardware to ensure proper chair orientation
Screened-In Porches
These offer excellent protection for your hammock chair but require careful installation to avoid damaging the screen. Consider mounting to the main structural elements rather than the screening framework.
For challenging porch designs, browse inspiring covered porch hammock chair ideas that showcase creative solutions for various architectural styles.

How Long Will My Hammock Chair Installation Last?
The lifespan of your hammock chair installation depends on several key factors:
Quality Factors Affecting Longevity
Installation Quality:
– Properly sized and installed hardware can last 5-10 years or more
– Undersized or incorrectly installed components might fail within months
Hardware Materials:
– Stainless steel components can last 7-10+ years outdoors
– Galvanized steel typically lasts 3-5 years before showing signs of wear
– Standard steel may show rust within 1-2 seasons
Environmental Exposure:
– Fully covered, protected installations may last 10+ years
– Partially exposed installations typically last 3-7 years
– Fully exposed installations may need components replaced every 1-3 years
Maintenance Practices:
– Regular inspection and maintenance can double hardware lifespan
– Prompt replacement of wearing parts prevents damage to major components
– Seasonal removal and storage during harsh weather extends longevity
For maximum durability, consider weather-resistant hammock chairs for your porch designed specifically to withstand outdoor conditions. Additionally, heavy-duty hammock sets often include commercial-grade hardware that significantly extends installation lifespan.
With proper installation using quality components and regular maintenance, your hammock chair can provide years of relaxing enjoyment on your porch—becoming your favorite spot to unwind, read, or simply enjoy the gentle swaying motion that makes hammock chairs so uniquely comforting.