

I. Understanding Your Swinging Chair Installation Needs
Swinging chairs represent the perfect blend of comfort and style, offering a unique relaxation experience that regular furniture simply can’t match. These suspended seats come in various forms – from woven macramé chairs that add bohemian flair to your space, to cushioned egg chairs that envelop you in comfort, hammock chairs that offer flexible support, and modern pod chairs that create a personal retreat.
Proper installation is not just about aesthetics – it’s fundamentally about safety. A well-installed swinging chair provides years of worry-free enjoyment, while improper mounting can lead to accidents and damage to both your home and the chair itself. According to home safety experts, furniture-related accidents often stem from incorrect installation, particularly with suspended items.
You’ll need to consider three primary installation methods:
- Ceiling mounting: Permanent installation into ceiling joists
- Tree branch hanging: Outdoor installation using tree-friendly techniques
- Stand-based setup: Freestanding, portable option requiring no permanent fixtures
The most critical safety consideration across all methods is weight capacity. Different swinging hammock chairs are designed to support varying weights, typically ranging from 150-330 pounds (68-150 kg). Always verify your specific chair’s weight rating before installation and never exceed this limit.
Before beginning any installation, ensure you have:
- Adequate clearance (minimum 3 feet/0.9 meters in all directions)
- Appropriate mounting hardware rated for your weight needs
- A clear understanding of the structural support requirements
Various swinging hammock chair sets come with different installation requirements, so understanding your specific model is essential before proceeding with any mounting method.
II. Essential Preparation: Before You Begin Installation
Selecting the perfect location for your swinging chair requires thoughtful consideration beyond just available space. Think about how you’ll use it – a reading nook might benefit from natural light near a window, while a meditation space might need a quieter corner away from household traffic. For outdoor relaxation, consider shade patterns throughout the day.
The structural integrity of your mounting point is non-negotiable. For ceiling mounts, you’ll need to locate solid joists, not just drywall. For outdoor tree installations, healthy, mature branches are essential. For stand-based setups, level, stable surfaces are required.
Understanding weight ratings is particularly important. Manufacturers provide two key figures:
- Static weight capacity: How much the chair can hold when still (higher number)
- Dynamic weight capacity: How much the chair can support while in motion (lower number)
Always base your installation decisions on the dynamic weight capacity, as the swinging motion creates additional stress on mounting points.
Thorough hanging chair installation tips can help you avoid common pitfalls that many first-time installers encounter. Following manufacturer guidelines precisely is essential, as each chair model may have specific requirements.
Before gathering your tools, check what you’ll need based on your installation method:
- Ceiling installation: Stud finder, drill with appropriate bits, wrench, ladder
- Tree hanging: Tree-friendly straps, measuring tape, ladder
- Stand assembly: Basic hand tools (often included with the stand)
Having all materials ready before you begin prevents mid-project delays and ensures a smooth installation process.

III. Ceiling Installation: Step-by-Step Process
Locate a ceiling joist: Using an electronic stud finder, locate a solid ceiling joist – these are typically spaced 16 or 24 inches (40.6 or 61 cm) apart. For additional verification, tap along the ceiling; joists produce a solid sound rather than a hollow one. Mark the joist center with painter’s tape.
Select appropriate mounting hardware: For most swinging chairs, a 3/8-inch (10mm) eye bolt or heavy-duty swing hook rated for at least 200 pounds (90kg) is recommended. For heavier chairs or multiple users, consider a mounting plate that attaches to multiple joists.
Drill a pilot hole: Using a drill bit approximately 1/16-inch (1.5mm) smaller than your mounting hardware’s shaft, create a pilot hole directly into the center of the joist. This prevents wood splitting while providing maximum thread engagement.
Install the mounting hardware: For eye bolts, thread the bolt into the pilot hole, turning clockwise until the eye is firmly against the ceiling with no visible threads. For mounting plates, secure with the provided lag bolts into pre-drilled pilot holes.
Attach hanging components: Connect your chair to the ceiling mount using appropriate components:
– Chain: Provides stability and easy height adjustment
– Rope: Offers aesthetic appeal but requires secure knots
– Spring: Adds bounce and reduces strain on mounting points
– Swivel: Allows for 360-degree rotationTest the installation gradually: Before full use, test your installation with increasing weight:
– First test: Apply 25% of the maximum weight capacity
– Listen for creaking sounds or observe any movement of the mounting hardware
– Gradually increase to 50%, then 75%, and finally full capacity
– Check that the mounting hardware remains firmly in place
Understanding how to install porch hammock chairs properly will ensure your suspended seat remains secure. Warning signs of improper installation include creaking noises when weight is applied, visible movement of the mounting hardware, or any sagging of the ceiling material around the mount.
Regular inspection of your ceiling mount is essential – check monthly for any signs of loosening hardware or structural changes, especially after periods of heavy use.
IV. Outdoor Tree Branch Installation
When installing your swinging chair from a tree, selecting the right branch is crucial for both safety and tree health. Look for mature hardwood trees like oak, maple, or beech with healthy branches at least 6-8 inches (15-20 cm) in diameter. Avoid softer woods like pine or fruit trees, which may not support the weight or could be damaged by the installation.
The ideal branch should be:
– Horizontal or nearly horizontal
– Free of visible damage, disease, or insect infestation
– At least 8-10 feet (2.4-3 meters) from the ground
– Attached to a healthy, mature tree
To protect the tree during installation:
Use wide tree straps: These distribute weight and prevent bark damage. Avoid ropes or chains directly against the bark, which can cause girdling and potentially kill the branch.
Position hanging points properly: Place straps at least 3-4 feet (0.9-1.2 meters) from the trunk where the branch is strong but not too flexible.
Check for branch movement: Assess how much the branch moves in windy conditions. Excessive movement indicates the branch may not be suitable.
Install with tree protection in mind: Use adjustable straps that can be loosened periodically to accommodate tree growth.
For outdoor installations, weather considerations become important. Consider:
– Removing or covering the chair during severe weather
– Using weather-resistant hardware (stainless steel or galvanized)
– Checking the installation more frequently than indoor setups
If you prefer a more controlled outdoor setup without depending on trees, various hammock chairs with stands provide excellent alternatives that can be placed anywhere in your yard or patio.
Remember that seasonal changes affect outdoor installations – tree branches may move differently when laden with snow or when leaves create additional wind resistance. Plan to inspect and potentially adjust your installation with the changing seasons.
V. Using a Swinging Chair Stand: The Portable Solution
Swinging chair stands offer significant advantages over permanent installations, making them increasingly popular for both indoor and outdoor use. These freestanding structures eliminate the need for drilling into ceilings or relying on suitable tree branches, providing flexibility in placement and easy relocation.
The main types of swinging chair stands include:
C-stands: These feature a C-shaped design with a heavy, stable base and overhanging arm that supports the chair from above. They typically offer the most stability and highest weight capacity.
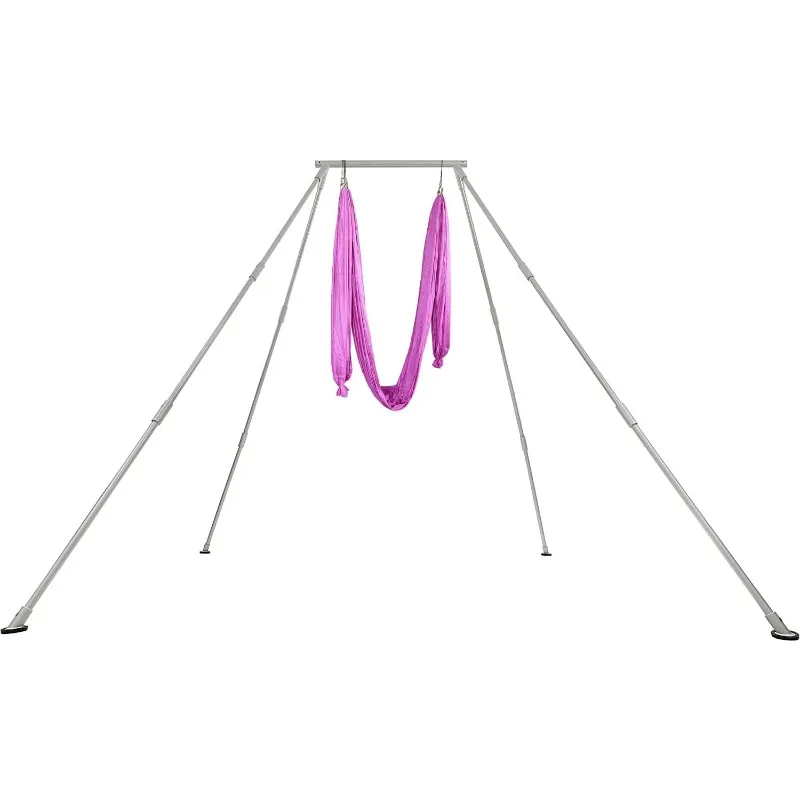
Tripod stands: Using three legs in a pyramid configuration, these stands balance weight distribution efficiently while maintaining a relatively small footprint.
A-frames: Resembling the letter A, these stands are often lightweight, portable, and easy to assemble, though they may have lower weight capacities than other designs.
Assembly instructions vary by model, but generally follow these steps:
- Lay out all components and identify them according to the manufacturer’s guide
- Assemble the base components first to create a stable foundation
- Connect vertical supports, ensuring all bolts are properly tightened
- Attach the suspension point or hanging bar at the top
- Test the stand’s stability before hanging your chair
When setting up your stand, surface considerations are important. On decks or patios, ensure the stand sits flat without rocking. On grass or soft surfaces, you may need to place the stand on a flat wooden board to prevent sinking and ensure stability.
For those with limited space or who enjoy changing their relaxation spots, patio-friendly swinging hammock chairs with stands provide the perfect solution. Most quality stands support between 250-350 pounds (113-159 kg), but always verify the specific rating for your model.
If you prefer spacious comfort, deep seat hammock chair sets paired with appropriate stands create luxurious relaxation spaces that can be moved to follow the shade or accommodate guests.

VI. Hardware and Hanging Components Guide
Selecting the right hardware for your swinging chair installation significantly impacts both safety and functionality. Each component plays a crucial role in the overall system:
| Component Type | Recommended Materials | Weight Rating | Best For |
|---|---|---|---|
| Eye Bolts | Stainless steel, forged steel | 300-600 lbs (136-272 kg) | Ceiling mounts, permanent installations |
| Ceiling Hooks | Stainless steel with closed design | 200-300 lbs (90-136 kg) | Lighter chairs, indoor use |
| Carabiners | Climbing-grade aluminum or steel | 200-800 lbs (90-363 kg) | Quick connections, adjustable setups |
| S-Hooks | Marine-grade stainless steel | 150-300 lbs (68-136 kg) | Chain connections, height adjustments |
| Chain | Stainless or galvanized steel, min. 1/4 inch (6mm) | 400-800 lbs (181-363 kg) | Outdoor use, heavy chairs |
| Rope | Polyester or nylon, 3/8-1/2 inch (10-13mm) | 300-700 lbs (136-318 kg) | Aesthetic installations, indoor use |
| Springs | Stainless steel with safety covers | 200-300 lbs (90-136 kg) | Adding bounce, reducing structural stress |
| Swivels | Sealed bearing, stainless steel | 200-600 lbs (90-272 kg) | Allowing 360° rotation |
When choosing connecting components, remember that your installation is only as strong as its weakest link. For adults, never use hardware rated less than 250 pounds (113 kg), and apply a safety factor by choosing components rated at least 1.5 times your actual weight requirements.
Material considerations are particularly important for outdoor installations:
- Stainless steel offers superior corrosion resistance but at higher cost
- Galvanized steel provides good outdoor durability at moderate prices
- Nylon rope offers UV resistance but can stretch over time
- Polyester rope maintains length better but may have less give
Following hammock installation requirements and safety guidelines ensures all components work together as a system. Many experienced installers recommend adding a swivel component to prevent rope twisting and enhance the natural swinging motion, while springs can reduce stress on mounting points during active use.
VII. Safety Testing and Initial Use
After completing your swinging chair installation, proper safety testing is essential before regular use. Follow this progressive testing protocol:
Visual inspection: Carefully examine all connection points, hardware, and the chair itself for any manufacturing defects, loose components, or alignment issues.
Physical inspection: Firmly tug on the hanging components in various directions to check for stability. The mounting hardware should remain completely stationary without shifting or creaking.
Gradual weight testing:
– Apply 25% of the maximum rated weight and observe for any movement or concerning sounds
– Increase to 50% of the maximum weight, checking all connection points
– Test with 75% of the maximum weight, paying attention to how the system handles the load
– Finally, test with the full maximum rated capacity (not exceeding manufacturer specifications)Movement testing: Gently swing in various directions, listening for unusual sounds and feeling for any instability.
During initial testing, be alert for warning signs including:
– Creaking or popping sounds
– Visible bending of hardware
– Movement at mounting points
– Unusual swaying or jerking motions
– Any sense of instability
For your first relaxing session, limit movement to gentle swinging rather than vigorous rocking. This allows hardware connections to settle properly and helps identify any potential issues before they become problematic.
Remember that different installations have different “normal” sounds and movements – ceiling mounts may creak slightly as hardware settles, while stand-based installations should remain virtually silent during use.
VIII. Height Adjustments and Ergonomic Positioning
Finding the perfect height for your swinging chair transforms the experience from merely comfortable to truly ergonomic. For most adults, the ideal seat position places the bottom of the chair approximately 16-20 inches (40-50 cm) from the floor, allowing feet to touch the ground easily while seated. For children, proportionally lower heights maintain proper ergonomics.
Different chair types have specific height considerations:
- Egg and pod chairs: Typically hung higher (18-24 inches/45-61 cm from floor) to accommodate their deeper seating profile
- Hammock chairs: Often positioned slightly lower (14-18 inches/35-45 cm) for easy entry and exit
- Macramé chairs: Usually adjusted to medium height (16-20 inches/40-50 cm) based on their flexible nature
To make precise height adjustments:
- Chain systems: Simply count links to ensure consistent height
- Rope systems: Mark measured intervals with colored tape before making adjustments
- Spring systems: Add or remove connecting hardware to achieve desired height
The perfect height should allow you to:
– Enter and exit the chair easily without awkward movements
– Touch the ground lightly with your feet when desired
– Feel balanced when swinging gently
Many hanging egg chair sets come with adjustable hanging systems, making it easier to find your optimal position. For most users, the sweet spot provides light contact with the ground while seated deeply in the chair, allowing for controlled movement without straining to reach the floor.
Test your height setting by sitting for at least 15 minutes, noting any pressure points or awkward positioning. Make small, incremental adjustments until you achieve ideal comfort.
IX. Ongoing Maintenance and Seasonal Care
Maintaining your swinging chair installation ensures both safety and longevity. Establish a regular inspection routine:
Weekly Visual Inspections:
– Check for fraying ropes or chains
– Look for any signs of wear at connection points
– Verify that mounting hardware remains flush and secure
– Ensure the chair fabric or weaving remains intact
Monthly Physical Inspections:
– Test all hardware connections for tightness
– Examine structural components for any bending or stress
– Check that spring or swivel components move freely
– Verify weight capacity hasn’t been compromised
For outdoor installations, weather protection for patio hammock chairs becomes especially important. Seasonal maintenance should include:
Spring Care:
– Thoroughly clean all components after winter storage
– Check for any rust or corrosion on metal parts
– Tighten any hardware that may have loosened
– Apply appropriate weather protectants to wooden components
Fall Preparation:
– Consider removing or covering outdoor installations
– Apply additional waterproofing to fabric components
– Inspect tree branches for seasonal changes or damage
– Tighten all connections before potential winter storms
Hardware maintenance is simple but crucial – keep moving parts like swivels lightly lubricated with silicone-based products, and immediately address any squeaking or grinding noises as they indicate friction that could lead to premature wear.
Watch for warning signs that require immediate attention:
– Visible rust or corrosion on any metal components
– Fraying of ropes or chains beyond surface wear
– Cracking sounds when weight is applied
– Any shifting of mounting hardware from its original position


Dark Wood Hammock Sets, Porch Swing Chair Sets
$653.82 Select options This product has multiple variants. The options may be chosen on the product page
A-Frame Stand Hammock Sets, Swinging Hammock Chair Sets
$154.62 Select options This product has multiple variants. The options may be chosen on the product page
Light Wood Hammock Sets, Swinging Hammock Chair Sets
$1,359.35 Select options This product has multiple variants. The options may be chosen on the product page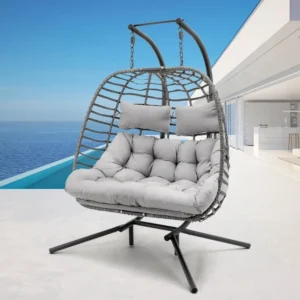 $963.29 Select options This product has multiple variants. The options may be chosen on the product page

Complete Camping Hammock Systems, Hanging Egg Chair Sets
$266.73 Select options This product has multiple variants. The options may be chosen on the product page
Deep Seat Chair Hammock Sets, Hanging Egg Chair Sets
$165.85 Select options This product has multiple variants. The options may be chosen on the product page
X. Troubleshooting Common Installation Issues
Even with careful installation, you may encounter issues that require adjustment. Here are solutions to the most common problems:
Excessive Movement or Instability
– Problem: Chair swings too widely or feels unstable during use
– Solution: Add stabilizing elements like a second attachment point, reduce hanging chain/rope length, or install motion limiters (like strategically placed bungee cords)
Creaking or Unusual Noises
– Problem: Mounting hardware makes noise during use
– Solution: For ceiling mounts, verify the bolt is in the center of the joist and tighten completely. Apply thread-locking compound to prevent loosening. For stands, tighten all bolts and check for parts rubbing together.
Uneven Hanging or Tilting
– Problem: Chair hangs at an angle or tilts to one side
– Solution: Check that mounting points are level. For ceiling mounts, verify the joist is straight. For rope systems, ensure equal length on all suspension points. Adjust chain links or rope length to correct balance.
Height Adjustment Problems
– Problem: Difficulty achieving the right height
– Solution: For chain systems, add S-hooks for more incremental adjustments. For rope systems, learn adjustable knots like the trucker’s hitch for fine-tuning.
Wear Points on Ropes or Chair Materials
– Problem: Visible fraying where components rub together
– Solution: Add protective sleeves at friction points, install swivels to prevent twisting, or reposition connections to distribute wear more evenly.
For stands specifically, wobbling is often solved by ensuring all legs contact the ground evenly. On uneven surfaces, use shims under specific legs to create stability. Remember that most issues can be resolved with minor adjustments rather than complete reinstallation.
XI. Enhancing Your Swinging Chair Experience
Once your chair is securely installed, consider these enhancements to elevate your relaxation experience:
Comfort Accessories
– Add supportive lumbar pillows for extended lounging
– Layer weather-resistant cushions in complementary colors
– Include a small side table within reach for books or beverages
– Drape a lightweight throw blanket for cooler evenings
Weather Protection Solutions
– Install a retractable shade or canopy above outdoor chairs
– Use quick-release hanging systems for rapid removal during storms
– Apply fabric protectants appropriate for your chair material
– Consider decorative covers that protect while enhancing aesthetics
Ambient Environment Creation
– String gentle lighting nearby for evening relaxation
– Position potted plants around the base to create a natural sanctuary
– Add a small outdoor rug beneath for a defined relaxation zone
– Incorporate sound elements like wind chimes for multisensory enjoyment
Perfectly positioning your swing hammock chair within your space creates not just a piece of furniture, but a dedicated relaxation zone. Consider seasonal rotations – in summer, position for maximum shade and breeze; in winter, capture available sunlight for warmth.
The beauty of a properly installed swinging chair extends beyond the chair itself – it becomes the centerpiece of a personal retreat that engages all your senses and invites daily moments of pause and reflection.
XII. Is Professional Installation Right for You?
While many swinging chair installations are suitable for DIY approaches, certain situations warrant professional assistance:
Consider professional installation when:
- Your ceiling is concrete, reinforced, or has unusual construction
- Installation points are extraordinarily high (over 12 feet/3.7 meters)
- You’re unsure about locating structural support elements
- Your chair exceeds 300 pounds (136 kg) in weight capacity
- You have physical limitations that make installation challenging
- The installation requires modification to structural elements
Professional installation typically costs between $100-300 depending on complexity and location. When hiring an installer, look for:
- Experience specifically with hanging furniture or swinging elements
- Proper insurance and bonding
- References from previous similar installations
- Clear explanation of their process and hardware choices
- Willingness to discuss load ratings and safety factors
Questions to ask potential installers:
– What type of mounting hardware will you use?
– How will you identify the structural supports?
– What safety factors do you build into your installations?
– Do you provide any warranty or guarantee for your work?
For specialized installations like porch swing chair sets with custom mounting needs, professional experience can make the difference between a merely functional setup and one that provides years of trouble-free enjoyment.
XIII. FAQs About Swinging Chair Installation
Q: What’s the typical weight capacity for different installation methods?
A: Ceiling joist installations typically support 300-400 pounds (136-181 kg), proper tree branch installations 250-350 pounds (113-159 kg), and quality stands 250-300 pounds (113-136 kg). Always verify specific ratings for your components and apply a safety margin.
Q: How do indoor and outdoor installations differ?
A: Outdoor installations require weather-resistant hardware (stainless steel or galvanized), UV-resistant ropes or chains, more frequent maintenance checks, and consideration for seasonal removal during harsh weather conditions.
Q: What safety precautions should I take for children using swinging chairs?
A: Install at appropriate height for easy access, use chairs with side supports for younger children, implement a lower maximum weight capacity, add soft ground covering beneath, and teach proper entry/exit techniques to prevent tipping.
Q: How can I install a swinging chair in a rental property?
A: Use free-standing stands that require no permanent fixtures, consider tension-mounted support systems between floors and ceilings (similar to tension shower rods but much stronger), or use doorway-mounted options with landlord approval.
Q: How do I move my swinging chair to a new location?
A: For ceiling mounts, install a second mounting point in the new location before moving. For tree installations, use adjustable straps that can be easily relocated. Document your current installation with photos before disassembly to reference during reinstallation.
Q: Can I leave my outdoor swinging chair installed year-round?
A: This depends on your climate and chair materials. In moderate climates with proper weather-resistant components, year-round installation is possible with regular maintenance. In severe climates (heavy snow, extreme heat), seasonal removal is recommended to extend the life of your chair.
XIV. Enjoying Your Properly Installed Swinging Chair
With your swinging chair correctly installed and thoroughly tested, you’re ready to enjoy one of the most uniquely relaxing experiences home comfort can offer. The gentle rocking motion has been shown to reduce stress hormones and promote relaxation by stimulating the vestibular system – the same reason rocking chairs have been used for centuries to promote calm.
Remember these key principles to maintain your relaxing retreat:
- Schedule regular quick visual inspections to catch any maintenance needs early
- Keep your chair clean according to the specific material guidelines
- Respect the weight limits established during installation
- Adjust seasonal accessories to maximize comfort year-round
Your swinging chair creates opportunities for special moments – from morning coffee with a gentle sway, to afternoon reading sessions cradled in comfort, to evening relaxation watching the sunset. By following proper installation and maintenance procedures, you’ve created not just a piece of furniture, but a personal sanctuary that will provide years of enjoyment.
The perfect swinging chair experience combines proper installation with your personal touch – making it truly a reflection of your ideal relaxation environment.