
Understanding the Ultralight Hammock Philosophy
The ultralight hammock camping approach represents a radical shift from traditional outdoor sleeping systems. At its core, this philosophy embraces minimalism while maximizing comfort, with practitioners often aiming for a sub-10 pound base weight (everything you carry except consumables like food and water). This approach isn’t just about shedding pounds—it’s about rethinking your entire relationship with outdoor gear.
Hammock systems offer inherent advantages for those pursuing ultralight adventures. A complete ultralight hammock setup typically weighs 3-4 pounds, nearly half the weight of traditional hammock arrangements (7-8 pounds) and significantly lighter than most tent systems. This weight reduction doesn’t just make your pack lighter—it transforms your hiking experience entirely.
The benefits of embracing ultralight hammock camping include:
- Reduced physical strain and fatigue during hiking
- Ability to cover more distance with less effort
- Enhanced enjoyment of the journey rather than struggling with heavy loads
- Greater mobility and agility on challenging terrain
- Improved posture and reduced impact on joints
The introduction to ultralight hammock philosophy requires a fundamental mindset shift. Rather than asking “What should I bring?” ultralight hammockers ask “What can I leave behind?” This perspective values intentionality over convenience and multipurpose items over specialized gear.
Perhaps most importantly, hammock systems offer a superior weight-to-comfort ratio compared to ground setups. By eliminating heavy tent poles and bulky sleeping pads, you’re not just carrying less—you’re often sleeping better. Modern ultralight camping hammock sets provide exceptional comfort while keeping weight to an absolute minimum.
Essential Components of an Ultralight Hammock System
The Hammock Body
The foundation of any ultralight hammock system starts with the hammock body itself. Material selection critically impacts both weight and performance. Today’s ultralight hammocks typically use high-tech fabrics like Dyneema Composite Fabric (DCF) or specialized lightweight nylon.
Weight-conscious hammockers should consider:
- Dyneema (0.5-0.75 oz/sqyd) offers exceptional strength-to-weight ratio but at premium prices
- Lightweight nylon (1.0-1.7 oz/sqyd) balances affordability with respectable weight savings
- Ripstop patterns that provide durability without significant weight penalties
The lightest solo hammocks weigh just 7-11 oz (198-312 g), a remarkable achievement considering they support over 250 pounds. When selecting a hammock, consider whether integrated features justify their weight. For instance, camping hammock sets with bug nets add 2-4 ounces but eliminate the need for separate bug protection, potentially saving weight overall while adding convenience.
Size considerations matter significantly as well. While longer and wider hammocks (typically 11’ x 58”) offer more comfort, every extra inch adds weight. Many ultralight enthusiasts find that 10’ x 52” hammocks offer an excellent balance of comfort and weight savings for average-sized adults.
Suspension Systems: Going Lighter
Your suspension system—the components that attach your hammock to trees—offers surprising opportunities for weight reduction. Traditional rope or webbing straps can weigh 4-6 ounces, while ultralight alternatives like whoopie slings or Dyneema straps weigh just 1-2 ounces.
Hardware choices significantly impact overall weight as well. Consider these lightweight alternatives:
- Replace carabiners (0.9-1.5 oz each) with toggles (0.1-0.3 oz)
- Use titanium buckles instead of steel components
- Choose specialized ultralight suspension systems with integrated adjusters
Despite the focus on reducing weight, never compromise safety. Even ultralight suspension components should maintain a safe working load rating of at least 400 pounds. Understanding proper hammock weight capacity guidelines ensures you balance weight savings with necessary strength.
The lightest complete suspension systems weigh under 2 ounces while still providing quick adjustability and secure attachment. These systems often employ specialized materials like UHMWPE (Ultra-High-Molecular-Weight Polyethylene) cordage, which offers remarkable strength despite its thin diameter.
Insulation: Crucial Lightweight Options
Insulation represents a critical component of hammock systems that new hammockers often underestimate. Unlike ground sleepers, hammock campers need under-insulation to prevent “cold butt syndrome” caused by compressed sleeping bag insulation and air circulation beneath the hammock.
Underquilts provide the most efficient insulation solution, wrapping beneath your hammock to create a pocket of warm air. Ultralight options include:
- Down underquilts (12-16 oz) offering superior warmth-to-weight ratio
- Synthetic underquilts (16-22 oz) providing better performance when wet
- Partial-length underquilts (8-12 oz) that insulate only core areas for summer use
For top insulation, quilts outperform sleeping bags in hammock systems. Top quilts eliminate unnecessary insulation and zippers that would be compressed beneath you, saving 4-8 ounces compared to equivalent temperature-rated sleeping bags. Quilts also allow better temperature regulation and freedom of movement within the hammock.
The insulation system often represents the heaviest component of your hammock setup, but also the area where thoughtful choices yield the greatest weight savings without compromising comfort.
Weather Protection: Minimalist Tarps
Your tarp provides critical protection against rain, wind, and other elements. Ultralight tarps balance coverage against weight through careful material selection and design.
Material options include:
- Dyneema Composite Fabric (DCF/Cuben Fiber): Extremely lightweight (0.5-0.8 oz/sqyd) with excellent waterproofing but higher cost
- Silnylon: Moderate weight (1.1-1.5 oz/sqyd) with good waterproofing and stretch characteristics
- Silpoly: Similar weight to silnylon but with less stretching when wet
Tarp shapes significantly impact both protection and weight. Diamond tarps offer minimal coverage at the lowest weight (5-7 oz), while hexagonal tarps provide better protection at a slight weight penalty (7-10 oz). Winter campers might require full-coverage winter tarps (11-15 oz) with doors for complete protection.
Minimalist rigging solutions further reduce weight. Consider replacing heavy guy lines with 1.5mm Dyneema cord and using titanium shepherd hook stakes (0.2-0.4 oz each) instead of heavier aluminum options. Effective lightweight hammock gear organization ensures your tarp components stay together and deploy quickly when needed.
Pre-Packing Strategies: Planning for Ultralight Success
Successful ultralight hammock trips begin long before you hit the trail. The pre-packing phase—where you evaluate, select, and optimize your gear—often determines whether you achieve truly ultralight status or just carry a slightly lighter heavy load.
Start by creating a gear spreadsheet that tracks every item by weight, listing each component down to the gram. This visual representation quickly identifies heavy outliers that deserve scrutiny. Categorize items as “essential” (shelter, insulation, water purification), “conditional” (rain gear, first aid), or “optional” (camp shoes, extra clothing) to facilitate decision-making.
Understanding your true base weight provides the foundation for improvement. Calculate this by weighing everything except consumables (food, water, fuel). Beginners often start with 12-15 pound base weights, while intermediate hammockers achieve 8-12 pounds. Advanced ultralight practitioners maintain base weights under 8 pounds.
Seasonal adjustments significantly impact your carried weight. Summer setups typically weigh 2-3 pounds less than shoulder season gear, while winter hammocking might add 4-6 pounds for additional insulation and weather protection. Make deliberate seasonal gear lists rather than simply adding or subtracting items from your standard setup.
Before packing begins, perform a methodical gear review process:
- Weigh every component individually
- Question each item’s necessity (“Do I need this or just want it?”)
- Consider lighter alternatives for heavy items
- Evaluate multi-use potential for each piece of gear
- Test your systems before committing to a minimalist setup
Effective mastering pack efficiently pack hammock strategies ensure you bring exactly what you need and nothing more, setting the foundation for ultralight success.
Core Packing Techniques for Individual Components
Optimizing Hammock Packing
The hammock body itself presents unique packing challenges and opportunities. The age-old debate between stuffing versus rolling typically favors stuffing for synthetic materials, which prevents hard creases while allowing random compression patterns that reduce fabric stress. However, some hammock materials benefit from precise folding that aligns fibers consistently.
For most nylon hammocks, follow this stuffing technique:
- Hold the hammock body at its center point
- Loosely gather material in 6-8 inch sections, allowing air to escape
- Stuff from the middle outward into your storage bag
- Avoid twisting or forcing the fabric, which can create stress points
Specialized storage solutions like bishop bags or snake skins allow the hammock to remain attached to the suspension system, dramatically speeding setup and takedown. These systems add 0.5-1.5 ounces but often justify their weight through convenience and protection.
Moisture management remains crucial when packing hammocks. Always dry your hammock before long-term storage, and consider keeping a small absorbent cloth in your stuff sack to remove morning dew before packing. Following proper how to pack hammock hiking techniques ensures your hammock remains in optimal condition throughout your adventure.
Suspension System Organization
Properly organized suspension systems save weight, space, and significant frustration on the trail. Tangled suspension components rank among hammock campers’ top complaints, but simple techniques prevent this common issue.
Use these coiling methods to prevent tangles:
- Start with suspension fully extended and untangled
- Fold webbing straps in half repeatedly rather than wrapping around your hand
- Secure with a simple velcro strap or rubber band
- Store hardware like carabiners or buckles in the center of coiled straps
For continuous loop and whoopie sling systems, daisy-chain the cordage using slip knots that release instantly when pulled. This technique prevents knots while keeping components compact. Some ultralight hammockers use small silnylon stuff sacks (0.2-0.3 oz) to organize suspension separately from the hammock body.
Quick-deploy arrangements significantly improve the ultralight hammock setup guide process. Consider leaving tree straps connected to their respective hardware, ensuring you can immediately identify the head and foot ends without untangling components in the field.
Insulation Compression Strategies
Insulation typically occupies the most space in your pack, making effective compression crucial for ultralight hammock camping. Different insulation materials require specific compression approaches to prevent damage.
For down insulation:
- Start by loosely stuffing the item into its sack
- Gradually apply compression from multiple angles
- Allow 10-15 minutes for air to fully escape before final compression
- Store compressed only during trips, never for long-term storage
Synthetic insulation requires more careful handling, as aggressive compression can permanently damage the material structure. Compression sacks with multiple straps distribute pressure more evenly than stuff sacks, reducing material stress. Never store synthetic quilts compressed for more than a few days, as they may not fully recover their loft.
Moisture protection during compression becomes critical for insulation performance. Consider using water-resistant stuff sacks or pack liners to protect these vital components. The proper master hammock compression techniques can reduce insulation volume by 60-70% while preserving its thermal properties.
Warning: Never store down or synthetic insulation compressed during long-term storage between trips. This practice damages the material structure and dramatically reduces insulation effectiveness over time.
Tarp and Rainfly Folding Techniques
Tarps and rainflies benefit from systematic folding rather than stuffing, which minimizes wrinkles that can create water channeling issues. Proper folding also allows quicker deployment during unexpected rain.
Follow this efficient tarp folding sequence:
- Lay the tarp flat with ridgeline horizontal to you
- Fold in thirds lengthwise, creating a long rectangle
- Fold in half, then in thirds widthwise
- Roll tightly from one end, squeezing air out as you go
Managing attached guy lines prevents the frustrating “guy line spaghetti” that delays setup. Either wrap each line around its respective attachment point or use the “ranger band” method—wrapping each line in a figure-eight around your fingers, then securing the bundle with the final few inches of line.
For rapid deployment in rainy conditions, consider keeping your tarp accessible at the top of your pack or in an external pocket. Some ultralight hikers even use quick-release attachment systems for their camping hammocks stands and tarps, allowing near-immediate protection from sudden weather changes.
Backpack Organization for Maximum Efficiency
Weight Distribution and Pack Balance
Proper weight distribution transforms how your pack feels on the trail. Ultralight hammock systems require different packing strategies than traditional tent setups due to their unique component shapes and weights.
Follow these critical weight distribution principles:
- Place heavy, dense items (food, water filtration) centered between your shoulder blades
- Position medium-weight items (insulation) against your back
- Store lightweight bulky items (clothing, hammock body) toward the outside of the pack
- Keep frequently accessed items in external pockets or near the top
The center of gravity concept becomes especially important with lightweight loads. Aim to position the heaviest gear about 2-3 inches above your waist and close to your back, creating a stable carrying position that moves with your body rather than pulling you backward or sideways.
Common packing mistakes include placing heavy items too high (causing neck strain), too low (increasing hip belt pressure), or off-center (creating imbalance). These errors become more noticeable with lighter overall loads, as individual heavy items have greater proportional impact on balance.
Strategic Component Placement
Organizing your pack by zones creates intuitive access while maintaining proper weight distribution. For hammock systems, consider this zone approach:
Bottom Zone (Sleeping System)
* Underquilt and top quilt (compressed in waterproof sack)
* Extra clothing in compression sack
* Items not needed until camp
Middle Zone (Dense/Heavy Items)
* Food bag centered against your back
* Cooking system
* Water reservoir or bottles
* Bear canister (if required)
Top Zone (Frequent Access)
* Hammock body and suspension
* Rain gear and wind layer
* First aid kit
* Snacks and water filter
External Pockets
* Map, compass, and navigation tools
* Snacks for the day
* Sunscreen, bug spray, and small essentials
* Tarp (for quick access during rain)
This arrangement keeps your hammock and tarp accessible for quick setup upon reaching camp or during unexpected weather. Consider the natural sequence of your campsite setup when organizing gear. Quick-setup hammock sets benefit from being packed together with their suspension systems for immediate access.
Waterproofing Strategies
Effective moisture management makes the difference between comfortable nights and miserable experiences. Ultralight hammockers typically choose between two primary approaches: pack liner or individual dry sacks.
The pack liner approach (using a single waterproof liner inside your backpack) offers the lightest solution at 1-2 ounces, but makes accessing individual items more difficult. Individual ultralight dry sacks (0.5-1 oz each) allow better organization but add cumulative weight with each additional bag.
Critical components requiring absolute waterproofing include:
- Insulation (quilts, sleeping bags)
- Extra clothing, especially down items
- Electronics and batteries
- Maps and documents
For emergency moisture management, carry a turkey-sized oven bag (0.3 oz) as a backup waterproof layer. This ultralight solution provides critical protection if your primary waterproofing fails.
External Attachment Techniques
External attachments can free up internal pack space but come with significant trade-offs. Items carried outside your pack face greater exposure to damage, moisture, and loss. Reserve external attachment for bulky, lightweight, quick-dry items that don’t require waterproofing.
Secure attachment requires deliberate techniques:
- Use compression straps rather than bungee cords for stability
- Attach items symmetrically to maintain balance
- Keep external items close to your pack body to prevent snagging
- Use quick-release buckles for frequently accessed items
Trail hazards like branches can snag externally carried gear. Consider using a rain cover over external attachments or positioning items where you can visually monitor them while hiking.
The backpacking compact hammock guide offers additional external attachment methods specific to hammock components, helping you balance accessibility with protection.
Space-Saving Techniques and Multi-Purpose Gear
The transition from lightweight to truly ultralight hammock camping often comes through maximizing every item’s utility while eliminating single-purpose gear. This approach requires rethinking traditional camping assumptions and embracing creative solutions.
Advanced ultralight hammock campers focus on items serving multiple functions. Each multi-purpose item potentially eliminates several single-purpose alternatives, dramatically reducing overall pack weight and volume. The cumulative effect transforms your entire approach to outdoor gear.
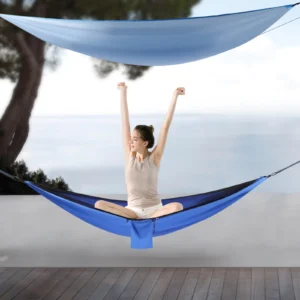

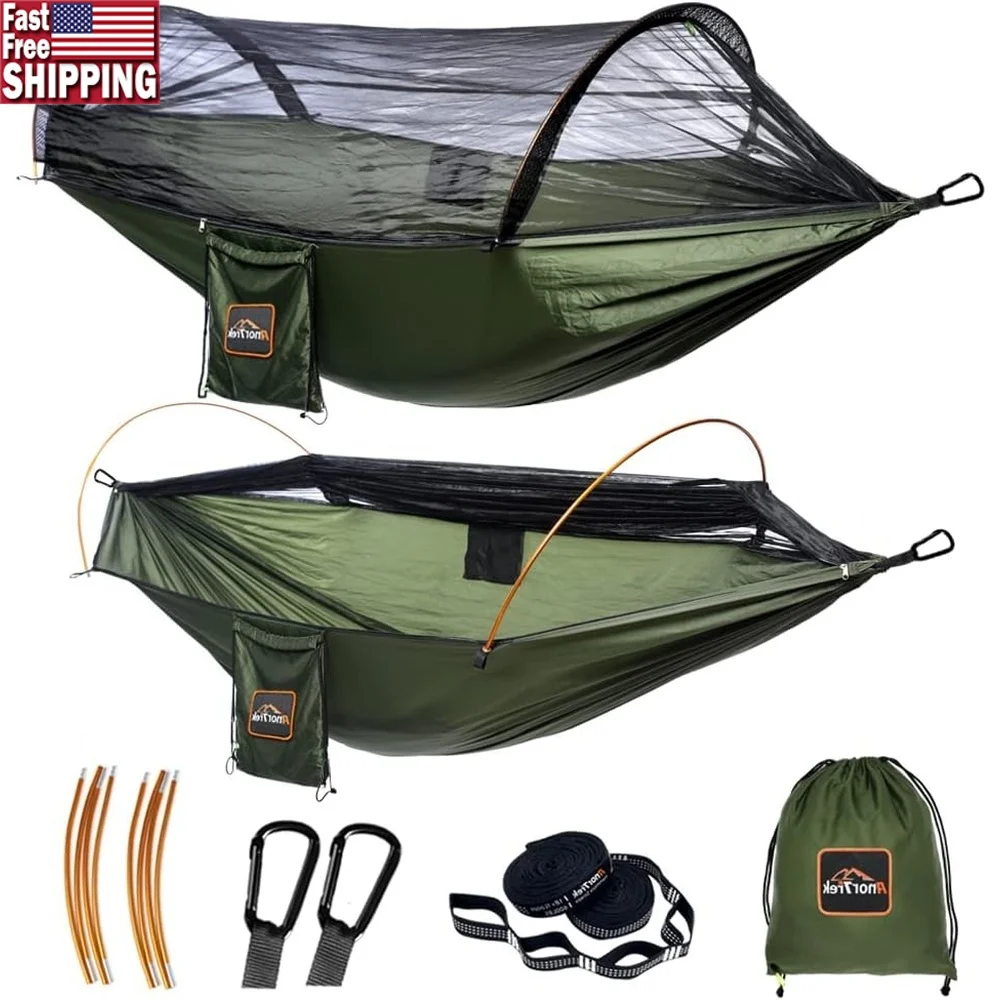
Camping Hammock Sets with Bug Net, Ultralight Camping Hammock Sets
$139.72 Select options This product has multiple variants. The options may be chosen on the product page
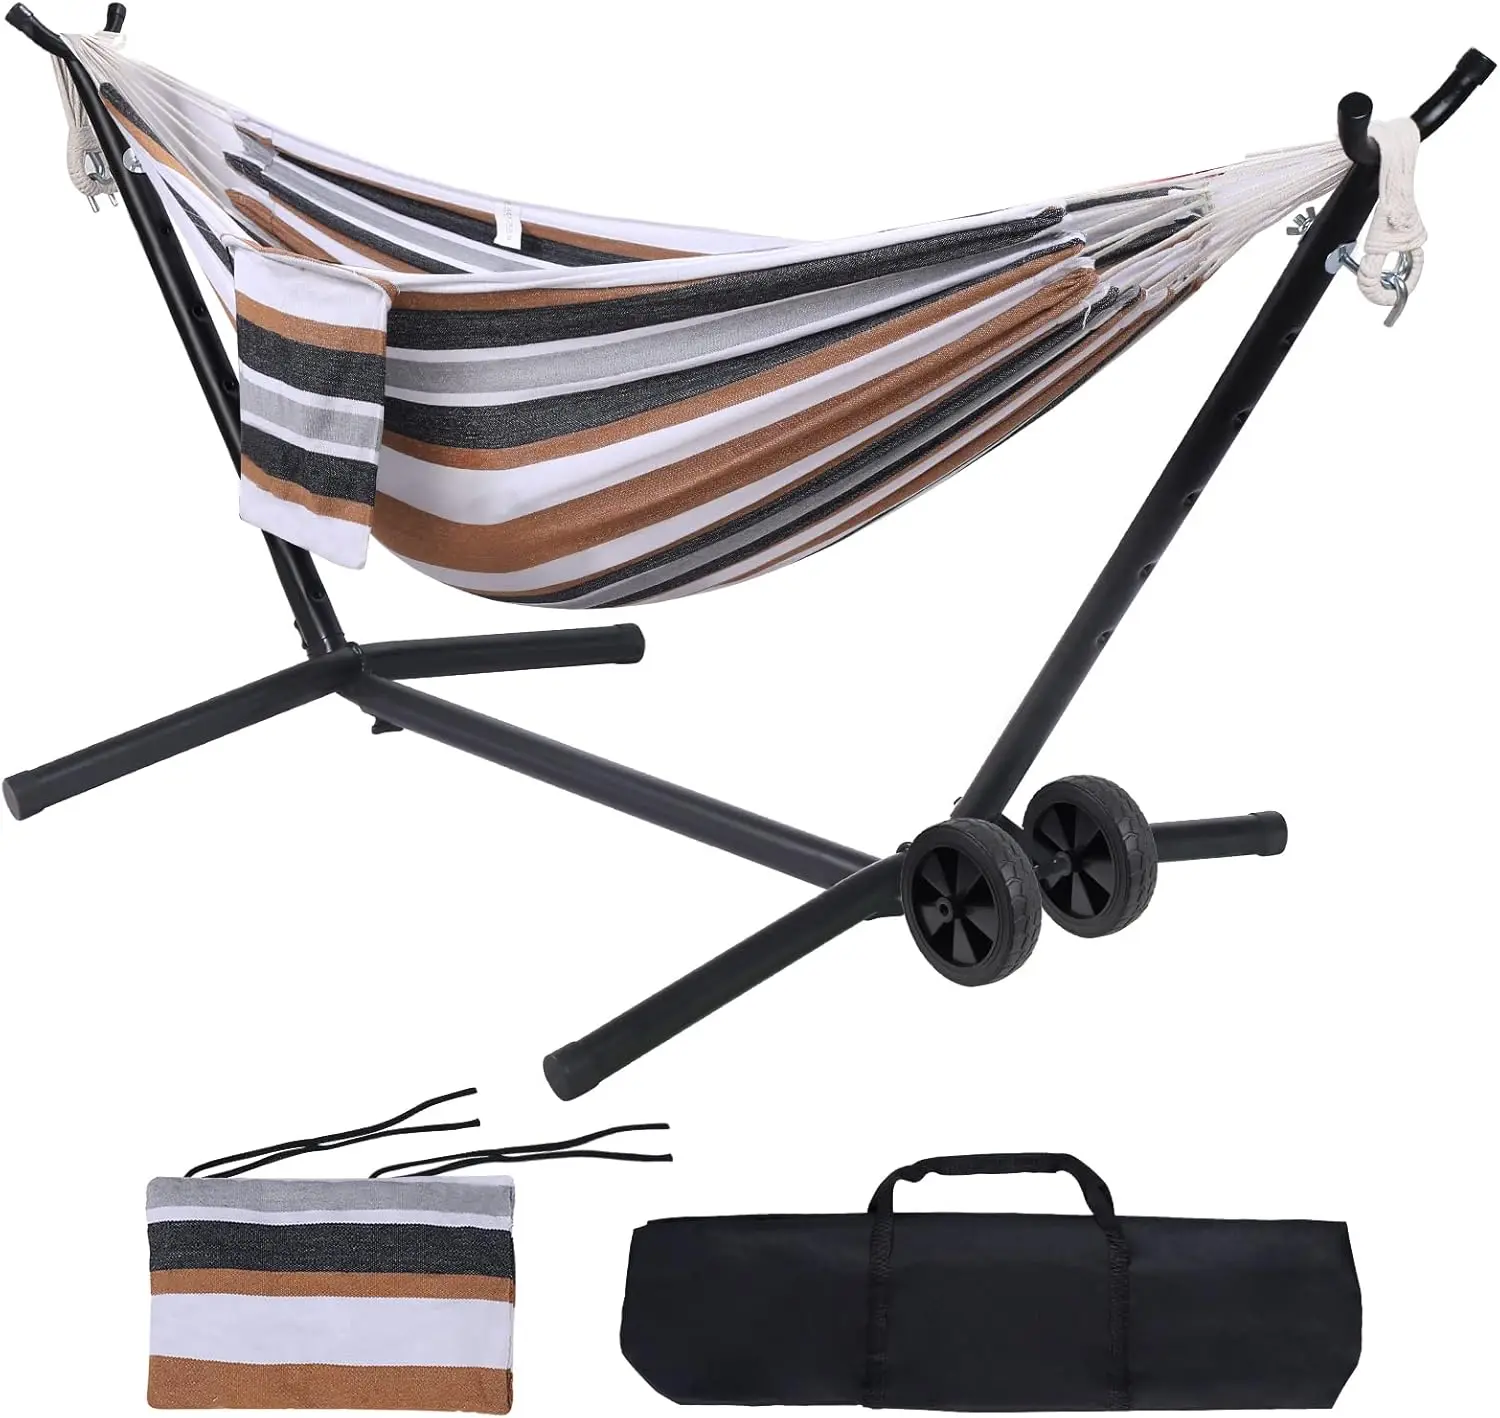
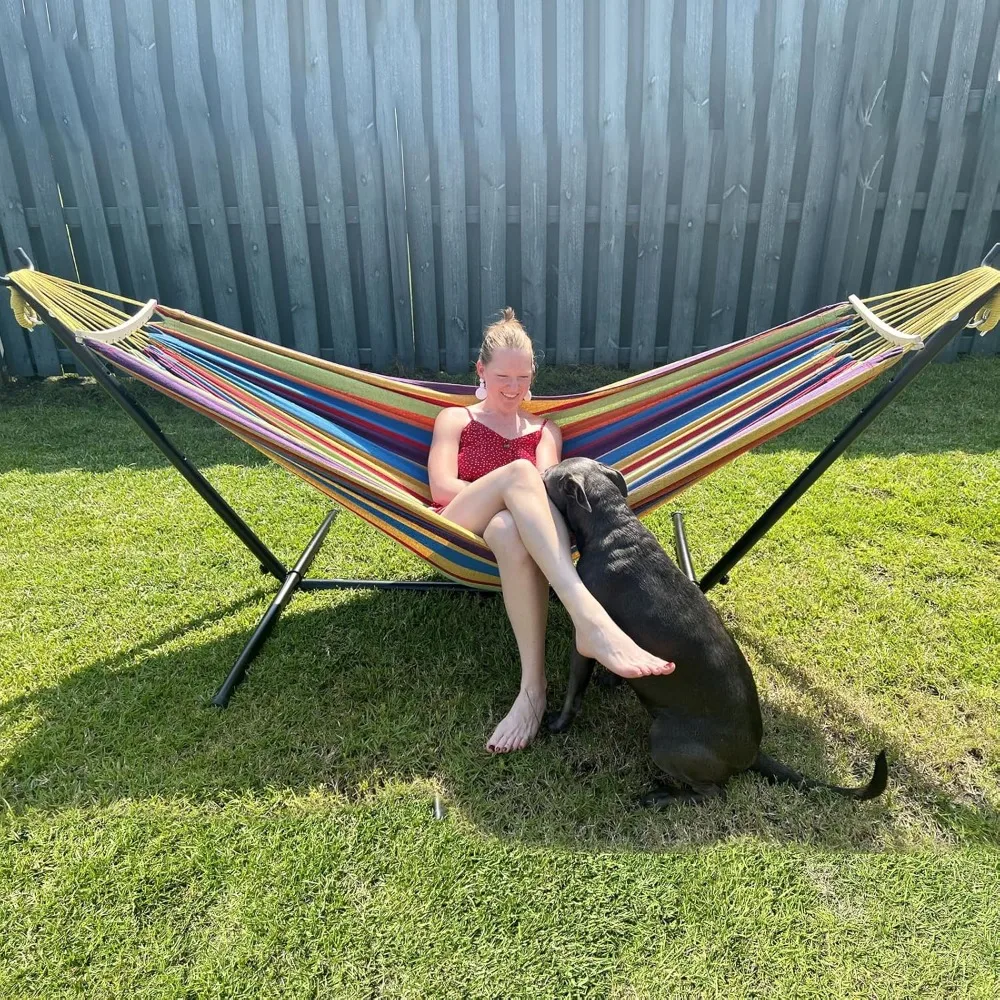
Folding Hammock Sets, Quick Setup Hammock Sets
Price range: $305.52 through $583.27 Select options This product has multiple variants. The options may be chosen on the product page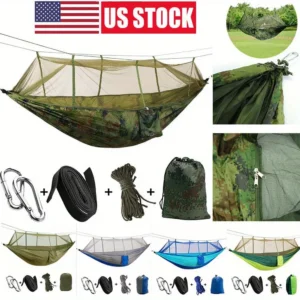
Camping Hammock Sets with Bug Net, Complete Camping Hammock Systems
Price range: $82.73 through $97.96 Select options This product has multiple variants. The options may be chosen on the product page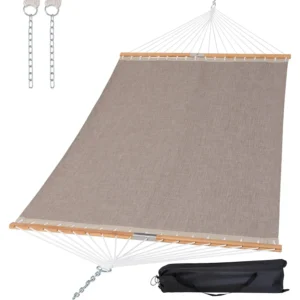
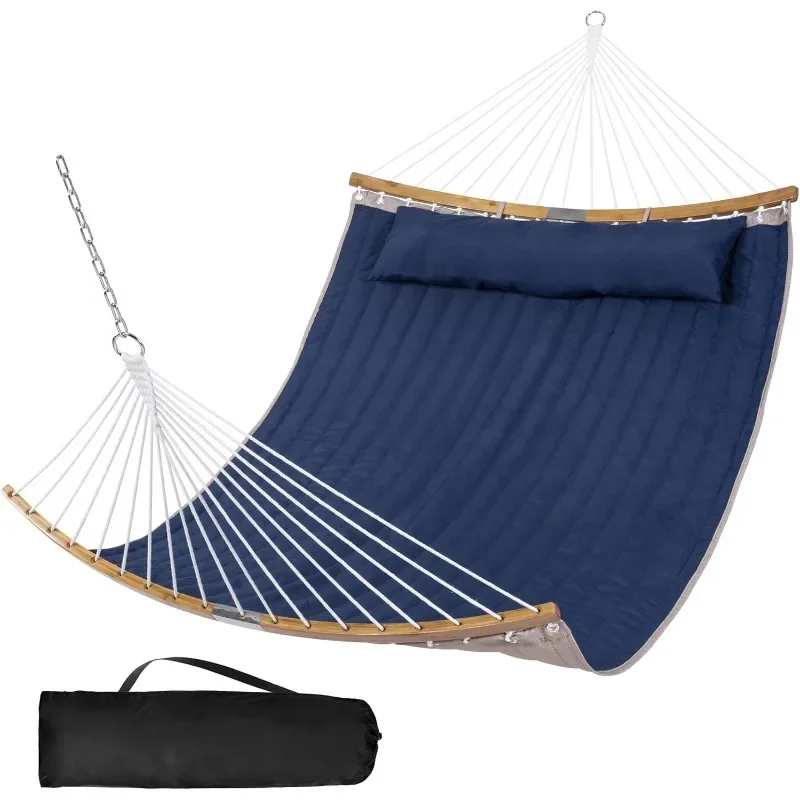
Lightweight Hammock Sets, Spreader Bar Hammock Sets
$292.43 Select options This product has multiple variants. The options may be chosen on the product page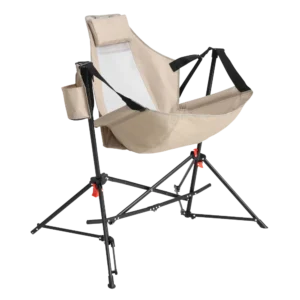
Folding Hammock Sets, Lightweight Hammock Sets
$295.80 Select options This product has multiple variants. The options may be chosen on the product page

Complete Camping Hammock Systems, Hanging Egg Chair Sets
$266.73 Select options This product has multiple variants. The options may be chosen on the product page
Advanced Compression Methods
Beyond basic stuffing and compression sacks, advanced techniques further reduce packed volume. The vacuum compression method creates remarkable space savings for soft goods like clothing and insulation:
- Place items in a durable plastic bag or specialized compression sack
- Close the bag almost completely
- Press out air while closing the final opening
- Roll from the bottom up, forcing remaining air out
- Secure with compression straps or rubber bands
Ranger rolling provides superior compression for clothing while keeping items wrinkle-free and easily identifiable:
- Lay garment flat and fold sleeves inward
- Fold bottom third upward
- Create a small fold at the top (~1 inch)
- Roll tightly from the collar down
- Use the small fold to secure the roll by wrapping it around
Space utilization strategies include filling empty spaces (like cook pots) with smaller items and using vacuum-sealed meal packages that conform to available spaces rather than rigid food containers.
Multi-Purpose Gear Selection
Hammock-specific multi-use items offer substantial weight savings. Consider these creative applications:
- Use your hammock’s ridgeline organizer as a stuff sack when packed
- Convert your pack liner to a water collection device or solar shower
- Employ trekking poles as tarp supports rather than carrying dedicated poles
- Utilize your hammock as a trail-side lunch spot or camp chair
This table demonstrates the weight savings achieved through multi-purpose selections:
| Traditional Setup | Weight | Multi-Purpose Alternative | Weight | Savings |
|---|---|---|---|---|
| Hammock Chair + Stuff Sack | 14 oz | Hammock with Chair Mode | 9 oz | 5 oz |
| Separate Bug Net | 6 oz | Complete camping hammock systems with Integrated Bug Net | 3 oz | 3 oz |
| Dedicated Tarp Poles | 8 oz | Trekking Poles with Adapters | 1 oz | 7 oz |
| Camp Chair | 16 oz | Hammock with Sit Kit | 2 oz | 14 oz |
| Total | 44 oz | Total | 15 oz | 29 oz |
This approach requires evaluating each item with the question: “How many problems can this solve?” The more versatile the item, the more justified its inclusion becomes.

Ultralight Clothing System
Hammock camping requires specific clothing considerations that differ from ground sleeping. The compressed insulation beneath your body in a hammock creates unique temperature regulation challenges that your clothing system must address.
Key hammock-specific clothing strategies include:
- Focus on thin, high-performance base layers that trap warm air effectively
- Prioritize insulated hats and socks (extremity protection becomes more important)
- Consider separate sleep clothes to keep moisture from day hiking out of your sleep system
- Use modular layers that can be combined for varied temperatures
Hammock-specific layering typically includes:
- Moisture-wicking base layer (both top and bottom)
- Lightweight insulating mid-layer
- Wind/rain protection shell
- Insulated hat, socks, and possibly hand protection
This system addresses the 360-degree air exposure experienced in hammocks versus the partial insulation ground provides to tent campers. The ventilation benefits of hammock camping become a challenge in colder conditions, making clothing selection particularly critical.
Eliminating Redundancy
Critical examination often reveals unnecessary redundancies in hammock systems. Common examples include:
- Multiple cutting tools (knife, scissors, multi-tool)
- Redundant water containers
- Extra stakes beyond what your setup requires
- Multiple light sources with similar functionality
Apply careful risk assessment before eliminating any potential backup item. Consider the consequence of failure, likelihood of failure, and available alternatives. Items protecting against life-threatening scenarios (water purification, insulation) warrant redundancy, while convenience items generally don’t.
Group hammock camping offers unique redundancy elimination opportunities. Shared items might include:
- Water filtration system
- Repair kit
- First aid supplies
- Cooking system
Following the “just enough” principle means carrying exactly what you need—no more, no less. This approach requires honest evaluation of your actual needs versus perceived ones, often informed by previous trip experiences.
On-Trail Management and Campsite Organization
Efficient Setup Sequence
An optimized setup sequence dramatically improves camp efficiency, especially in challenging weather. For hammock systems, this typically follows a shelter-first approach:
- Select appropriate trees and clear ground area of hazards
- Attach tree straps at sitting height
- Connect hammock to suspension and adjust for proper sag
- Deploy tarp over hammock, securing ridgeline first
- Adjust tarp sides and guy lines
- Install insulation (underquilt, then top quilt)
- Organize gear under hammock or on ridgeline
This sequence provides shelter quickly before unpacking your entire backpack. With practice, this process takes under 5 minutes for basic setups and 7-10 minutes for complete systems with insulation and accessories.
For rainy conditions, modify this sequence to prioritize tarp deployment first, creating a dry workspace before handling other components. Having your tarp accessible without unpacking your entire backpack becomes particularly valuable in sudden weather changes.
Campsite Organization
Effective ridgeline organization transforms your hammock from merely a sleeping space to a functional living environment. Most hammock campers use the ridgeline (the cord running above the hammock) as their primary organization point.
Optimize your hammock living space by:
- Attaching a lightweight mesh organizer (1-2 oz) to hold essentials like headlamp, glasses, and small items
- Using mitten hooks or small carabiners (0.1-0.3 oz each) to hang clothing or gear
- Positioning your backpack under your hammock’s foot end, protected by your tarp
- Creating a dedicated “wet zone” outside your tarp’s drip line for storing damp items
Night access considerations become particularly important in hammocks. Keep essential items like headlamp, water bottle, and personal needs within arm’s reach, either in ridgeline organizers or small stuff sacks hung beside you.
For secure pack storage, place your backpack on its back panel under your hammock, ideally on a small ground cloth if conditions are wet. This position protects it from ground moisture while keeping it accessible. Many folding hammock sets include integrated storage solutions specifically designed for efficient campsite organization.
Packing for Departure
Efficient morning departure requires a deliberate packing sequence that prevents forgotten items and maintains organization for future setups. Follow this reverse-order process:
- Pack sleep insulation first (it’s no longer needed and benefits from early compression time)
- Collect and store small items from ridgeline organizers
- Drop and pack tarp while hammock remains set up
- Use hammock as a “clean surface” for final gear organization
- Pack hammock and suspension last
This approach keeps your hammock deployed as a useful work surface until final departure, reducing the likelihood of leaving small items behind. The morning sequence typically completes in 7-10 minutes with practice.
Managing damp gear presents special challenges. Separate wet items from dry using lightweight plastic bags or dedicated wet storage compartments in your pack. Position damp items where they can benefit from body heat or external air circulation during your day’s hike.
Perform a systematic campsite sweep as your final action before departure, scanning the area in a clockwise pattern from ground level to hanging height. This disciplined approach dramatically reduces lost or forgotten gear.
Advanced Ultralight Techniques and Modifications
The journey from lightweight to ultralight often involves customizing gear beyond manufacturer specifications. These modifications require careful evaluation of risks and benefits, as they typically void warranties while delivering significant weight reductions.
DIY Weight-Reduction Modifications
Safe, effective hammock modifications can reduce weight without compromising structural integrity. Common approaches include:
Suspension Modifications (Moderate Difficulty)
* Replacing heavy carabiners with toggles or descender rings (saves 0.5-1 oz per end)
* Trimming excess webbing length based on typical tree sizes (saves 0.5-2 oz)
* Switching to lighter cordage materials while maintaining strength ratings (saves 1-3 oz)
Hammock Body Modifications (Advanced Difficulty)
* Removing unnecessary attachment points or reinforcements (saves 0.5-1.5 oz)
* Trimming excess fabric while maintaining structural integrity (saves 1-3 oz)
* Replacing heavy hardware with lighter alternatives (saves 0.5-1 oz)
Tarp Modifications (Varies by Modification)
* Replacing guy lines with lighter cordage (saves 0.5-1.5 oz)
* Removing unnecessary tie-outs (saves 0.5-1 oz)
* Substituting lighter stakes where appropriate (saves 1-3 oz)
Warning: Always test modifications gradually with safety margins. Never modify critical structural components or reduce cordage below recommended strength ratings.
Expert hammockers often document their modifications with before/after weights and performance evaluations. This methodical approach helps identify which modifications deliver meaningful benefits versus marginal improvements that might compromise reliability.
Extreme Minimalist Approaches
Experienced ultralight hammockers sometimes employ strategies that challenge conventional wisdom but deliver exceptional weight savings. These approaches require substantial experience and careful risk assessment:
- Frameless packs under 1 pound that use your sleeping pad or hammock components as structural support
- Tarp-only setups that eliminate bug protection in appropriate seasons and locations
- Suspension systems using minimal cordage and specialized knots instead of hardware
- Ultra-minimal insulation approaches matching insulation exactly to expected conditions
The lightest complete hammock systems achieve sub-5-pound base weights through these techniques. However, these approaches introduce significant compromises and require advanced skills. Most hikers should master standard ultralight techniques before pursuing these extreme measures.
Seasonal limitations become particularly important with minimalist setups. A system perfectly optimized for summer conditions may prove dangerously inadequate during shoulder seasons or unexpected weather changes.
Maintaining Ultralight Gear
Ultralight gear typically sacrifices durability for weight savings, making proper maintenance crucial for longevity. Different materials require specific care approaches:
- Dyneema/DCF products need protection from prolonged UV exposure and abrasion
- Ultralight nylons require gentle cleaning without harsh detergents
- Down insulation must be stored uncompressed and completely dry
- Synthetic insulation benefits from occasional tumble drying to restore loft
Field repair capabilities become especially important with lightweight gear. Carry a minimal repair kit including:
- Tenacious Tape for fabric repairs (0.5 oz)
- Replacement cordage for critical components (0.2-0.3 oz)
- Small sewing kit with needle and thread (0.1 oz)
- Multi-purpose gear repair tool with scissors (0.8-1.2 oz)
Between trips, store all components—especially insulation—fully dry and uncompressed. This practice significantly extends gear lifespan, protecting your investment in quality ultralight equipment.
Adapting Your Ultralight Strategy
The ideal ultralight hammock system varies significantly based on environment, season, trip duration, and personal preferences. Successful lightweight hammockers adapt their approach rather than applying a single formula to every situation.
Environmental factors requiring adaptation include:
- Desert environments: Focus on sun protection and reduced insulation
- Alpine zones: Prepare for rapid weather changes and increased wind exposure
- Dense forests: Consider narrower tarps to fit between closely spaced trees
- Open terrain: Plan for alternative suspension options where trees are limited
Seasonal modifications might include:
- Summer: Minimal insulation, smaller tarps, bug-focused protection
- Spring/Fall: Versatile insulation options, full-coverage tarps
- Winter: Maximum insulation, wider tarps with doors, wind protection
Trip duration considerations become particularly important beyond weekend adventures. For longer journeys, slightly heavier but more durable components often prove worthwhile, as the consequences of failure increase with trip length.
Personal comfort requirements vary significantly between individuals. Some hikers willingly accept greater discomfort for weight savings, while others prioritize sleep quality even at a weight penalty. There’s no universally “correct” balance—only the right approach for your specific needs and preferences.
Are Ultralight Hammock Systems Right for Everyone?
While ultralight hammock systems offer remarkable advantages, they’re not universally appropriate for all campers or situations. Consider these factors when evaluating whether to embrace this approach:
Who benefits most from ultralight hammock systems?
* Distance hikers covering substantial daily mileage
* Those with physical limitations making heavy loads problematic
* Backpackers in humid regions where hammocks excel
* Experienced campers comfortable with minimalist gear
Who might prefer traditional approaches?
* Campers prioritizing comfort over weight
* Those frequently camping in areas with limited trees
* Beginners still developing their outdoor skills
* Groups with young children or special needs
The learning curve for ultralight hammock camping proves steeper than traditional ground sleeping. Proper hanging technique, insulation management, and weather adaptation require practice to master. Most users report needing 5-7 nights before achieving consistently comfortable setups.
Comfort expectations require realistic calibration. While many find hammocks more comfortable than ground sleeping, ultralight hammock systems prioritize efficiency over luxury. For those seeking maximum comfort with less concern for weight, portable hammocks stands and more robust components might provide a better experience.
The ultralight approach requires accepting calculated compromises—carrying exactly what you need rather than preparing for every contingency. This mindset shift represents the most challenging aspect for many transitioning campers, but ultimately delivers the freedom that defines the ultralight hammock experience.
By mastering these techniques and finding your personal balance between weight and function, you’ll discover why so many backpackers have embraced ultralight hammock camping as their preferred wilderness shelter system.