
Understanding the Ultralight Hammock Revolution
Ultralight hammock camping represents a fundamental shift in how outdoor enthusiasts approach wilderness sleeping arrangements. By suspending yourself between two trees rather than setting up on potentially uncomfortable ground, hammock campers enjoy:
• Superior comfort through ergonomic support and the perfect diagonal lay
• Dramatically reduced pack weight (often 50% lighter than tent setups)
• Enhanced mobility and simplicity when setting up camp
• Freedom from uneven or rocky terrain concerns
• A unique connection with nature without barriers
For backpackers, thru-hikers, and minimalist campers, ultralight hammocking transforms the outdoor experience. While traditional tent setups often weigh 3-5 pounds at minimum, complete ultralight hammock systems frequently come in under 2 pounds—sometimes as light as 1.5 pounds for a full shelter system with weather protection.
The weight savings doesn’t just mean less strain on your shoulders; it translates to increased range, better energy levels, and a more enjoyable journey. When properly assembled, these minimalist systems provide superior comfort while occupying minimal pack space.
Learning proper ultralight hammock packing techniques allows hikers to maximize space efficiency while minimizing bulk. The transformation to hammock camping isn’t just about weight—it’s about reimagining your entire approach to outdoor sleep systems.
This comprehensive guide will walk through the essential components, setup process, and optimization techniques to help you create an ultimate ultralight hammock system that delivers on both comfort and portability.
Essential Components of an Ultralight Hammock System
A properly designed ultralight hammock setup functions as an interconnected system where each component complements the others. Understanding the relationship between these elements helps create a balanced approach to weight reduction while maintaining functionality and comfort.
When planning your system, consider the weight hierarchy—typically the hammock body, tarp, and insulation represent the heaviest components, followed by the suspension system and accessories. Each piece must be evaluated not only for its individual weight but for how it integrates with other components.
Proper lightweight hammock gear organization becomes crucial as you assemble your system, ensuring easy access and logical setup sequence.
The Hammock Body: Selecting for Weight and Comfort
The hammock itself forms the foundation of your sleep system. Modern ultralight hammocks typically weigh between 7-12 ounces while providing exceptional comfort and durability. Material selection plays a crucial role:
• Ripstop nylon (1.0-1.6oz/sqyd): The most common material offering good balance between weight, strength, and cost
• Polyester: Less stretch when wet compared to nylon, maintains consistent sag
• DCF/Cuben Fiber (0.8oz/sqyd): Premium ultralight option with excellent strength-to-weight ratio but higher cost
Construction factors significantly impact comfort and weight:
• Single vs. double layer: Single layer designs (7-10oz) maximize weight savings, while double layer constructions (12-16oz) provide reinforcement and a sleeve for inserting a sleeping pad
• Length: 10-11 foot hammocks optimize the diagonal lay position for flat sleeping despite minimal weight penalties
• Width: 55-58 inches provides adequate coverage for most users
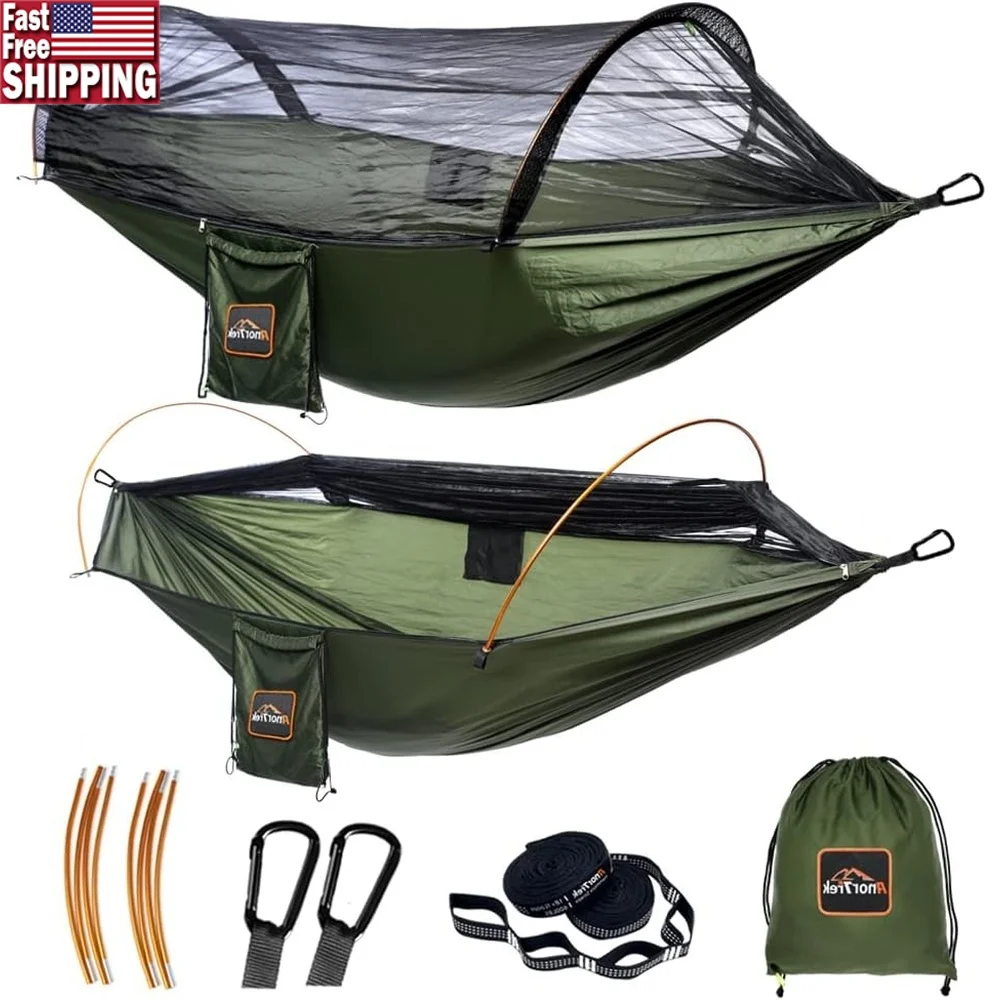
When considering bug protection, camping hammock sets with bug nets offer integrated solutions that often save weight compared to separate components. Integrated nets typically add 3-5 ounces but eliminate connection points and simplify setup.
Ultralight Suspension Systems: The Critical Connection
Your suspension system creates the vital link between hammock and anchor points, requiring a balance of minimal weight and maximum reliability. Key components include:
• Tree straps: Minimum 1-inch width polyester or Dyneema webbing (1.0-1.5oz each) distributes pressure and protects tree bark
• Adjustment mechanisms:
* Whoopie slings: Adjustable Amsteel loops weighing 0.5-0.7oz per side
* Cinch buckles: Hardware-based solution (0.8-1.2oz) offering easy adjustment with minimal knowledge
* Daisy chain systems: Integrated adjustment loops for quick setup (slightly heavier but simpler)
* Hardware-free options: Using specialized knots eliminates weight but requires skill
The ideal ultralight suspension aims for 2-4 ounces per side while maintaining safety and adjustability. Beyond weight considerations, responsible hammockers always prioritize tree protection through properly designed wide straps and careful site selection.
Structural Ridgeline: The Key to Consistent Comfort
A structural ridgeline runs between the gathered ends of your hammock, maintaining optimal sag regardless of hanging distance or tension. This small but critical component weighs just 0.5-1.0 ounce while providing:
• Consistent comfort through perfect 30° suspension angle and hammock curvature
• Fixed reference point for accessories (bug nets, gear organizers)
• Support for interior organization and gear hanging
• Reliable setup repeatable across different locations
Most ultralight ridgelines use Dyneema or Amsteel cord set to approximately 83% of the hammock’s total length. Fixed-length ridgelines are lighter than adjustable ones and ensure consistent geometry. This seemingly small component dramatically impacts your sleeping position and overall comfort.
Tarp Selection: Weather Protection at Minimal Weight
Your tarp selection balances coverage, weight, and packability, with several shapes offering different advantages:
• Hexagonal (hex) tarps: The most popular balance of coverage vs. weight
• Asymmetrical (asym) tarps: Weight-optimized designs matching diagonal lay
• Rectangular tarps: Maximum coverage for severe conditions
• Diamond/square tarps: Ultralight minimalist option for fair weather
• Catenary-cut edges: Reduce fabric flapping and weight through tensioned curves
Material selection dramatically impacts weight and performance:
• Silnylon: 1.1-1.3oz/sqyd, good affordability, some stretch when wet
• Silpoly: Similar weight to silnylon but maintains tension when wet
• DCF/Cuben Fiber: Premium ultralight option (0.5-0.8oz/sqyd) with no stretch
The lightest functional tarps weigh 5-8oz, while more protective models range from 8-12oz. Proper compact tarp and hammock packing techniques ensure minimal bulk in your backpack.
Insulation Solutions: Underquilts and Topquilts
Unlike ground sleeping where a pad creates an insulation barrier, hammock campers deal with “Cold Butt Syndrome”—compressed insulation underneath your body that loses effectiveness. Proper insulation systems solve this:
• Underquilts:
* Hang beneath the hammock, providing uncompressed insulation
* Full-length (16-22oz) vs. 3/4 length (12-16oz) options balance weight and coverage
* Down insulation offers superior warmth-to-weight ratio (20-30% lighter than synthetic)
* Suspension systems ensure proper positioning without compression
• Topquilts:
* Function like a sleeping bag without the underside and zipper
* Save 20-30% weight compared to traditional sleeping bags
* Allow easier movement and temperature regulation
* Typically weigh 16-24oz for 3-season conditions
• Temperature ratings:
* Summer (45°F+): 12-18oz systems
* 3-Season (25-45°F): 20-30oz systems
* Winter (below 25°F): 30oz+ systems
While sleeping pads can work (especially inflatable ones at 12-16oz), they shift and compress in hammocks, making purpose-built underquilts the preferred ultralight solution.
Lightweight Accessories and Hardware Minimization
Small components add up quickly in weight calculations, making accessory selection critical:
• Essential hardware:
* Titanium or aluminum stakes (0.2-0.4oz each) for tarp guylines
* Dyneema guylines (0.5mm or 1.2mm) save significant weight over paracord
* Soft shackles or toggles (0.1-0.2oz) replace heavier carabiners
* Ridgeline organizers (0.3-0.5oz) keep small items accessible
• Knowledge-based weight savings:
* Replacing hardware with knots saves 0.5-1.5oz per connection
* Multi-functional items (trekking poles as tarp supports)
* Ditty bags made from ultralight materials for organization
Mastering hammock compression techniques helps minimize the bulk of these accessories, further optimizing your pack.
Selecting the Perfect Hang Site
The foundation of a successful ultralight hammock experience starts with finding the right location. Ideal site selection considers:
• Tree selection:
* Diameter: Minimum 6 inches (about forearm thickness) for adequate support
* Health: Live, healthy trees without visible damage or dead branches
* Species: Hardwoods preferred over soft-barked varieties
* Spacing: Ideally 12-15 feet apart (adjustable with longer suspension)
• Ground assessment:
* Clear of sharp objects or hazards beneath your hammock
* Good drainage to prevent water pooling during rain
* Position relative to terrain features for natural wind protection
* Minimal impact on vegetation and soil
• Environmental considerations:
* Awareness of local regulations regarding hammock use
* Avoiding sensitive ecological areas or tree species
* Checking overhead for widow-makers or dangerous branches
* Anticipating sun exposure for morning warmth or afternoon shade
Before unpacking, take a few moments to observe the area, visualize your complete setup, and consider how weather patterns might affect your site throughout your stay.
Step-by-Step Ultralight Hammock Setup Process
Setting up an ultralight hammock system follows a logical progression that maximizes efficiency while ensuring proper positioning. The sequence outlined below represents the most effective approach for most conditions, though adaptations may be necessary for specific environments.
The setup process becomes increasingly efficient with practice, with experienced hammockers achieving complete shelter setup in under 5 minutes. In adverse conditions, prioritize tarp setup first to create a dry workspace for the remaining components.
Organizing your pack with a strategic sequence in mind—typically suspension system first, followed by tarp, hammock, and insulation—facilitates a smooth setup process. Our complete camping hammock systems are designed with this logical progression in mind.
Step 1: Tree Strap Deployment and Suspension Attachment
- Select appropriately spaced trees (12-15 feet apart) with adequate diameter
- Position tree straps at eye level (approximately 5 feet high) for optimal final height
Wrap straps around trees with these techniques:
* Cinch method: Pass strap around tree and through itself
* Buckle method: Wrap completely around and connect to hardware
* Ensure minimum 1-inch width contact with bark for tree protectionAttach your chosen suspension system to the straps:
* Connect whoopie slings, daisy chains, or webbing to tree straps
* Leave sufficient adjustment range on both sides
* Ensure all connection points are secure before proceeding
Tips:
• Position straps slightly higher than your desired final hammock height
• Use the same height on both trees to create a level sleeping surface
• Apply tree straps to minimize bark damage and prevent slipping
Step 2: Hammock Mounting and Initial Adjustment
- Unpack your hammock and identify foot/head ends if differentiated
Attach hammock ends to the suspension system:
* Connect continuous loops to whoopie slings or webbing
* Ensure gathered ends are evenly bundled without fabric twistsInstall structural ridgeline if not already integrated:
* Attach between the gathered ends of the hammock
* Verify proper length (approximately 83% of total hammock length)Make initial tension adjustments:
* Aim for 30-degree angle on suspension lines from horizontal
* Ensure adequate height (18-24 inches above ground when weighted)
* Test the lay position and make minor adjustments as neededVerify the hammock has proper sag:
* Too tight creates uncomfortable pressure points
* Too loose causes excessive wrapping and instability
This foundation determines your sleeping comfort, so take time to achieve the optimal position before proceeding to weather protection components.
Learning proper techniques for packing after setting up preserves your careful adjustments and streamlines future deployments.
Step 3: Tarp Installation for Weather Protection
Determine appropriate tarp positioning:
* Center over hammock ridgeline
* Align with prevailing wind direction (usually narrow end toward wind)
* Ensure adequate coverage on all sidesChoose your ridgeline approach:
* Continuous ridgeline over hammock (most common ultralight approach)
* Separate tarp ridgeline above hammock
* Direct attachment to trees (less adjustable)Tension the tarp ridgeline:
* Apply sufficient tension to create proper catenary curve
* Position approximately 8-12 inches above hammock ridgeline
* Secure with appropriate hardware or knotsStake out tarp corners and sides:
* Position stakes at 45-degree angles away from tarp
* Apply even tension across all attachment points
* Adjust height based on weather conditionsConfigure appropriate pitch for conditions:
* A-frame: Standard setup with moderate coverage
* Storm mode: Lower sides closer to ground for maximum protection
* Porch mode: Raise one side for ventilation and views in good weather
Our lightweight hammock options with integrated tarps simplify this process with matched components designed to work together seamlessly.
Step 4: Adding Insulation and Finalizing Comfort
Install underquilt:
* Attach suspension cords to hammock ends or ridgeline
* Position underquilt to fully wrap hammock bottom
* Adjust tension to eliminate air gaps while preventing compression
* Ensure coverage matches your body position (shoulders to legs)Address common cold spots:
* Adjust underquilt suspension to eliminate gaps at shoulders and feet
* Use additional clothing or small items to fill persistent gaps
* Verify no compression occurs when lying in hammockPrepare topquilt or sleeping bag:
* Place inside hammock in position for easy entry
* Pre-arrange for diagonal lay position
* Configure foot box or closure system as neededOrganize the interior space:
* Attach small gear organizer to ridgeline
* Position essential items within reach
* Arrange entry/exit strategy for nighttime needsMake final comfort adjustments:
* Test diagonal lay position (approximately 30° off centerline)
* Fine-tune suspension tension if needed
* Verify weather protection coverage from all angles

Camping Hammock Sets with Bug Net, Ultralight Camping Hammock Sets
$139.72 Select options This product has multiple variants. The options may be chosen on the product page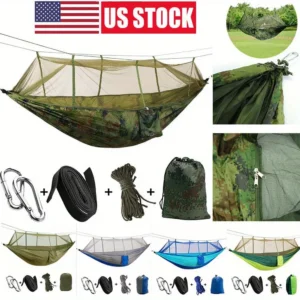
Camping Hammock Sets with Bug Net, Complete Camping Hammock Systems
Price range: $82.73 through $97.96 Select options This product has multiple variants. The options may be chosen on the product page
Lightweight Hammock Sets, Spreader Bar Hammock Sets
$292.43 Select options This product has multiple variants. The options may be chosen on the product page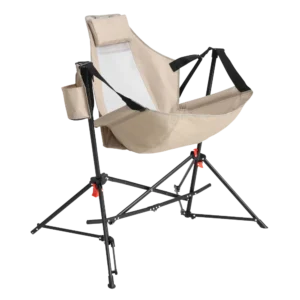
Folding Hammock Sets, Lightweight Hammock Sets
$295.80 Select options This product has multiple variants. The options may be chosen on the product page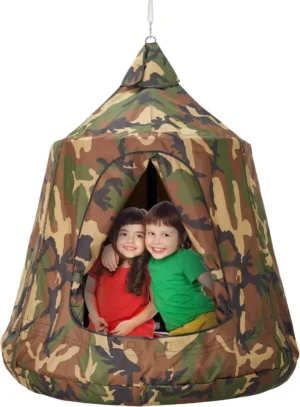

Complete Camping Hammock Systems, Hanging Egg Chair Sets
$266.73 Select options This product has multiple variants. The options may be chosen on the product page
Complete Camping Hammock Systems, Folding Hammock Sets, Lightweight Hammock Sets, Quick Setup Hammock Sets
$255.54 Select options This product has multiple variants. The options may be chosen on the product page
Advanced Techniques for Ultralight Efficiency
Mastering a few key skills transforms a good hammock setup into an ultralight masterpiece. These techniques replace hardware with knowledge, saving precious ounces:
• Essential knots for hardware replacement:
* Becket Hitch: Replaces carabiners for suspension attachment
* Adjustable Grip Hitch: Creates adjustable guy lines without hardware
* Prusik Knot: Creates movable attachment points on ridgelines
* Marlinspike Hitch: Used with toggle for quick-release connections
• Streamlined systems:
* Continuous ridgelines that serve both tarp and accessories
* Snake skins or bishop bags that enable one-piece deployment
* Multi-functional components (trekking poles as tarp supports)
• Efficiency boosters:
* Pre-assembled systems that deploy as units
* Strategic component arrangement in your pack
* Color-coding for quick identification
These approaches can reduce overall system weight by 3-6 ounces while improving setup speed. Additional techniques for ultralight backpacking with hammocks focus on refining skills rather than adding equipment.
Common Issues and Troubleshooting
Even experienced hammockers encounter occasional challenges. Here are solutions to common problems:
• Excessive sag or “banana shape”
* Problem: Structural ridgeline too long or missing
* Solution: Install proper-length ridgeline (83% of hammock length)
• Suspension slippage
* Problem: Inadequate friction in suspension system
* Solution: Verify knots, replace worn components, or add friction elements
• Cold spots despite insulation
* Problem: Air gaps or compression in underquilt
* Solution: Adjust underquilt suspension points, add secondary attachment points
• Water pooling on tarp
* Problem: Insufficient tension or improper pitch
* Solution: Increase ridgeline tension and adjust tie-out points
• Difficulty achieving diagonal lay
* Problem: Hammock too tight or too narrow
* Solution: Add more sag, verify proper width (55”+)
• Rain water running down suspension
* Problem: Missing drip lines
* Solution: Add small cord loops at suspension to direct water away
Understanding proper stability solutions for hammock setups helps resolve many common issues before they arise.
Leave No Trace Principles for Hammock Camping
Responsible hammocking requires adherence to Leave No Trace principles:
• Tree protection fundamentals:
* Always use tree straps at least 1-inch wide (wider is better)
* Never hammer nails or screws into trees
* Select appropriate tree diameters (6+ inches)
* Avoid dead, damaged, or delicate-barked trees
• Campsite considerations:
* Use established sites when possible
* Avoid creating new social trails
* Minimize trampling of vegetation under your hammock
* Disperse impact in pristine areas
• Additional hammocking ethics:
* Pack out all trash and leftover food
* Respect regulations regarding hammock use in parks
* Maintain appropriate distance from water sources (200+ feet)
* Minimize visual impact for other wilderness users
By following these guidelines, hammockers can often create less environmental impact than ground-based camping while enjoying superior comfort.
Maintaining Your Ultralight Hammock System
Proper maintenance extends the life of your lightweight gear while ensuring safety and performance:
• Field maintenance:
* Keep components clean and dry whenever possible
* Address small issues before they become major failures
* Regularly inspect suspension systems for wear
* Clean and dry thoroughly after each trip
• Material-specific care:
* Nylon/polyester: Hand wash with mild soap, air dry completely
* DCF/Cuben Fiber: Clean with water only, avoid scrubbing
* Down insulation: Minimize compression during storage, use appropriate cleaning products
• Critical inspection points:
* Stitching at hammock connection points
* Suspension components for abrasion
* Tarp tie-out reinforcement
* Ridgeline integrity
Understanding how to efficiently pack your hammock protects components during transport and simplifies future setup.
Ultralight Hammock Setup FAQs
What’s the ideal hammock length for an ultralight setup?
10-11 feet provides optimal comfort for most users while maintaining reasonable weight. Shorter hammocks (9’) save weight but significantly reduce comfort for users over 5‘8”.
Can I use a sleeping bag instead of quilts?
Yes, but you’ll sacrifice weight efficiency. Sleeping bags have insulation underneath that gets compressed in a hammock, adding unnecessary weight. If using a bag, look for models with full-length zippers.
What’s the minimum weight capacity I should consider?
Choose hammocks rated at least 50 pounds above your body weight. Most ultralight hammocks support 250-350 pounds despite weighing only 7-12 ounces.
Which knots are essential for ultralight setups?
Master the Becket hitch, Marlinspike hitch with toggle, Prusik knot, and McCarthy hitch for maximum versatility with minimum hardware.
How do I create effective drip lines?
Attach short pieces of cord (3-4 inches) at the suspension connection points, creating a low point that forces water to drip off before reaching the hammock.
What’s the typical packed size of a complete ultralight system?
A full 3-season ultralight hammock system typically compresses to about the size of a football (approximately 8”×5”×5”) when properly packed.
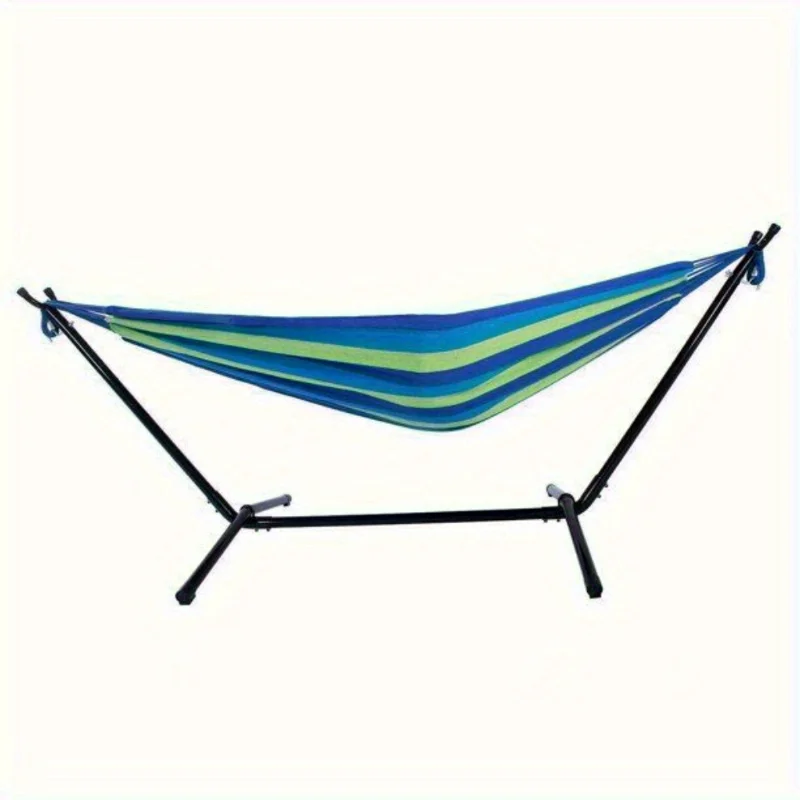
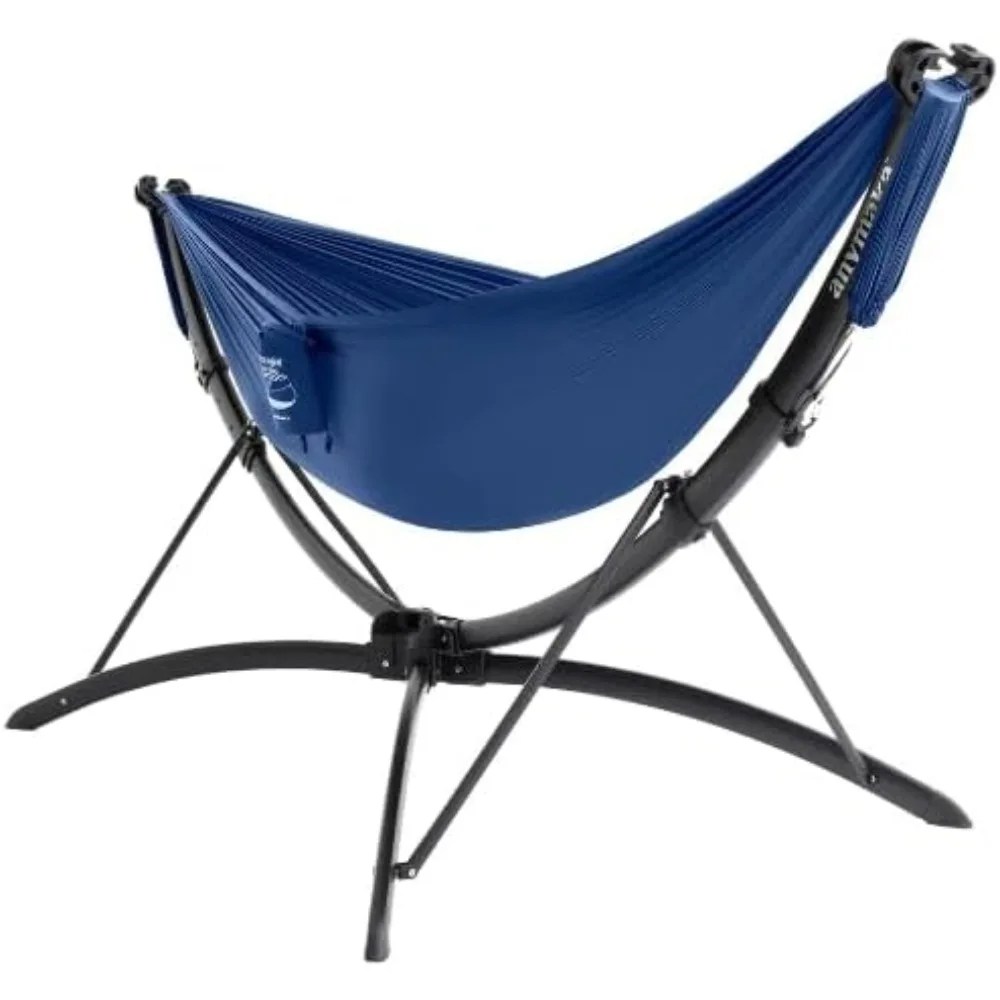
When Trees Aren’t Available: Alternative Support Options
While trees provide the ideal support for hammocks, several alternatives exist for treeless environments:
• Portable hammock stands:
* Ultralight frames (3-5 pounds) for backpacking
* Collapsible designs that fit in backpacks
* Tripod-style stands requiring minimal hardware
• Natural alternatives:
* Large rock formations with appropriate anchor points
* Man-made structures (with permission) like posts or railings
* Vehicle attachment points for roadside camping
• Adaptive techniques:
* Trekking pole configurations for low hanging setups
* A-frame adaptations using ridgeline as tent-like support
* Ground setups using hammock as bivy alternative
When traditional hanging isn’t possible, explore our hammock stands for treeless environments designed specifically for portability and easy assembly.